Coloring tracks and regions in Logic Pro is a great way to organize and color-coordinate the many elements of your projects. It allows you to visually represent different parts of a project, which makes it easier for you to keep track of where everything is. It can help you distinguish between instruments and quickly identify what’s what.
In this guide, we’ll show you how to color tracks and regions in Logic Pro. Without further ado, let’s get started!

How To Color Tracks In Logic Pro
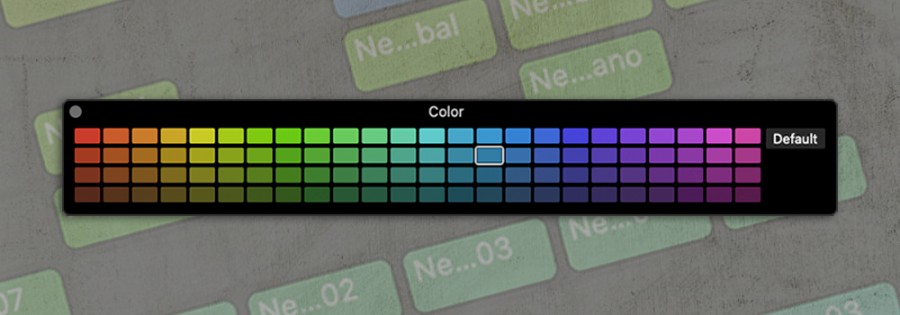
To color tracks in Logic Pro, navigate to the ‘View’ menu at the top of your screen and select ‘Show Colors’. Next, select the track(s) you would like to change the color of. Lastly, select a color from the color palette.
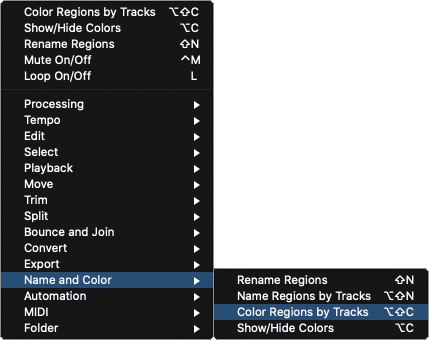
You can also access Logic Pro’s color palette by right-clicking a region and selecting ‘Name and Color’ then ‘Show Hide Colors’. Alternatively, you can use the keyboard shortcut [OPTION/Alt] + C.

How To Color Regions In Logic Pro
To color regions in Logic Pro, navigate to the ‘View’ menu at the top of your screen and select ‘Show Colors’. Next, select the region(s) you would like to change the color of. Lastly, select a color from the color palette.

Color Regions By Tracks
Logic Pro’s ‘Color Regions By Tracks’ function allows users to instantly match the color of regions with the color of the hosting track. Simply right-click a region to open the region tools, select ‘Name and Color’ then ‘Color Regions by Tracks’.
You can match the color of multiple regions to a track by first holding down [SHIFT] and left-clicking on a collection of regions.

Related Posts:
How To Reverse Audio In Logic Pro
How To Nudge Regions In Logic Pro
How To Insert Arrangement Markers In Logic Pro
Want To Know More?
Here at Live Aspects, we have dozens of useful lessons and tutorials created to enhance your music production skills and help speed up the learning process. You can access our huge range of music theory lessons and production tips and tricks here.