Ableton Live’s consolidate function is an extremely useful feature that can help you organize your projects. When creating music in Ableton Live, consolidating can keep your arrangement view tidy and makes it easier to edit groups of clips.
In this guide, we’ll explain how to consolidate clips in Ableton Live. We’ll also outline how consolidating can be used to improve your creative flow and how it can change the way you perform your projects.
Without further ado, let’s get started!

What Does It Mean To Consolidate?
In Ableton Live and other DAWs, the process of consolidating is the act of combining several audio or MIDI clips into a single clip. The consolidation of multiple clips is done for a variety of reasons but the most common is to make it easier to edit and arrange the elements of a project.
How To Consolidate In Ableton Live
Step 1: Import/Create Clips
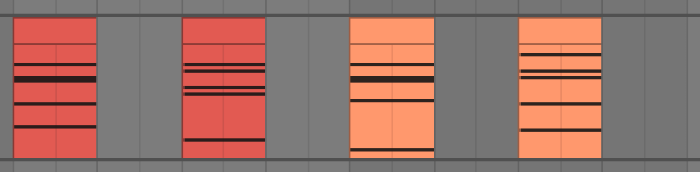
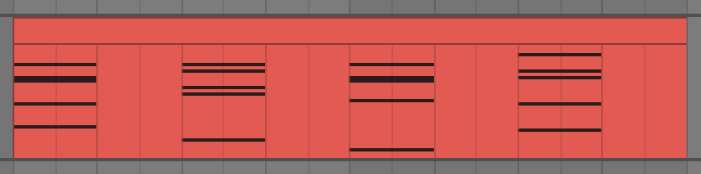
To consolidate in Ableton Live, start by adding a series of audio or MIDI clips to your project (if you haven’t already). This could be multiple takes of a recording session, a collection of MIDI chords, a group of drum samples etc.
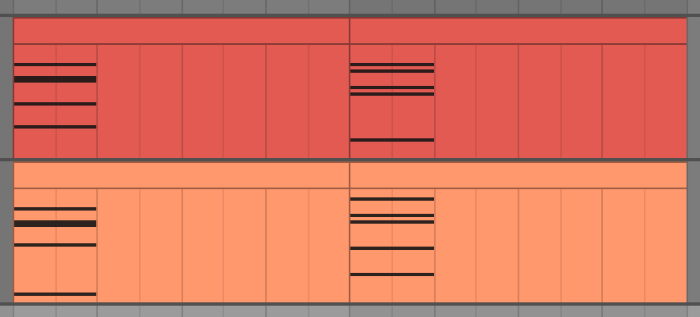
Step 2: Arrange Clips
Next, move each the clips you want to consolidate onto the same track and position them in preparation for consolidation.
Step 3: Select Clips
Hold down [SHIFT] and select each of the clips you would like to consolidate. When consolidated, Live will convert the highlighted area into a single clip so make sure to also select any empty beats|bars you may want to include in the consolidated clip.
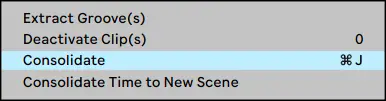
Step 4: Consolidate
Lastly, right-click anywhere on the highlighted clips and select ‘Consolidate’. Alternatively, you can use the keyboard shortcut [COMMAND] + J on Mac or [CNTRL] + J on Windows.
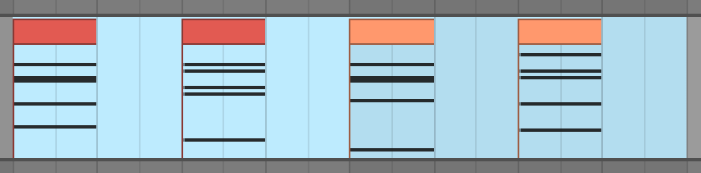
Your collection of clips will now be consolidated into a single clip.
Consolidate Keyboard Shortcut
Mac: [COMMAND] + J
Windows: [CNTRL] + J
Consolidate Time To New Scene
Live’s ‘Consolidate Time To New Scene’ feature instantly consolidates clips within a highlighted section of the arrangement view into a single clip in the session view. This function makes it easy to convert the different layers of your project into the session view and allows users to trigger layers using a MIDI controller.
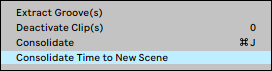
Consolidating time to a new scene to can be achieved by highlighting a region on the arrangement view, right-clicking anywhere on the highlighted region, then selecting ‘Consolidate Time to New Scene’ from the pop-up menu. A new clip will appear on the same track in the session view.

Related Posts:
Using MIDI Files In Ableton Live
How To Edit Audio In Ableton Live
30 Ableton Live Keyboard Shortcuts You Need To Know
Want To Know More?
Here at Live Aspects, we have dozens of useful lessons and tutorials created to enhance your music production skills and help speed up the learning process. You can access our huge range of music theory lessons and production tips and tricks here.