Logic Pro is one of the most versatile DAWs available, offering everything you need to make professional-quality recordings. It is used by professionals and hobbyists alike and comes with an incredible set of tools for recording and editing audio.
Whether you’re looking to add real instruments to your Logic project or record a podcast, here’s how to record in Logic Pro in 5 easy steps.
- | Step 1: Setting Up Your Equipment
- | Step 2: Setting Up Logic Pro
- | Step 3: Creating An Audio Track
- | Step 4: Arm Recording
- | Step 5: Recording
Without further ado, let’s get started!

| Step 1: Setting Up Your Equipment
In order to record, you will need the following equipment:
- A microphone
- An XLR cable
- An audio interface + USB cable
- A pair of headphones
- A pop shield (for vocals only)
- A microphone stand (optional)
Once you’ve positioned your microphone in a comfortable space and are ready to perform, connect it to your computer, along with any headphones, speakers and audio interface you may be using. If you’re using a USB microphone, you can skip the audio interface and plug it straight into your computer or laptop.
| Step 2: Setting Up Logic Pro
Before we get started, there are a few settings in Logic that need to be set up. First, navigate to the Logic Pro menu at the top of your screen and select Preferences > Audio.
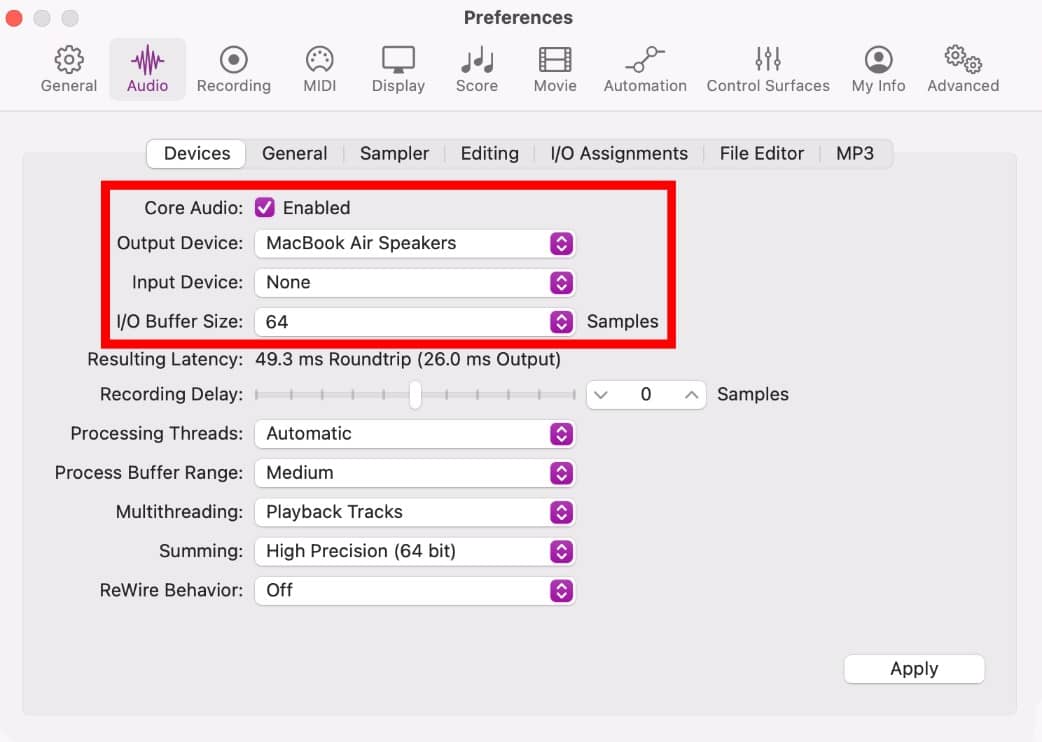
From the ‘Input Device’ drop-down box, select the device you would like to record with. If you’re using an audio interface, make sure it’s selected for both ‘Input Device’ and ‘Output Device’. If you’re using a USB microphone or your built-in microphone, select this as the ‘Input Device’ and your headphones/speakers as the ‘Output Device’.
You may also need to change the I/O Buffer Size. This will prevent latency, an unwanted effect where the audio you hear is delayed. Smaller buffer size = less latency, but harder work for your computer, and vice versa for larger buffer sizes. For an optimal latency balance, 64 or 128 Samples work best in most cases.
Once you have finished in Logic’s Preferences, select ‘Apply’ and close the window.
| Step 3: Creating An Audio Track
If your project doesn’t already contain an audio track, you can add one by selecting the small plus icon button in the top-left corner of the Logic workspace. Once the ‘Add Tracks’ window has appeared, select ‘Audio’. From the ‘Audio Input’ drop-down box, select the input you have your microphone plugged into.
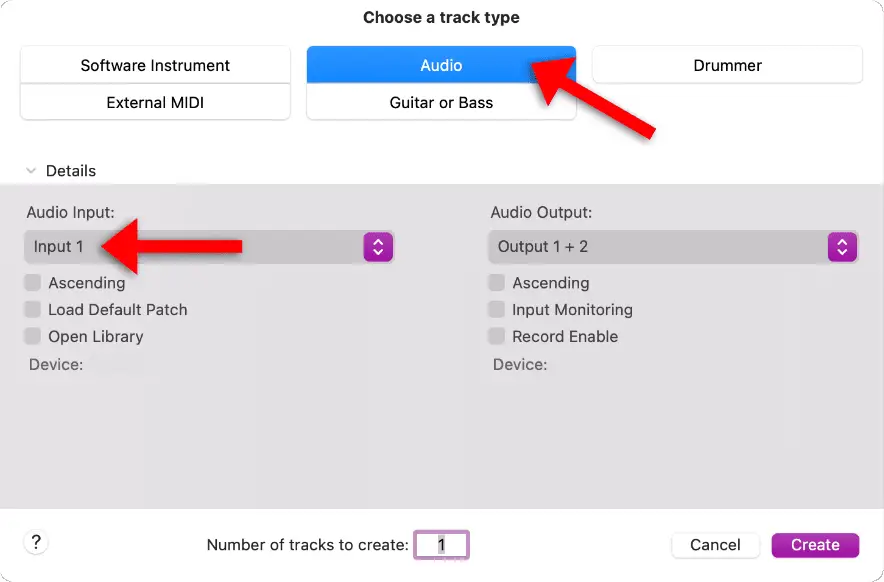
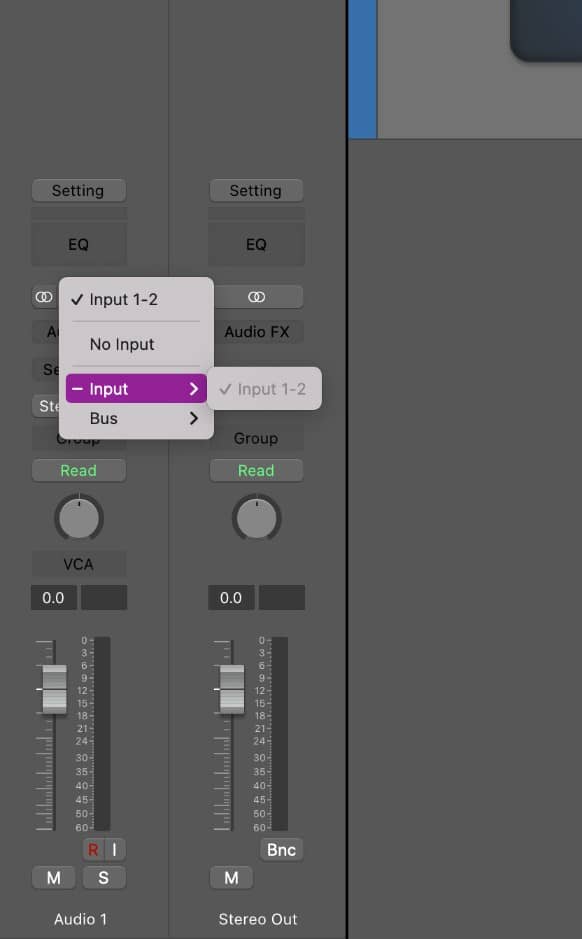
In case you accidentally selected the wrong Audio Input, you can change it any time from the inspector on the left-hand side of the workspace (press ‘I’ if you don’t see it).
| Step 4: Arm Recording
To start getting signal into Logic, select the Record Enable button (small ‘R’ icon) on your audio track. This means that your audio track is now record-armed and ready for recording. You should see a green signal appear on the meter when your microphone picks up sound.
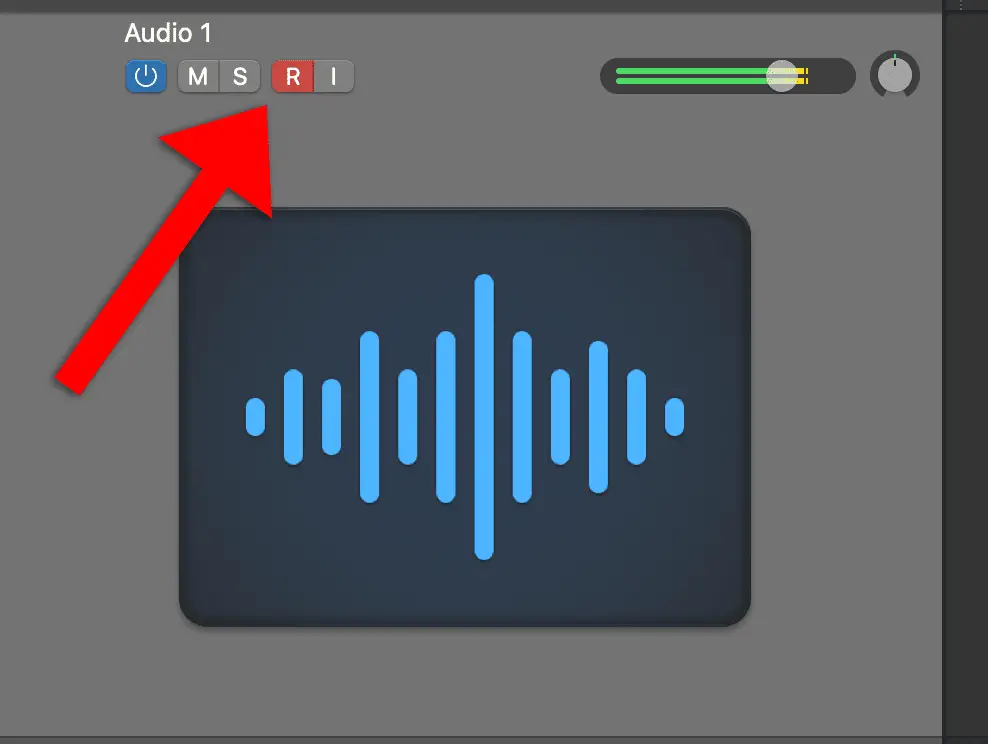
If you want to hear the microphone input through your headphones or speakers, select the ‘I’ icon next to the arm recording button to turn on Input Monitoring. However, make sure to disable Input Monitoring before recording.
Next, set the input volume of your microphone by adjusting the ‘gain’ dial on your audio interface (it may be called ‘volume’ on a USB microphone). You can test out your microphone’s input volume by singing or playing into it. Try to make sure it stays below 0 dB. Audio recorded above this level will start to distort.
| Step 5: Recording
Finally, you’re ready to record! Just hit ‘R’ on your keyboard or the red circle icon from the control bar to begin recording from wherever the playhead is. You can press spacebar to stop recording.
If you need a metronome, you can turn it on from the control bar at the top, as well as add a count-in. Just right-click either of these functions to open their settings. If you need to change the tempo of your project, double-click on the current project tempo and type in a new tempo.

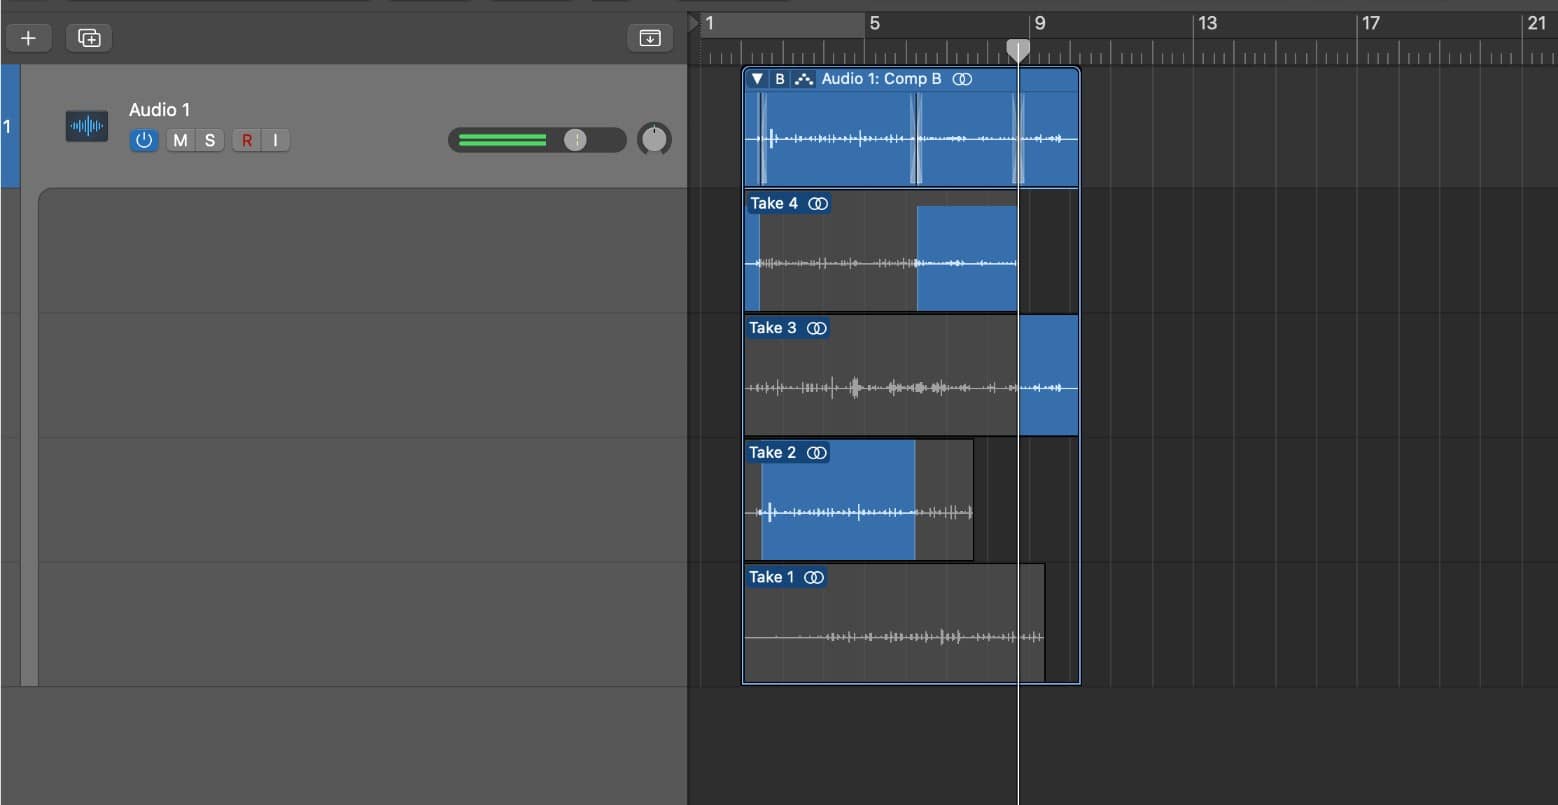
If you’re recording multiple takes, don’t worry about creating new audio tracks. Just record over your old take and Logic will automatically put all your takes in a takes folder. You can then go through them and choose the best bits later.
| Quick Punch-In Mode
Have you ever been in a situation where you got the perfect take, the performance of a lifetime, and then realized you weren’t recording? Fortunately, Logic Pro has a clever solution—Quick Punch-In mode. When Quick Punch-In mode is on, recording occurs in the background from the moment you start playback.
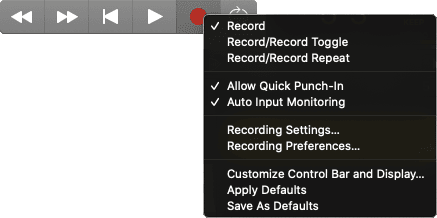
Before you start, right-click the red record button from the control bar and tick ‘Allow Quick Punch-In’. This means that Logic is always listening, even when you aren’t recording.
To recover an unrecorded section of audio, start by pressing ‘R’ and recording for just a few seconds. Next, conclude your recording by pressing spacebar. Lastly, expand the recorded region backwards and your recording will appear.
| Top Recording Tips
To finish off, here are a few handy recording tips to help you get the most out of your recording sessions
- Microphone positioning is the best way to control your tone—experiment and find what works best.
- Find the sound you want first, don’t try to fix it later.
- If you’re using a cardioid microphone (records from only one direction), don’t get too close. This will add too much bass and muddiness to your recordings.
- Condenser microphones need ‘phantom power’ or 48v to work. There should be a button for this on your audio interface.
- Consider how you want your instrument or voice to sound in the context of the song. Does it need to be warm and full to fill up space or be a little lighter to complement the other layers of your track?
Related Posts:
How To Fade In Logic Pro X
How To Nudge Regions In Logic Pro
How To Insert Arrangement Markers In Logic Pro
Want To Know More?
Here at Live Aspects, we have dozens of useful lessons and tutorials created to enhance your music production skills and help speed up the learning process. You can access our huge range of music theory lessons and production tips and tricks here.