Whether it’s to pick a key that is well-suited for a vocalist or to make a song easier to perform, there are times when an arrangement needs to be transposed. If you’re looking to transpose an entire song or adjust the key of an audio or MIDI region, Logic Pro can be used to quickly transpose without affecting tempo.
In this guide, we’ll show you how to transpose audio and MIDI regions, as well as how to change the key of your entire Logic Pro project.
Without further ado, let get started!
| How To Transpose Audio In Logic Pro
Step 1: Open The Inspector
To transpose audio in Logic Pro, open the Inspector by selecting the ‘i’ icon in the top-left corner of the Logic Pro window. Alternatively, you can press [i] on your keyboard.

Step 2: Select Audio Region
Next, left-click the audio region you would like to transpose. To transpose multiple audio regions, hold down [SHIFT] on your keyboard and left-click all regions you want to transpose.

Step 3: Transpose
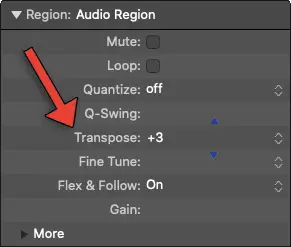
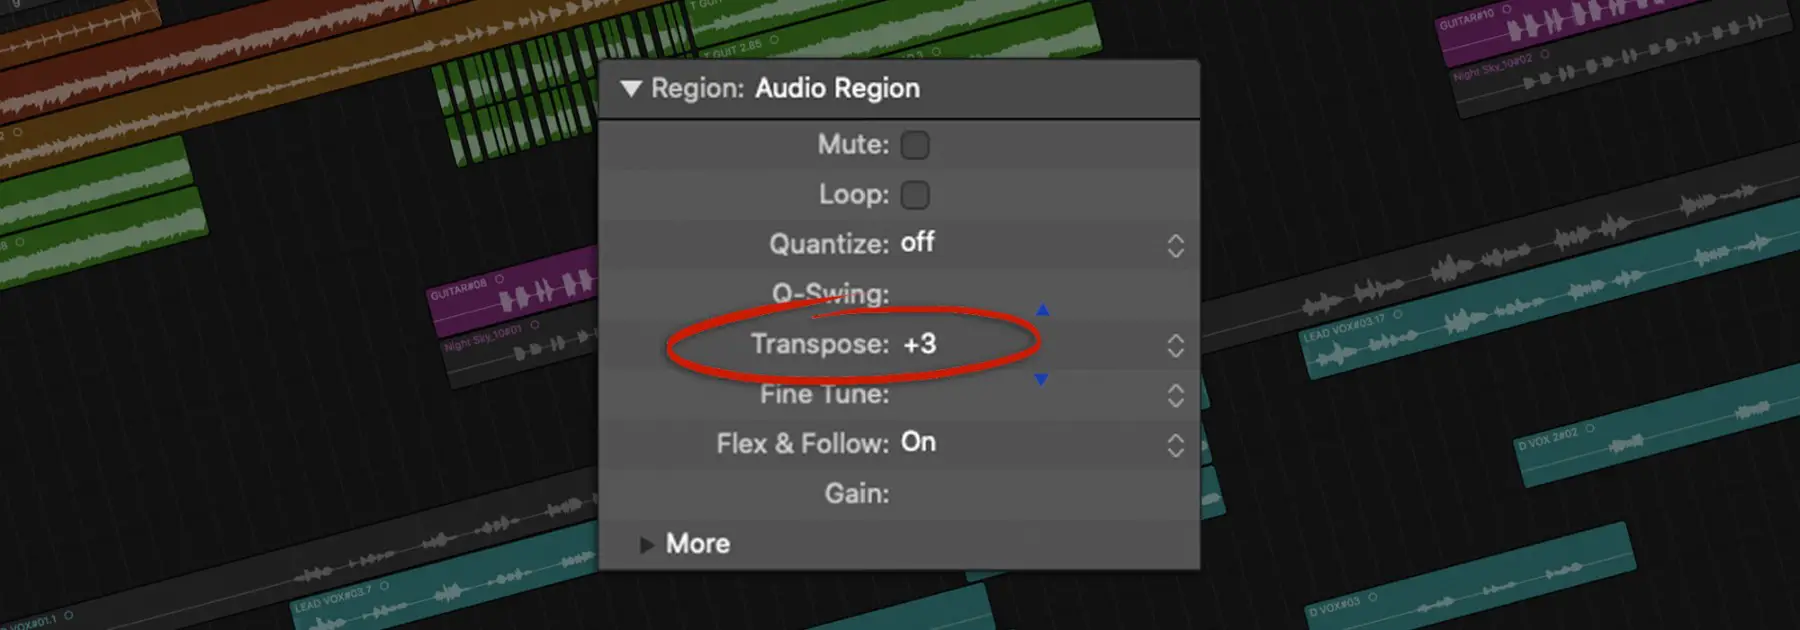
Lastly, navigate to the ‘Transpose’ setting located in the Inspector, then left-click on the space beside it and drag up or down. Alternatively, double-click the blank area and type in the number of half steps you would like to transpose by.

Your audio region(s) will now display the number of half steps it has been transposed by in its title.

| How To Transpose MIDI In Logic Pro
Step 1: Open The Inspector
To transpose MIDI in Logic Pro, open the Inspector by selecting the ‘i’ icon in the top-left corner of the Logic Pro window. Alternatively, you can press [i] on your keyboard.

Step 2: Select MIDI Region
Next, left-click the MIDI region you would like to transpose. To transpose more than one MIDI region, hold down [SHIFT] on your keyboard and left-click each of the regions you want to transpose.

Step 3: Transpose
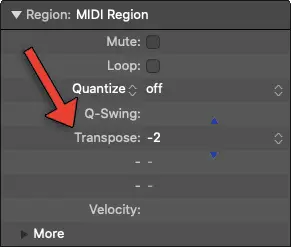
Lastly, navigate to the ‘Transpose’ setting located in the Inspector, then left-click on the space beside it and drag up or down. Alternatively, double-click the blank area and type in the number of half steps you would like to transpose by.

Your audio region(s) will now display the number of half steps it has been transposed by in its title.

| How To Transpose An Entire Logic Pro Project
Step 1: Show Global Tracks
To transpose an entire Logic Pro project, start by revealing the Global Tracks. You can do this by selecting the icon above the Pan/Balance knob of your first track or by pressing [G] on your keyboard.

Step 2: Reveal Transposition Track
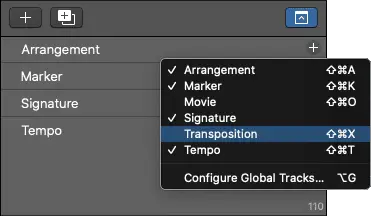
Next, right-click anywhere on the Global Tracks list to reveal the list of available global tracks and select ‘Transposition’. Alternatively, you can use the keyboard shortcut [COMMAND + Shift + X] to reveal the Transposition track.

Step 3: Automate Transposition Track
Lastly, transpose your project by creating points and shaping the Transposition track automation. You can left-click the automation envelope to create a point and double-click a point to delete it. Left-click and drag the automation envelope up or down to adjust your project’s key.

Related Posts:
How To Group Tacks In Logic Pro
How To Change Tempo In Logic Pro
How To Color Tracks & Regions In Logic Pro
Want To Know More?
Here at Live Aspects, we have dozens of useful lessons and tutorials created to enhance your music production skills and help speed up the learning process. You can access our huge range of music theory lessons and production tips and tricks here.
