If you have ever created a big project or tried to record in FL Studio, there’s a good chance that you’ve encountered latency. Audio latency refers to the time it takes for an audio or MIDI signal to be sent to your computer and heard from your speakers. Even a small amount of latency can make it extremely difficult to record or use a MIDI device.
The good news is that making a few small adjustments to your software and workflow can significantly reduce latency.
The 10 most effective strategies for reducing latency in FL Studio are:
- Reduce Buffer Size
- Increase Sample Rate
- Delete Inactive Plugins
- Delete Unused Tracks & Clips
- Install ASIO4ALL
- Update FL Studio
- Close Other Programs
- Free Up Hard Drive Space
- Upgrade Your Computer’s RAM
- Restart Your Computer
Without further ado, let’s get started!
1. Reduce Buffer Length
Reducing the buffer length is one of the most effective ways to minimize latency in FL Studio. Buffer is the amount of time it takes for your computer to process any incoming audio signal.
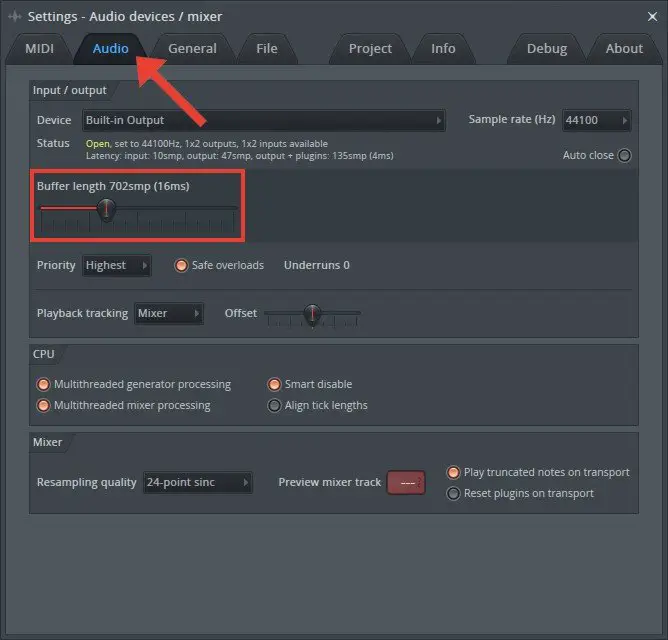
To reduce the buffer length in FL Studio, go to Options then select Audio Settings. Locate the Buffer Length slider, then click and drag it left to reduce buffer. Make sure your buffer is no less than 10 ms (441 samples) – we recommend between 10-40 ms. The ideal buffer length is the smallest your computer can manage without running into other unwanted audio issues.
2. Reduce Sample Rate
Another way to minimize latency in FL Studio is to reduce the sample rate. Sample rate is the number of samples of audio carried per second – the lower the sample rate, the less demand there is on FL Studio to produce an audio signal.
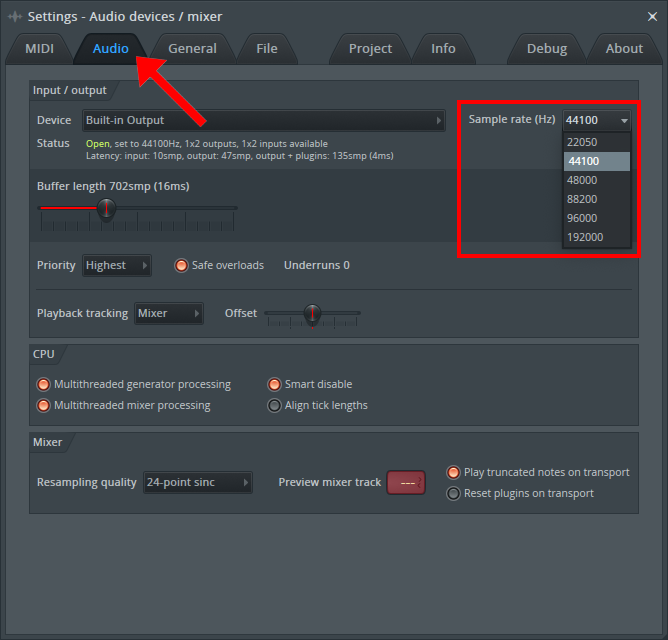
To reduce the sample rate in FL Studio, open Settings and select the Audio tab. Open the drop-down box beside Sample rate and select a lower sample rate. High sample rates such as 192.0 kHz or 96.0 kHz will use significantly more CPU than the recommended default of 44.1 kHz, resulting in a more noticeable delay in audio.
3. Delete Inactive Plugins
One of the easiest ways to reduce latency is by deleting any plugins that aren’t being used in your FL Studio projects. Plugins can take up a large chunk of your CPU which directly impacts latency.
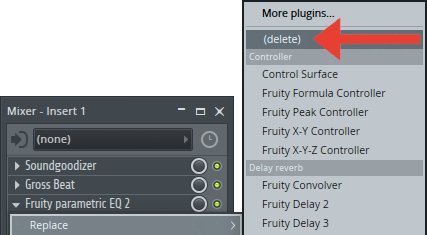
To delete inactive or unused plugins, head to FL Studio’s mixer. Beside an inactive instrument of effect plugin, select the small arrow then select Replace > (delete).
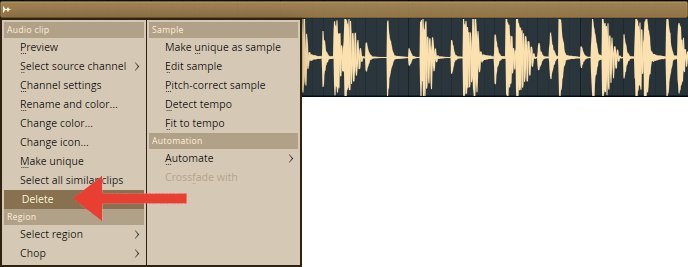
4. Delete Unused Tracks & Clips
Deleting unused track and clips is a quick and easy way to reduce latency. By removing nonessential elements of your FL Studio project, you can lessen the burden on your computer’s CPU, therefore reducing latency.
To delete audio and MIDI clips, simply right-click the top portion of the clip. Alternatively, click on the icon in the top left corner of a clip and press Delete. To delete tracks, right-click the track number/name and press Delete.
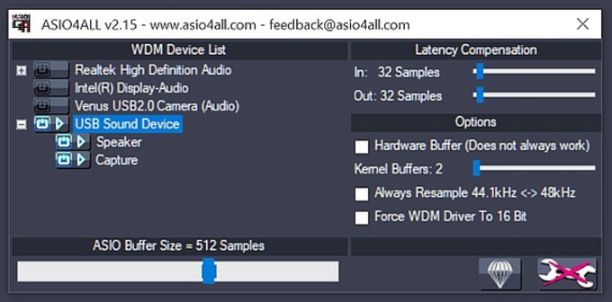
5. Install ASIO4ALL
ASIO4ALL is an audio driver for Windows computers that is specifically designed to help reduce audio latency. ASIO4ALL can lower your CPU load and give you a more responsive playback than other types of drivers.
To download ASIO4ALL, click here. Once you have installed the driver, select Audio Settings from the Options menu. Lastly, open the Device drop-down box and select ‘ASIO4ALL’.
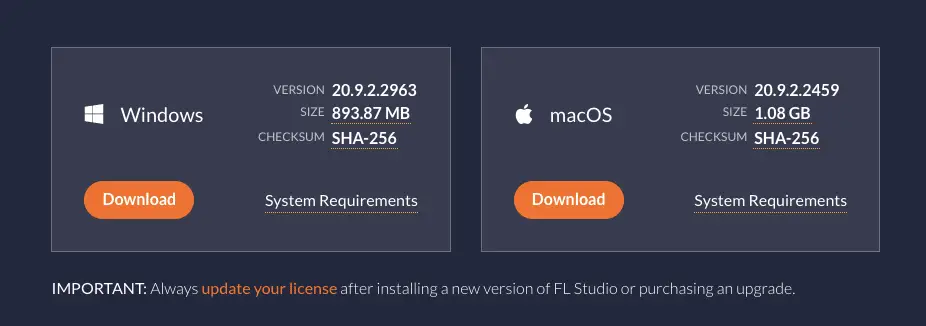
6. Update FL Studio
To minimize latency in FL Studio, try to keep the software up to date. It’s the only way to make sure that you have all the latest features, bug fixes and security updates. Also update any external plugins, VSTs and drivers that you have installed within FL Studio.
If you would like to learn more about updating FL Studio, make sure to visit our previous guide titled ‘How To Update FL Studio Without Losing Data’.
7. Close Other Programs
Another simple way to reduce latency in FL Studio is to close other programs and browsing tabs that are running on your computer. This will free up a significant amount of RAM and ensure FL Studio has the space to run smoothly and efficiently.

8. Free Up Hard Drive Space
Deleting unwanted files and applications can free up disk space and allow FL Studio to run more efficiently. If you are experiencing latency issues with FL Studio, try deleting any old files that you no longer need.
You can do this manually by selecting and deleting files or by using a disk cleaning utility (CCleaner, CleanMyMac etc.) that can do it for you automatically.
9. Upgrade Your Computer’s RAM
One of the most important components of your computer is RAM. It’s what allows your computer to run quickly and efficiently. While upgrading your computer’s RAM can be a difficult and costly procedure, it is perhaps the most effective way to reduce latency in FL Studio, as well as speed up all of your computer’s processes.

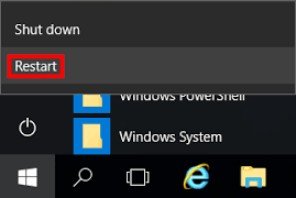
10. Restart Your Computer
When all else fails, try restarting your computer. This can help free up CPU and clear any unnecessary background processes which may be interfering with latency issues. Make sure to save your FL Studio project before restarting.
FAQ | What Causes Audio Latency?
Latency is a familiar problem faced by FL Studio users and unfortunately, there are a number of factors that can cause it. The most common factors include the audio driver and hardware you’re using, as well as your buffer size and sample rate.
FAQ | What Should My Buffer Size Be In FL Studio?
We recommend using a buffer size between 10-40 ms. The ideal buffer size is the smallest your computer can manage without running into other unwanted audio issues.
FAQ | What Sample Rate Should I Use In FL Studio?
For FL Studio, 44.1 kHz or 48.0 kHz is the best sample rate to go for. The lower the sample rate, the less demand there is on FL Studio to produce an audio signal. If you are using a more powerful computer with lots of free hard drive space, feel free to test higher sample rates.
Related Posts:
How To Update FL Studio Without Losing Data
Top 10 Artists That Use FL Studio
How To Export Stems In FL Studio
Want To Know More?
Here at Live Aspects, we have dozens of useful lessons and tutorials created to enhance your music production skills and help speed up the learning process. You can access our huge range of music theory lessons and production tips and tricks here.
1 comment
tysm this is so helpful