Reversing audio regions in Logic Pro is a quick and easy way to create interesting sound effects and transitions. From cymbals to downlifters, there are many instances where you might want to reverse audio.
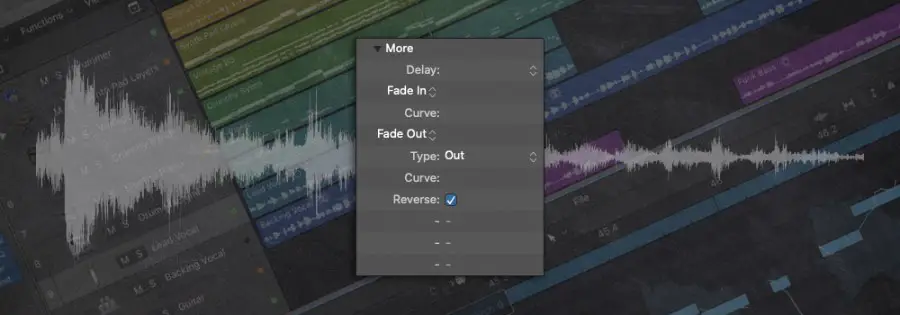
To reverse audio in Logic Pro, start by selecting one or more audio regions from the workspace. Next, open up the Inspector and select ‘More’. Lastly, tick the ‘Reverse’ box to reverse your audio region(s).
In this guide, we’ll walk you through the process of reversing audio regions in Logic Pro. Without further ado, let’s get started!

Step 1: Select Audio Region(s)
Start by left-clicking the audio region you would like to reverse from the workspace. To reverse multiple audio regions, hold down [SHIFT] on your keyboard and left-click each region.
Step 2: Open The Inspector
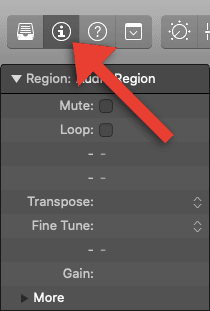
Next, open up the Inspector by selecting the ‘i’ icon in the top-left corner of Logic Pro. Alternatively, you can press ‘I’ on your keyboard. Here is where you can view and edit region settings.

Step 3: Click ‘More’
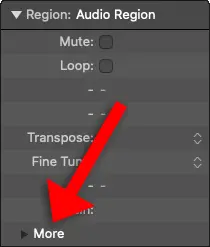
Under the ‘Region’ settings of the Inspector, select ‘More’.

Step 4: Select ‘Reverse’
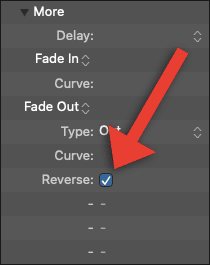
Lastly, tick the ‘Reverse’ box.

Your audio region will now be reversed.

Related Posts:
How To Fade In Logic Pro X
How To Nudge Regions In Logic Pro
How To Insert Arrangement Markers In Logic Pro
Want To Know More?
Here at Live Aspects, we have dozens of useful lessons and tutorials created to enhance your music production skills and help speed up the learning process. You can access our huge range of music theory lessons and production tips and tricks here.
