Pro Tools is a powerful program for recording and editing audio, but it needs to be properly configured before it can be utilized. If you’re looking to use Pro Tools with any type of audio interface, then you’ll need to change your audio output.
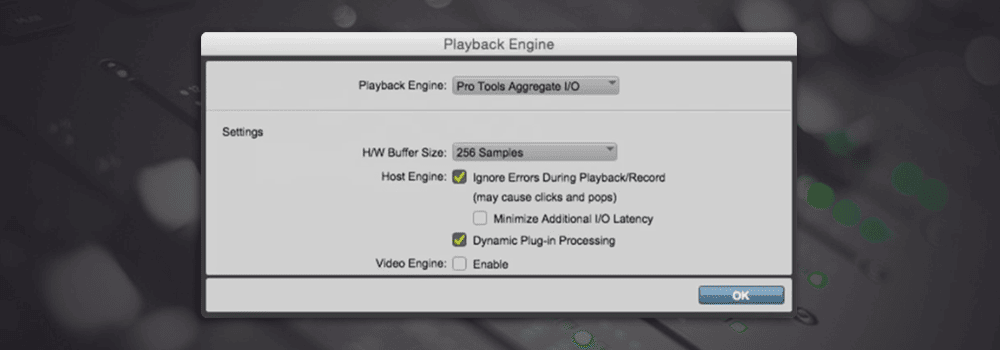
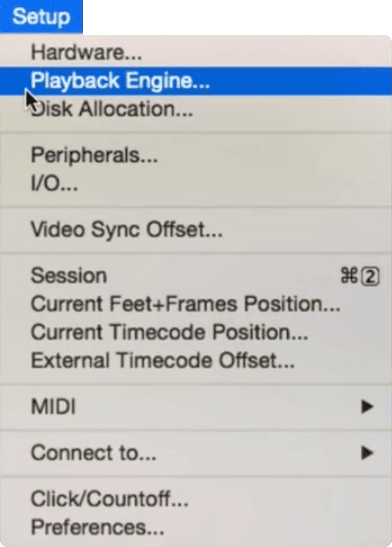
To change the audio output in Pro Tools, navigate to the Setup menu and select ‘Playback Engine’. Open the Playback Engine drop-down box and select the audio output you would like to use.
Hi, I’m Ben from Live Aspects and in four easy steps, I’ll show you exactly how to change your audio output in Pro Tools
- Step 1: Open Pro Tools
- Step 2: Go To Setup > Playback Engine
- Step 3: Select Playback Engine
- Step 4: Save & Close Sessions
Without further ado, let’s dive in!

Step 1: Open Pro Tools
To change the audio output in Pro Tools, you first need to open the software. Start a new project or open an existing one.

Step 2: Go To Setup > Playback Engine
Next, navigate to the Setup menu at the top of your screen and select ‘Playback Engine’. A new window will open up.

Step 3: Select Playback Engine
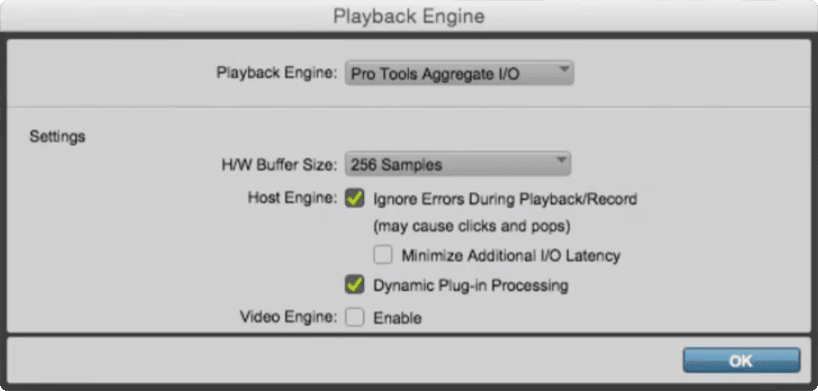
Expand the Playback Engine drop-down box and select the audio output you would like to use.
Step 4: Save & Close Session
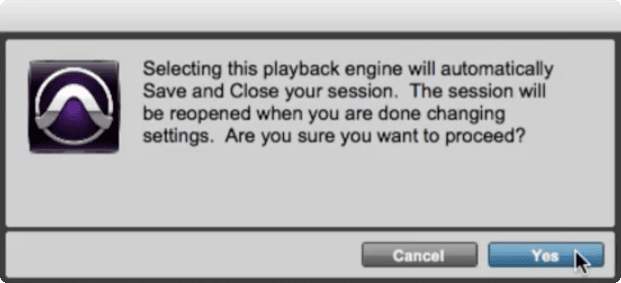
Lastly, select ‘Yes’ on the pop-up to close and reopen your session. When changing the audio output with a Pro Tools session open, Pro Tools requires that you close and reopen the session in order to initialize the new engine.

FAQ | Can You Use Pro Tools Without An Audio Interface?
Yes, you can use any edition of Pro Tools without an audio interface. While you will be able to use many of the software’s editing tools, you will not be able to record high-quality audio without an interface.
FAQ | How Do I Record Without An Audio Interface?
To record in Pro Tools without an audio interface, you can use a USB microphone, a MIDI instrument or a device plugged into your computer’s microphone input. Although these methods don’t require an audio interface, they typically result in a lower quality audio recording.
FAQ | What Should My Buffer Size Be In Pro Tools?
Choosing the right buffer size requires some experimentation in order to find the right balance between latency and computer performance. When using Pro Tools to edit or mix, we recommend setting your buffer size to a higher value (eg. 512 or 1024 samples). If you’re using Pro Tools to record, select a lower buffer size in order to reduce latency (eg. 32 or 64 samples).
Related Posts:
How Much Is Pro Tools?
Best Music Production Software In 2022
10 Tips For Producing Your First Hit Song
Want To Know More?
Here at Live Aspects, we have dozens of useful lessons and tutorials created to enhance your music production skills and help speed up the learning process. You can access our huge range of music theory lessons and production tips and tricks here.
