An audio interface is essential in any studio. They give musicians the ability to record instrumentation and output audio from a computer to studio monitors. Focusrite audio interfaces deliver an impressive and professional sound all in a compact and sleek design. Their trademark red colour distinguishes their Scarlett range from any other audio interface on the market.
Today we will be exploring how to setup and use any Focusrite audio interface as well as downloading and installing Ableton Live Lite.
- | How To Install Ableton Live Lite
- | How To Setup Your Focusrite Interface
- | How To Record Using Your Focusrite Interface
- | Which Is The Best Focusrite Interface?
Without further ado, let’s get started!

| How To Install Ableton Live Lite
Downloading and installing Ableton is the first step when using a Focusrite interface or for that matter, any audio interface. Live Lite comes free with all Focusrite devices. This makes it possible to plug-in and use your new interface without needing to purchase a DAW. Live Lite is intuitive enough for beginners yet advanced enough to inspire real creativity.
Follow these steps to install Ableton Live Lite using the serial number provided with your Focusrite interface:
Step 1: Download Live Lite
Head over to the Live Lite product page on Ableton’s website here. Scroll down to the bottom of the page, select your operating system (Mac or Windows) and select ‘Download’.
![]()
Step 2: Install Live Lite
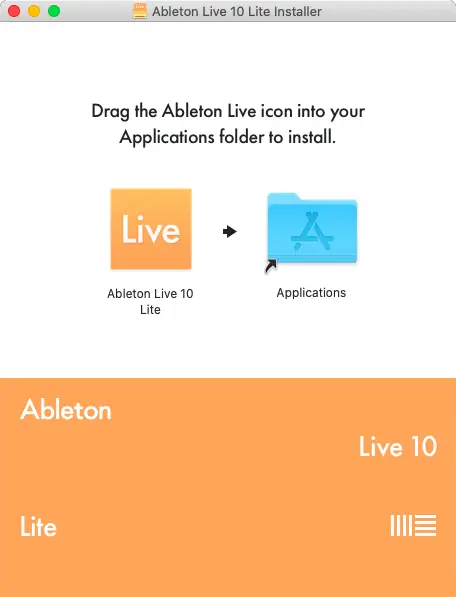
Locate the ‘ableton_live_lite’ file in your Downloads folder and double-click it. On Mac devices, simply drag the Live icon into the Applications folder as shown below. For Windows devices, extract the .zip file and run the setup. Follow the onscreen prompts until installation has completed.
Step 3: Login To Ableton.com
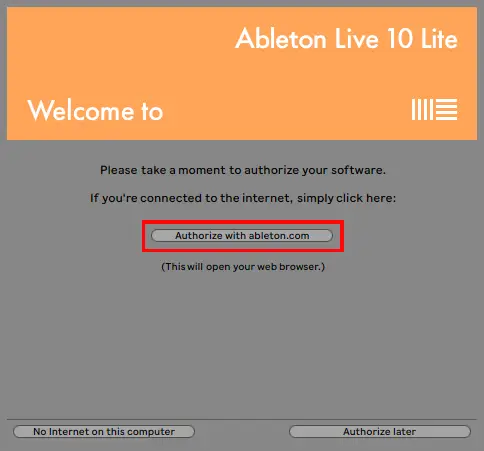
Open Live Lite and select ‘Authorize with ableton.com’ from the pop-up window. Live will automatically open your default web browser. Next, login to your existing Ableton account or register for a new one.
Step 4: Obtain Serial Number
Acquire the 24-digit serial number that came with your Focusrite audio interface. Type this into the field displayed under the ‘Register A Product’ heading.

Step 5: Authorize Live Lite
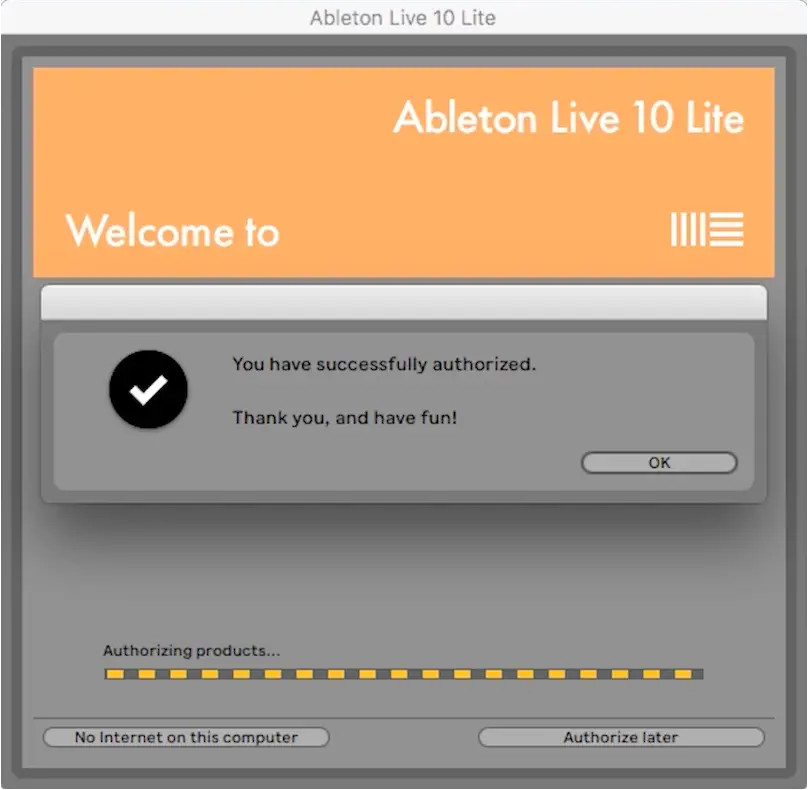
Once you have completed the online authorisation process, Live will automatically apply the information to your version of Live Lite. You have now successfully installed the full version of Ableton Live Lite.
| How To Setup Your Focusrite Interface
There are a few steps required to take before you can begin using your new audio interface. Make sure you have a set of speakers or studio monitors connected to an output of your interface so you can hear any audio coming from Live.
Drivers
Before you use your Focusrite audio interface, you first need to install any accompanying software such as drivers or controls. This allows your interface to work with supporting software like Ableton.
To access drivers and/or controls for your Focusrite product, click here. Pick your brand, then pick your product by type, then lastly, download the required software for your operating system. Make sure to quit Live before installing any drivers or controls.
Once you have installed any required drivers/controls for your interface, plug your interface into your computer via USB cable.
Inputs/Outputs
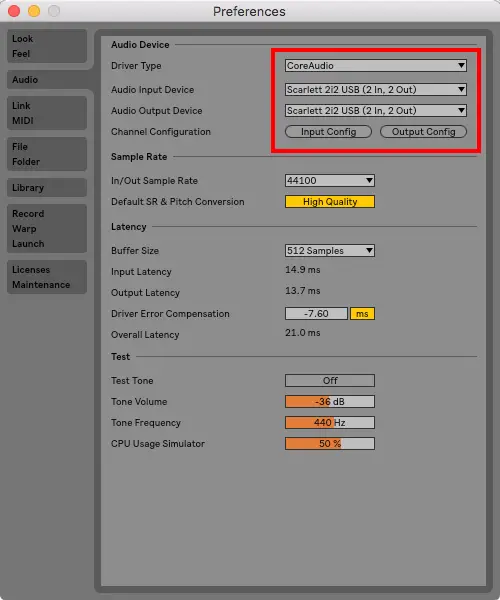
It’s time to head into Live. Access Live’s preferences and select the ‘Audio’ tab. Next, we are going to set the input and output of audio to your Focusrite interface. In the example below, we are using the first generation Scarlett 2i2 interface.
Start by selecting ‘CoreAudio’ as your Driver Type.
For the Audio Input Device and Audio Output Device, select your Focusrite interface.
You’re all set to start recording using your Focusrite audio interface!
| How To Record Using Your Focusrite Interface
Step 1: Plugin Instrument
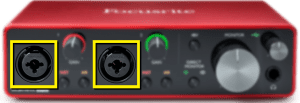
Plug in your microphone, guitar or any instrument using an XLR or 1/4″ Jack cable. Focusrite interfaces contain either XLR, 1/4″ Jack or Combo Jack (as seen below) inputs.
Step 2: Arm Recording
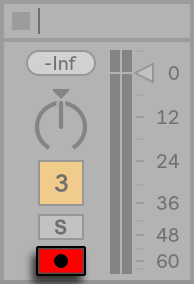
Create a new Audio track by pressing [COMMAND + T] on Mac or [CNTRL + T] on Windows. Alternatively, select ‘Create’ from the menu at the top of your screen and press ‘Insert Audio Track’. Next, click the Arm Recording button to ensure Live records audio onto this audio track.
To record to more than one audio track at once, select the Arm Recording button on each audio track by pressing [COMMAND + Click] on Mac or [CNTRL + Click] on Windows.
Step 3: Set Input
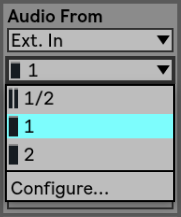
Set the input on your audio track to which number input your instrument is plugged into on your Focusrite interface. If your instrument is plugged into the left-most input on your interface, select ‘1‘ from the second drop-down box on your audio track. If you would like to hear your instrument through your speakers or studio monitors, select ‘In‘.
Step 4: Adjust Gain
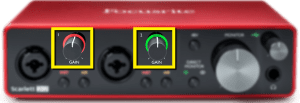
Adjust the gain knob until you are comfortable with the volume of your instrument’s input. Refer to the VU metre on your audio track to more accurately determine the volume of your instrument.
When Green appears around a gain knob, it indicates your Focusrite interface is receiving audio.
When Red appears around a gain knob, it indicates the volume is too loud and is clipping.
Step 5: Record
It’s time to record! Press the red circle in the top bar at the top of the Ableton window. Recording will begin where your marker is located on Arrangement View. Press spacebar or the black stop button to conclude your recording.
![]()
| Which Is The Best Focusrite Interface?
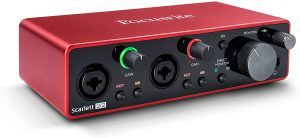
Scarlett 2i2
The 2i2 is the number one selling USB audio interface in the world.
It features everything beginner to intermediate producers need to successfully record audio and use a pair of studio monitors. It is a cost effective unit that has everything you need to record, produce, mix and master your own music.
It contains two inputs and two outputs; perfect for recording multiple instruments and for monitoring through speakers and headphones at once. Powered by USB, the Scarlett 2i2 doesn’t require any additional power. It also supports microphones that require phantom power.
The Scarlett 2i2 is just one of the many fantastic audio interfaces from the Scarlett range. You can purchase it from Amazon here.
| Conclusion
If you’re looking at buying a Focusrite Interface, I would highly suggest anything from the Scarlett range. The Scarlett audio interface range by Focusrite is arguably the most commonly used collection of interfaces. I have been using a Scarlett 2i2 for almost 10 years and it has helped me craft hundreds of ideas. A Focusrite audio interface is a fantastic investment for producers of any genre.
Want To Know More?
Here at Live Aspects, we have dozens of useful lessons and tutorials created to enhance your music production skills and help speed up the learning process. You can access our huge range of music theory lessons and production tips and tricks here.

2 comments
Hello! I just want to provide a huge thumbs up for the great info youve here on this blog. I will be returning aimed at your website for additional soon.
Awesome post sir, this is my favorite audio interface and amazing to use. Your blog was very comprehensive. Thank you, buddy!