Mixtapes are the best way to present a collection of your favorite tracks and to show what you have to offer as a DJ. Enjoy the party without having to stand behind the decks all night by creating a mixtape in Ableton Live.
Hi, I’m Ben from Live Aspects and today I’ll show you exactly how to make a mixtape in 6 easy steps.
- Step 1: Prepare Your Set
- Step 2: Import Tracks
- Step 3: Adjust Start Markers
- Step 4: Order Tracks
- Step 5: Create Transitions
- Step 6: Automate Master Tempo
Without further ado, let’s start creating!
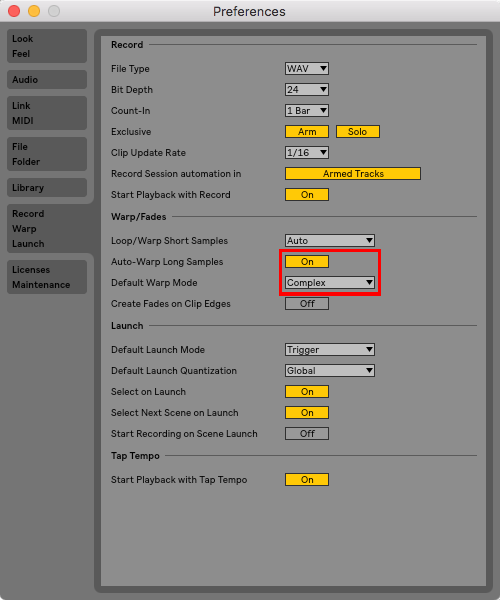
| Step 1: Prepare Your Set
Head into Live’s Preferences and select the Record Warp Launch tab. Next, make sure ‘Auto-Warp Long Samples‘ is On and ‘Default Warp Mode‘ is set to Complex. This will ensure your tracks are automatically warped to your project’s tempo, making transitions between songs sound smoother.
| Step 2: Import Tracks
Select the songs you would like in your mixtape in Finder (Mac) or File Explorer (Windows). Next, hold [COMMAND] on Mac or [CNTRL] on Windows while dropping your tracks in Live to place each song onto its own audio track.
Click and drag an audio track to re-order the songs in your mixtape.
| Step 3: Adjust Start Markers
Check that the start markers of each track are set to the very first beat of the song. Start markers are the lower grey triangle in clip view and determine where a track will start playing when it’s launched. This step ensures your tracks are synced in time when creating transitions between two songs.

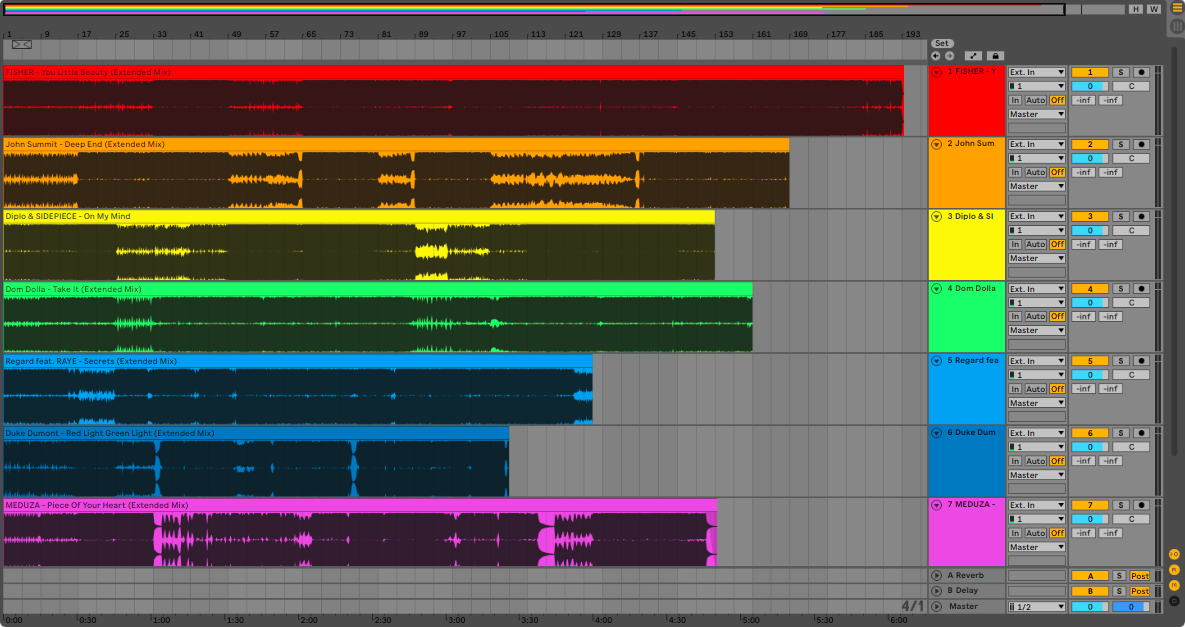
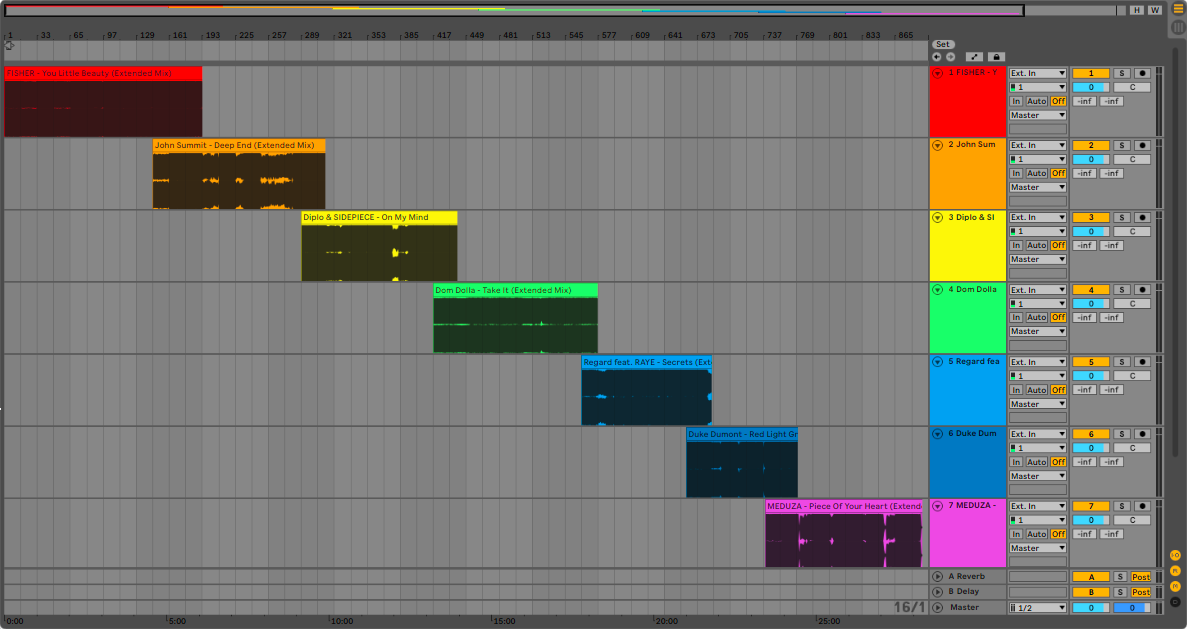
| Step 4: Order Tracks
Next, prepare to create transitions between your tracks by placing each song across the timeline in Arrangement View.
The most traditional method of transitioning from one song to another firstly requires a single song to play, then a second song to be slowly introduced, allowing both songs to play simultaneously when finally, the previous song fade out and allow only the second song to play.
Creating an overlap between tracks allows songs to be gradually introduced and faded out. Try placing the beginning of the next song as the current song approaches it’s conclusion.
| Step 5: Create Transitions
There are two essential steps required to create a seamless transition: automating Volume and EQ. Strategically automating these two parameters will help you create the best transitions possible throughout your mixtape.
Volume
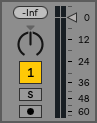
A common transition requires one song to fade in and one song to fade out. Volume automation is used to introduce and conclude tracks when transitioning between songs. You can access the volume fader of an audio track by switching to Session View.
EQ
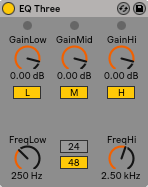
EQ’ing is pivotal when transitioning between songs, particularly in the low-end frequencies. It’s important to only keep the low-end of one track when two songs are playing in unison. An excess of low frequencies creates an unwanted distortion and becomes unpleasant to the ears.
Automating the mid and high frequencies can help feature or subside particular elements in the mix and therefore, assist in creating a smoother transition. Add Live’s EQ plugin ‘EQ Three’ to control the low, mid and high frequencies independently.
| Step 6: Automate Master Tempo
When a warped track is played back at a tempo different to it’s original BPM, it can lose quality and certain elements such as the kick drum may not sound as anticipated. While this step is optional, it is highly recommended to automate the tempo on your Master track so each song in your mixtape can be played back at it’s original quality.
Try selecting songs with similar or matching tempos in order to skip this step or minimise the amount of automation required.

Want To Know More?
Here at Live Aspects, we have dozens of useful lessons and tutorials created to enhance your music production skills and help speed up the learning process. You can access our huge range of music theory lessons and production tips and tricks here.