Fades allow you to gradually introduce or mute layers in your Live projects. While Live’s fade handle feature is only available on audio tracks, the process of fading a MIDI track is just as simple. By using a combination of automation and Live’s Utility plugin, you can quickly and easily create straight or curved fades on any MIDI clip.
Hi, I’m Ben from Live Aspects and in three easy steps, I’ll be showing you the best way to fade in or fade out a MIDI track in Ableton Live.
- | How To Fade A MIDI Track
- | How To Fade A MIDI Track: Alternate Method
- | How To Curve Fades
- | How To Copy & Paste Fades
Without further ado, let’s get started!
| How To Fade A MIDI Track
The best way to fade a MIDI track involves manually crafting fades using Live’s automation feature. Using Live’s Utility plugin allows you to adjust the MIDI track’s volume separately to its fades. You can also use the following method to create fades on an audio clip.
| Step 1: Add Utility Plugin
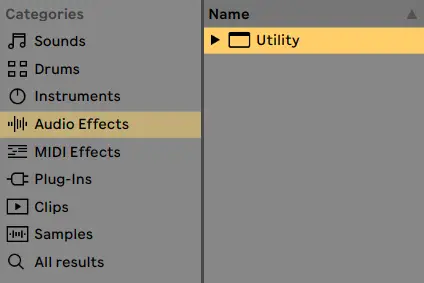
Head to Live’s Browser by toggling the triangular icon in the top left corner. Select the ‘Audio Effects’ tab and locate the Utility plugin. Double-click on Utility to add it to the selected MIDI track or simply drag and drop it onto the MIDI track that contains the clip you would like to fade.
| Step 2: Show Gain Automation
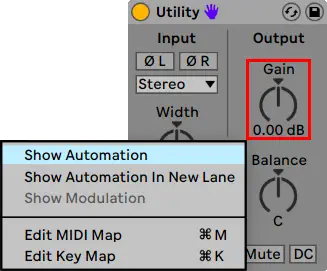
Once Utility has loaded into the device view, right-click the Gain knob and select ‘Show Automation’. You will now see the automation arm for the Gain parameter on your audio track in arrangement view.
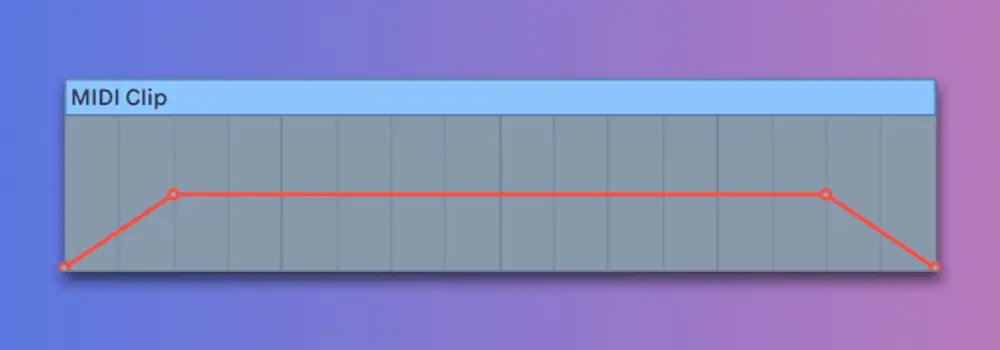
| Step 3: Create Fades
Lastly, craft your own fades by creating automation breakpoints and shaping the automation envelope. Ensure Draw Mode is turned off by toggling the pencil icon in the top-right corner of the Live interface or by pressing ‘B’ on your keyboard.

Additional:
To place a more precise automation breakpoint, change the grid size by right-clicking on an empty part of arrangement view and selecting a smaller fraction under ‘Fixed Grid’.
| How To Fade A MIDI Track: Alternate Method
If you’re looking to reduce the clutter in your arrangement view, this method involves embedding fades into the MIDI clip itself. This method can also be used to fade in or fade out an audio clip.
| Step 1: Open Clip View
For this method, start by opening up the clip view of the MIDI clip you would like to fade. You can do this by simply double-clicking on the top part of the clip.
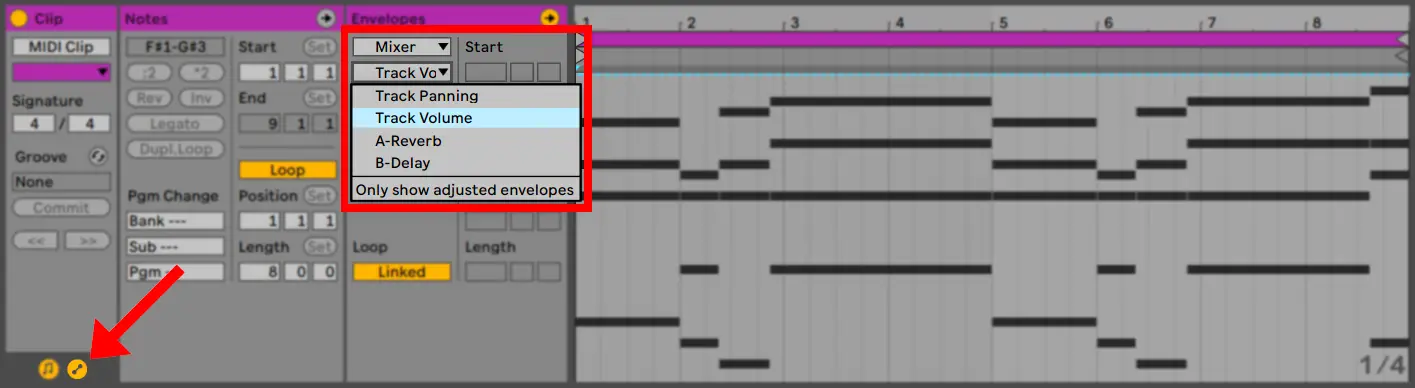
| Step 2: Show Track Volume Envelope
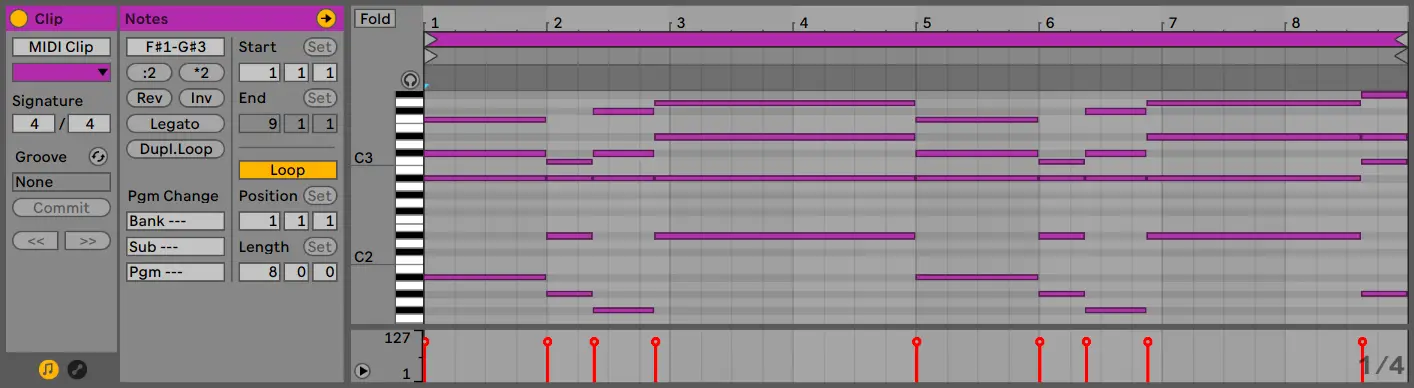
Reveal the Envelopes Box by selecting the icon in the bottom left corner of the clip view. Under the ‘Envelopes’ heading, select ‘Mixer‘ for the first drop-down box and ‘Track Volume’ for the second drop-down box. The Track Volume automation envelope will now appear on top of the MIDI note editor.
| Step 3: Create Fades
Lastly, craft your own fades by creating automation breakpoints and shaping the Track Volume envelope. Ensure Draw Mode is turned off by toggling the pencil icon in the top-right corner of the Live interface or by pressing ‘B’ on your keyboard.

Additional:
To place a more precise automation breakpoint, change the grid size by right-clicking on an empty part of arrangement view and selecting a smaller fraction under ‘Fixed Grid’.
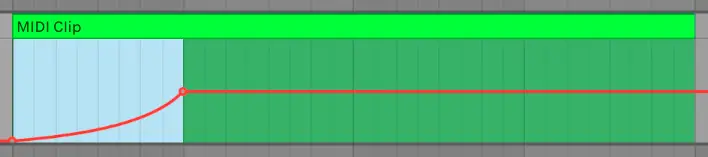
| How To Curve Fades
Curved fades are a great way to add a more human-like feel to your automation envelopes. To curve a fade, simply hold down [ALT] and drag the automation envelope up or down.

Live also has a selection of shapes that can be instantly inserted onto an automation envelope. To access the Insert Shape menu, highlight where on the automation lane you would like the shape to be inserted and right-click the envelope.

| How To Copy & Paste Fades
If you have created a fade that you would like to use on another MIDI clip, you can simply copy and paste the fade automation. With automation mode enabled, simply highlight the beats|bars that contain your fade and press [COMMAND + C] on Mac or [CNTRL + C] on Windows.
To paste your fade, left-click on the bar you would like the fade automation to begin and paste it by pressing [COMMAND + V] on Mac or [CNTRL + V] on Windows.

To learn more about automation in Ableton Live, visit our previous post titled ‘How To Automate In Ableton Live’.
Want To Know More?
Here at Live Aspects, we have dozens of useful lessons and tutorials created to enhance your music production skills and help speed up the learning process. You can access our huge range of music theory lessons and production tips and tricks here.