Is your Ableton Live producing an unexpected crackling sound during playback? Are your projects being disrupted with unpleasant noise? Audio issues occur when Ableton Live requires too much of your computer’s processing power. Thankfully, there is a simple solution to removing any unwanted audio errors.
Hi, I’m Ben from Live Aspects and in this guide, we will be unpacking the common causes for audio disturbances in Ableton and learning how to resolve them.
- | Why Is My Ableton Crackling?
- | What Is Buffer Size?
- | How To Fix Crackling Audio
- | How To Reduce Audio Latency
- | What Buffer Size Should I Use?
- | Why Is My Recording Crackling?
Without further ado, let’s dive in!
| Why Is My Ableton Crackling?
In most cases, audio errors such as crackling, glitching or drop-outs occur as a result of high CPU load. When you have several programs open or your Ableton projects grow in size, the demand on your CPU will increase. When your computer approaches its maximum CPU capacity, Ableton Live is dedicated less CPU power and is unable to function at an optimal level, resulting in audio errors.
Ableton’s CPU usage can be monitored using the ‘CPU Load Meter’ in the top right corner of Ableton Live. Heavy CPU load is mainly caused by instruments and effects.
![]()
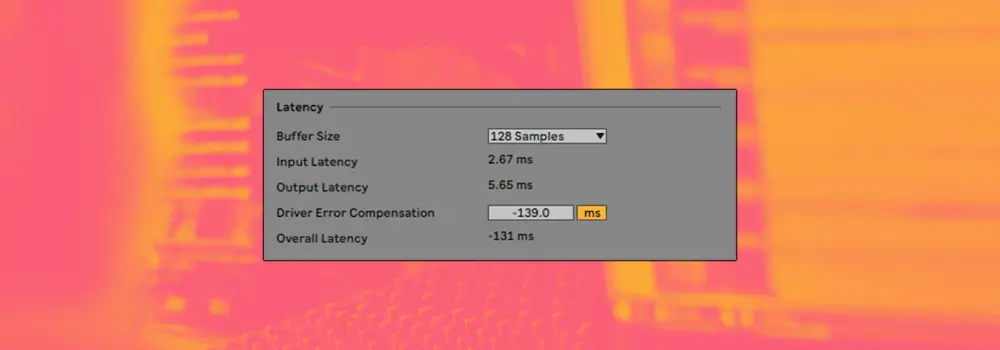
| What Is Buffer Size?
Buffer Size is the amount of time it takes for your computer to process any incoming audio signal. While a lower Buffer Size allows audio to be processed at a faster rate, it takes up a significant amount of Live’s CPU capacity.
Increasing the Buffer Size is the best solution to reducing CPU load and eliminating audio errors. If you’re experiencing any audio crackling, glitching or drop-outs in Ableton, it’s likely because your Buffer Size is too low.
The higher the Buffer Size, the less CPU required to run instruments and effects.
| How To Fix Crackling Audio
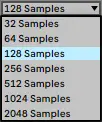
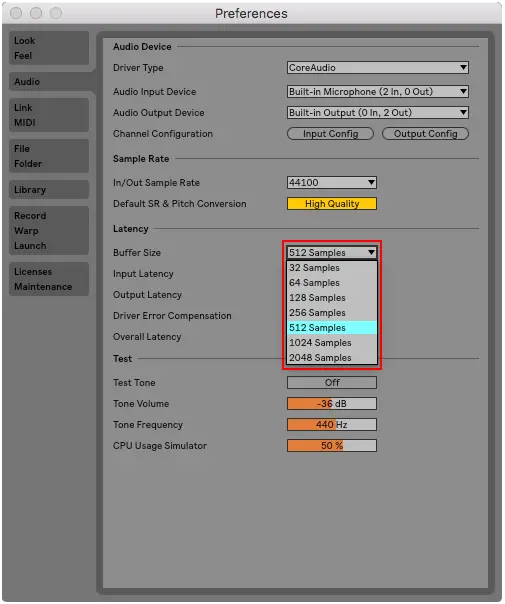
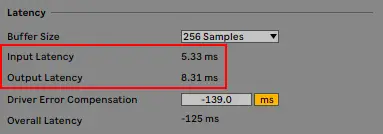
To fix crackling, glitching or audio drop-outs in Ableton, simply increase your project’s Buffer Size. Head to Live’s Preferences then select the ‘Audio’ tab. Under the ‘Latency’ heading, select the drop-down box beside ‘Buffer Size’.
Try to set the Buffer Size as low as your computer can handle before producing crackling, glitching or any other audio irritations. This helps keep latency low so you can edit your projects and record with as little lag as possible.
(Depending on your audio interface, you may need to select ‘Hardware Settings’ and configure the Buffer Size in the interface preferences.)
| How To Reduce Audio Latency
If you have increased your Buffer Size to remove audio crackling, it’s likely that you will be experiencing audio latency. Increased latency comes as a result of an increased Buffer Size. A substantial amount of latency makes it difficult to accurately record and use a MIDI device. While decreasing your project’s Buffer Size is the most direct way to counteract latency, you are more likely to witness audio errors.
Below are some additional ways to reduce latency without adjusting your Buffer Size:
• Freeze Tracks
• Lower Your Sample Rate
• Remove Stop Buttons
• Avoid Warping
• Delete Un-used Tracks, Clips & Plugins
• Quit other applications
• Clear hard-drive space
If you would like to read more about reducing lag in Ableton, feel free to view one of our previous posts titled ‘How To Reduce Lag In Ableton‘.
| What Buffer Size Should I Use?
Computers with higher processing abilities (eg. CPU, RAM and processor) are able to withstand higher Buffer Sizes. The goal is to select a Buffer Size as low as your computer can handle before producing crackling, glitching or any other audio irritations. Be sure to test different Buffer Sizes in order to find the best setting to run Ableton Live on your computer.
We recommend using a Higher Buffer Size (eg. 1024 samples) when mixing, mastering, editing or listening to your project.
We recommend using a Lower Buffer Size (eg. 64 samples) when recording or using a MIDI device.
It is not uncommon for producers to adjust the Buffer Size throughout a project when swapping between editing a track and recording audio and MIDI.

| Why Is My Recording Crackling?
Crackling, glitching or audio drop-outs in audio recordings can be caused by a variety of factors. Below are some common ways to avoid unwanted audio disturbances in your recordings:
• Ensure each of the connections between your microphone, audio interface and computer are properly inserted
• Check for damage to any cables (USB, XLR, Thunderbolt etc.)
• Make sure that the audio interface drivers and firmware are completely up to date
• Record in a quiet environment and ensure no external noise is being picked up by your microphone

Want To Know More?
Here at Live Aspects, we have dozens of useful lessons and tutorials created to enhance your music production skills and help speed up the learning process. You can access our huge range of music theory lessons and production tips and tricks here.