If you’re looking to get the most out of your MIDI controller, Live’s MIDI Mapping feature gives a whole new perspective to performing, recording and experimenting with Ableton Live. With immediate, hands-on access to your Live sessions, MIDI mapping can help you maximise the features of any MIDI device.
Hi, I’m Ben from Live Aspects and in this guide, I’ll be teaching you everything you need to know about mapping MIDI in Ableton Live.
- | What Is MIDI Mapping?
- | How To Map MIDI In Ableton
- | How To Map Drum Pads
- | Record Using A Mapped Controller
- | How To Save MIDI Mapping
Without further ado, let’s dive in!
| What Is MIDI Mapping?
MIDI Mapping is a powerful tool in popular DAWs that allows you to control almost any parameter inside of Ableton Live using your MIDI controller. Essentially, MIDI mapping makes it possible to integrate the buttons, knobs and pads on your MIDI controller with Live to control parameters such as volume, pitch, filter cutoff, reverb dry/wet etc. Get the most out of your MIDI device with Live’s MIDI mapping feature.

Before we get started, make sure your MIDI controller has been setup with Ableton Live. If you need help correctly setting up a MIDI device, make sure to visit our previous post titled ‘How To Use A MIDI Device In Ableton’.
| How To Map MIDI In Ableton
Step 1: Enable MIDI Map Mode
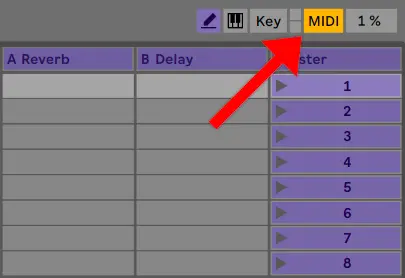
To map MIDI in Ableton Live, start by enabling MIDI Map mode. Simply navigate to the top-right corner of the Live window and select the ‘MIDI’ button. Alternatively, press [COMMAND + M] on Mac or [CNTRL + M] on Windows.
Step 2: Select Ableton Live Function
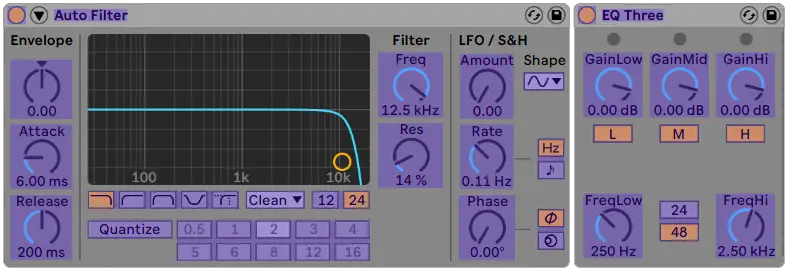
Left-click on the parameter you wish to control with your MIDI controller. Any parameter that is highlighted purple can be mapped to a MIDI device (eg. Volume, Reverb Dry/Wet, Filter Resonance, EQ Low Gain).
Step 3: Trigger MIDI Controller
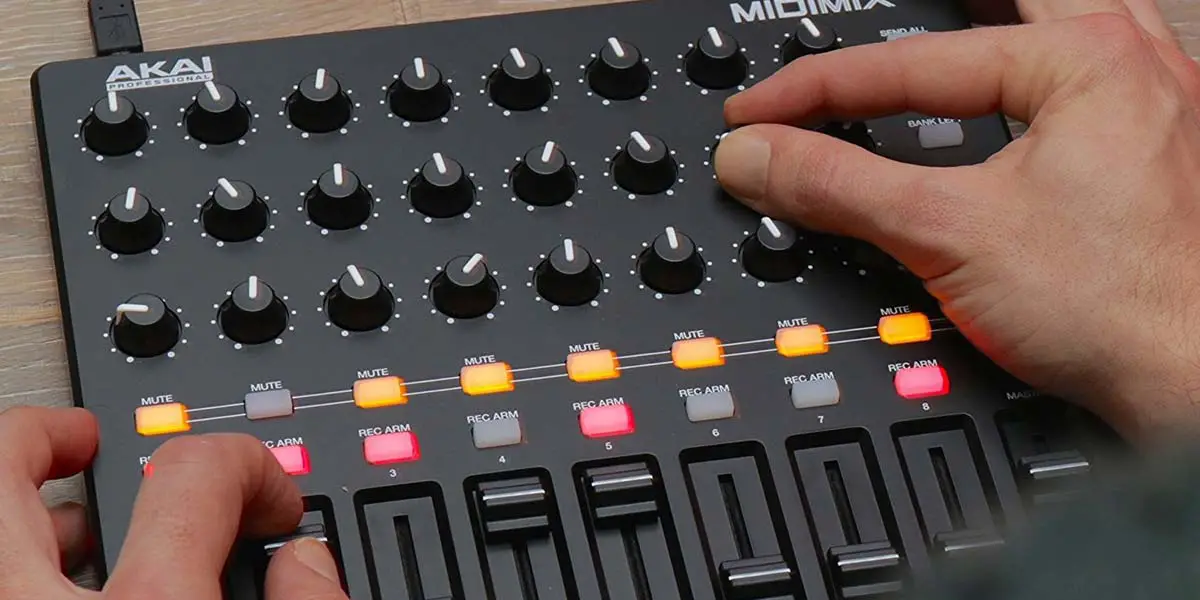
Trigger a knob, slider or button on your MIDI controller to map your chosen parameter from step 2. You will now see the MIDI channel and note number of your mapped control displayed on the mapped parameter. Feel free to repeat this process if you would like to map multiple Live parameters to multiple controls on your MIDI device.
Step 4: Exit MIDI Map Mode
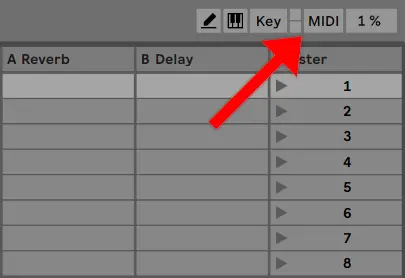
Lastly, exit MIDI Map mode by deselecting the ‘MIDI’ button or by using the keyboard shortcut from step 1. Your MIDI controller has now been mapped to Ableton Live! Perform, record and experiment using your MIDI device. All of your project’s mapped parameters are listed in Live’s Browser when MIDI Map Mode is enabled.
| How To Map Drum Pads
Step 1: Create MIDI Track
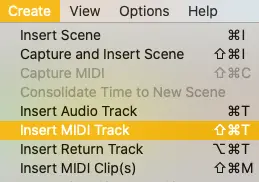
To map your controller’s drum pads, start by creating a MIDI track. Navigate to the ‘Create’ menu in the toolbar and select ‘Insert MIDI Track‘. Alternatively, you can press [COMMAND + Shift + T] on Mac or [CNTRL + Shift + T] on Windows.
Step 2: Add Drum Rack
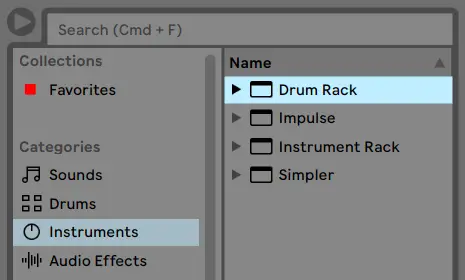
Navigate to Live’s Browser by toggling the triangular icon in the top-left corner of Live. Next, select the ‘Instruments’ category and double-click or drag ‘Drum Rack’ onto your MIDI track. The Drum Rack instrument will appear in the Device View of your MIDI track.
Step 3: Trigger Drum Pads
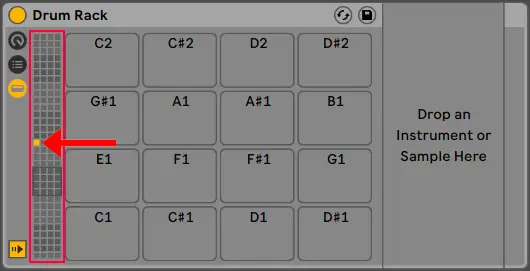
By default, drum pads on a MIDI controller are assigned to a note value (eg. C3, A#1, D2). On your MIDI controller, trigger each of the drum pads to identify the note assigned to each drum pad. When each drum pad is triggered, a small yellow square will be displayed on the accompanying Drum Rack pad. This is where you will place your drum samples.
Scroll between the different octaves by dragging the pad overview on the left side of the plugin.
Step 4: Insert Drum Samples
Drag and drop drum samples from Live’s Browser or Finder/File Explorer onto the empty drum rack pads identified in step 3. Once imported, each drum sample will now be able to be triggered using the drum pads on your MIDI controller.
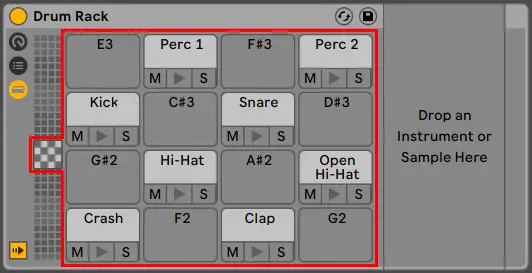
Each pad can hold one audio sample which can be edited in the accompanying Simpler plugin when selected. Here you can edit parameters such as sample length, start and end time, pitch, volume and more.

| Record Using A Mapped Controller
Step 1: Select Arm To Record Button
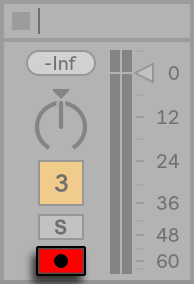
On the MIDI track that contains MIDI mapping, select the Arm Recording button below the Solo button. This will ensure all changes made to a mapped parameter will be recorded once recording begins.
Step 2: Press Record
On the arrangement view, select the beat|bar where you would like recording to begin. This could be at the beginning of your track or at the start of a section. Head to the top of your screen and select the Record button. If you would like a count-in before recording, access your metronome’s menu and select a count-in amount.
![]()
Step 3: Start Playing!
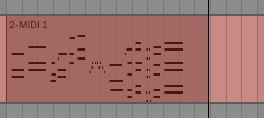
Anything you perform on your MIDI controller will now be recorded. Ableton will create a MIDI clip displaying all the notes of your performance and create an automation envelope for any faders or knobs toggled during recording. Select [SPACEBAR] or the black stop button in the top bar to conclude recording.
| How To Save MIDI Mapping
By simply saving your Live project, all mapped parameters will also be saved. This means that each time you re-open a project, any mapped parameters will be ready to use on your MIDI controller. Unfortunately, any mapping made in a particular Live session cannot be imported or opened in another project. You will need to re-map the parameters from that session in another session.

Want To Know More?
Here at Live Aspects, we have dozens of useful lessons and tutorials created to enhance your music production skills and help speed up the learning process. You can access our huge range of music theory lessons and production tips and tricks here.
