Are you struggling to find the best kick drum to fit your track? Can’t quite get that kick to pack a punch through your mix? A kick drum is one of the most important elements in an electronic composition.
I’m Ben from Live Aspects and I’ve been producing music for over 10 years. I’ve spent countless hours trialing and testing thousands of kick drums and today I’ll be sharing what I’ve learnt.
- | Perfecting The Perfect Kick Drum
- | Finding A Kick Drum
- | Editing A Kick Drum
- | Creating A Kick Drum
Without further ado, let’s dive in!
| Perfecting Your Kick Drum in Ableton
Kick drums are one of the most defining elements in electronic music and one of the key aspects to a groove that really packs a punch.
There are so many great kick samples out there and finding the perfect one can be a challenge. The key is knowing what to listen for. A good kick drum can make the difference between a track that sounds mediocre and one that audiences can listen to on repeat.
When it comes to finding the right kick drum you have three options – simply using a pre-existing kick, editing a pre-existing kick, or creating your own from scratch.
| Finding A Kick Drum
| Sample Packs
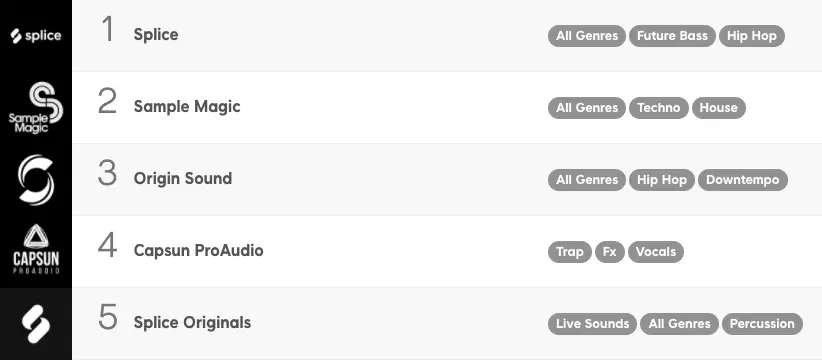
The most common method of finding the perfect kick drum is scanning through your sample libraries. This is the best place to start as it can most often remove the need to add additional effects to change the sound of your kick.
Finding the right kick drum for your track doesn’t have to be a difficult task. Sample Pack creators cut out the meticulous process of having to create kick drums from scratch through the use of sample packs. A good pack will also specify the key of their kick drum samples in the title which can help save valuable time.
Sample Packs will often target a specific style of electronic music (eg. Tech House, Trap etc.) so sourcing a kick sample from a pack made for a style similar to your project can often reduce the steps required to finding the right kick drum for your track.
It’s important to categorize the style you are aiming for as each sub-genre of electronic music generally has a particular kind of kick that defines them. Characteristics of a kick drum can vary anywhere from a long-decay 808 found in Trap music to a short-snappy Psytrance kick.
One useful tip is to find an existing track in the style you’re working within and identify the attributes of the kick eg. short and punchy, long decay etc.
| Sampling
Another technique that is commonly used is Sampling. This involves selecting a small section of an existing piece of music and using it in your own project.
While this method can be quite advantageous, it’s important to make adjustments to your new sample and to be aware of copyright infringement laws.
| Drum Sampler Plugins
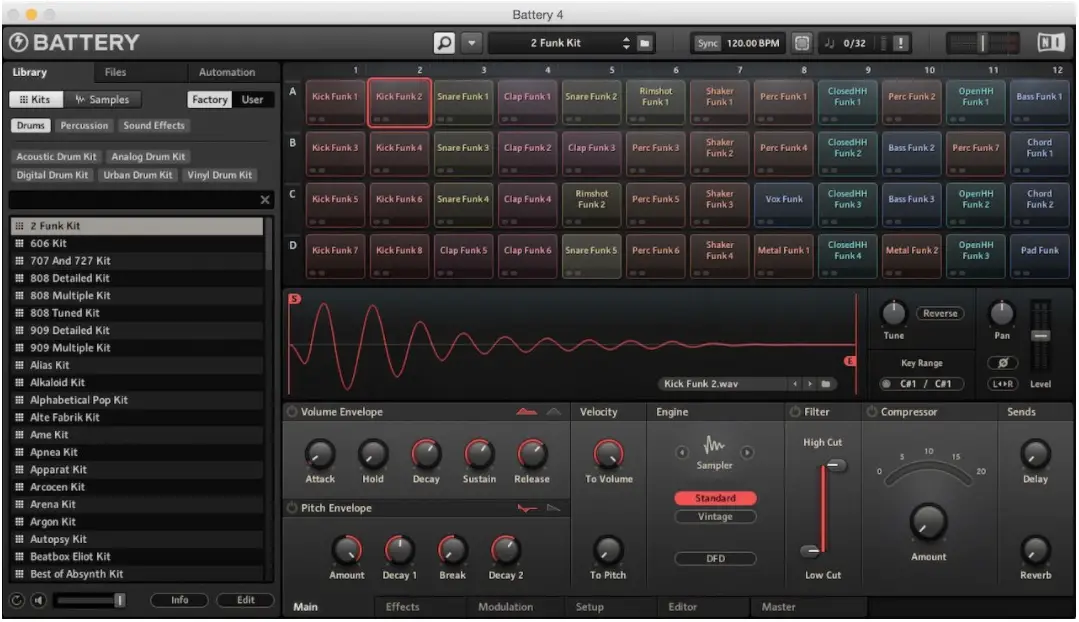
A great way to have quick access to complete drum kits, drum samples, and tailorable functions is through the use of drum sampler plugins. These plugins can help you create amazing-sounding drum beats.
They come with gigabytes of drum samples to select from and edit and often contain ADSR envelope editing which makes it possible to edit all aspects of your kick. You can also import external audio samples to make use of the plugin’s editing capabilities.
Many of these plugins act as an independent DAW for drums which means you can create, sample, sequence and arrange entire tracks without stepping outside of the VST interface.
So if you’re looking for a large library of drum samples with additional features to allow for complete personalization, this is the way to go.
Below is a list of some of the best drum sampler plugins for electronic drums:
• Native Instruments Battery
• Xfer Nerve
• FXpansion Geist2
• Arturia Spark 2
• Sonic Charge MicroTonic
• D16 Nepheton
• Native Instruments Polyplex
| Editing a Kick Drum
| Elements Of A Kick Drum
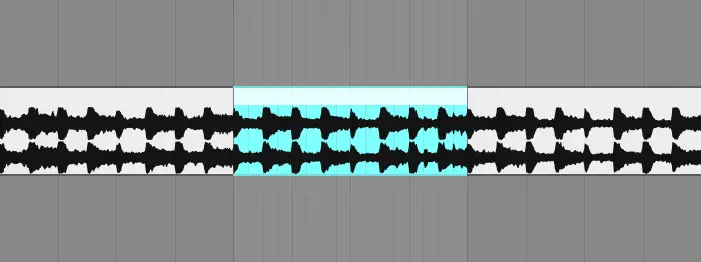
A traditional kick drum sample can be broken down into two elements: Transient and Decay. It’s important to identify both of these attributes individually when selecting or crafting a kick. Below is a visual representation of the volume of a typical kick drum over time:
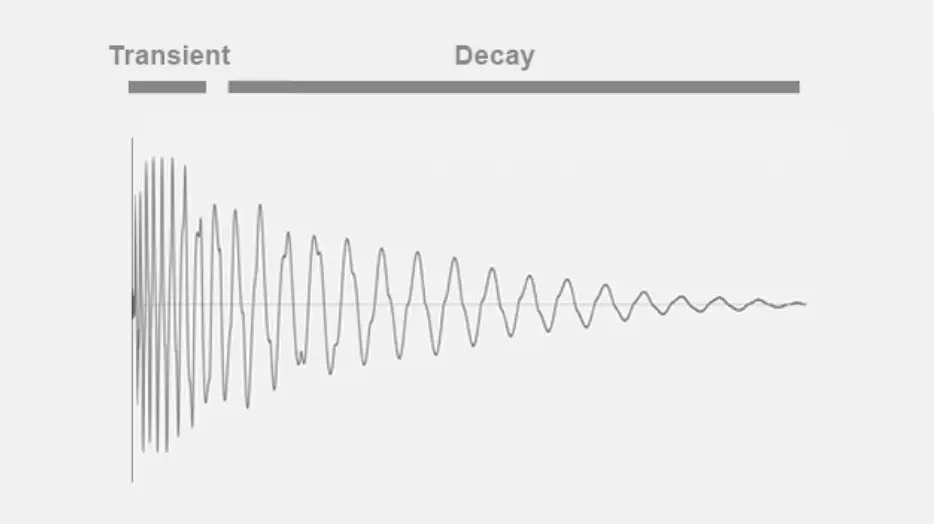
A kick’s transient is the initial attack portion of a kick. It is the volume spike, usually consisting of a large component of mid and high frequencies, at the beginning of a drum sample. The transient provides the ‘crack’ or ‘click’ sound that cuts through the mix. A kick’s transient is generally quite short, generally no longer than ~80ms.
Everything to the right of the initial transient is the decay (also called sustain or body) where the remainder of the drum sample decays in volume to zero. The length of the decay of your kick should depend on your bassline. These two layers take up the majority of the low frequencies of your track so it’s important to be aware of this relationship.
When using a kick with a long decay, try to keep your bass line punchy with shorter note lengths that won’t interfere with your kick. In comparison, it is recommended that you keep your kick decay on the shorter side when working with longer, more sustained bass notes.
| Using Ableton’s Fade Feature
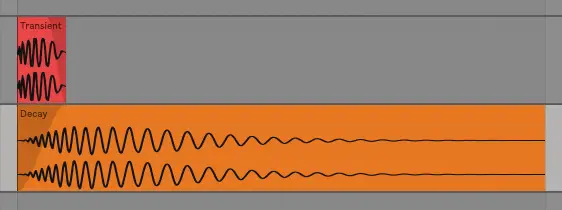
A common practice by many producers is to divide the transient and the decay of a single kick onto separate audio tracks in order to process them individually with EQ, compression, enhancers etc.
Ableton’s simple fade function also allows you to shorten or lengthen each of these new audio clips. At times, a kick sample may only contain certain portions that suit your mix so swapping out a kick’s transient or decay for another can easily be done using this method.
If you find yourself combining components of multiple kick drums, be careful to tune them correctly where necessary.
| Layering Your Kick
If you find yourself using exuberant amounts of EQ or Compression, instead, try layering your kick with another sample that has the character you’re looking for.
Layering with other audio samples can make your kicks more impactful and add interest and depth to the mix. Some other sounds to consider layering with your kicks could include a snare to your kick’s attack, a hi-hat for some extra high-end frequencies or a sine wave bass for some added decay.
| Tuning Your Kick
One aspect to always take into consideration when selecting a kick drum is to tune your kick. It’s important to select a kick drum that’s pitch is suitable to the key of your project.
Often, the pitch of a kick drum is indeterminable and may not affect the other elements of your track but it is important to be aware of this when a kick’s pitch is not indicated. Kicks with a longer decay time often have a more determinable key.
Selecting a kick drum with a pitch conflicting with your project’s key can cause a disturbance in the low frequencies of your track. You can adjust the key of a sample by adjusting the ‘Transpose’ knob on the target audio clip.
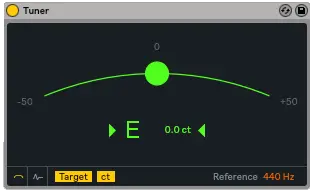
A quick and easy way to determine a kick drum’s key is by using Ableton’s Tuner Plugin. This stock plugin has a simple interface that provides an accurate, instant visual representation of pitch.
| Using Plugins To Edit Your Kick
Applying some dynamic treatments to your kick will help it stand out and cut through the mix.
Some simple editing can often bring your kick to life. Ableton comes with a variety of stock plugins to assist with your kick processing needs, including a Reverb, Saturator, Compressor and multiple EQ plugins.
• EQ
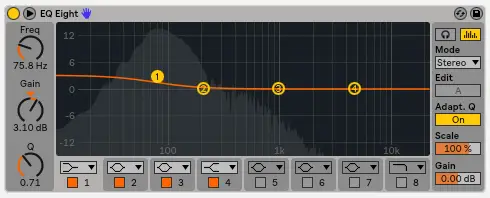
EQ’ing a kick can help remove any frequencies that sound unpleasant or clash with other layers of your track. It can boost or reduce frequencies to help a kick better fit the mix.
If you feel your kick is lacking low-end frequencies, a low shelving boost around 80 – 100Hz can often help solve this problem. A kick drum that lacks a punchy transient can be resolved by boosting somewhere within the 2 – 4Khz region.
• Compression
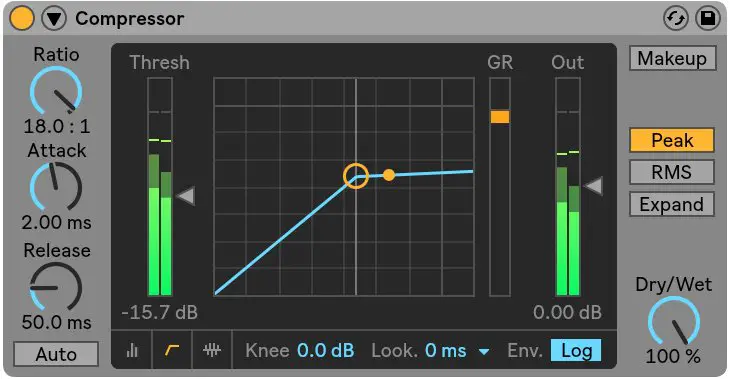
Although quite intricate, Compression can be used to make a variety of audible changes to a kick drum. It’s important to be well practiced with the parameters of compression as it can be easy to harm the sound of your kick.
Compression can be used to adjust the punch intensity of a kick. A fast attack will tell the compressor to reduce the punch of your kick. A slow attack, on the other hand, will tell the compressor to retain and enhance its punch.
Setting the Release Time to as fast as possible will add volume and density to your kick by bringing up low-level details such as the decay and ambiance.
• Reverb
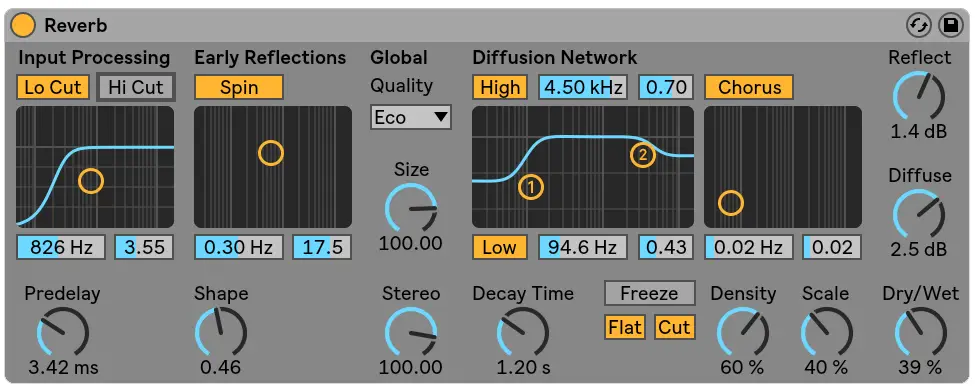
Keeping a kick drum dry is a good rule of thumb, particularly on dance tracks, but adding a bit of reverb flavor to the top end of the kick can sometimes enhance your project.
Reverb can add to a track’s build-up through the use of automation or be used to add ambience to your track. If you are going to add reverb to a kick, make sure to cut the low frequencies of the reverb tail.
Adding reverb to the low frequencies of your kick can cause muddiness and clog up the mix.
• Saturation
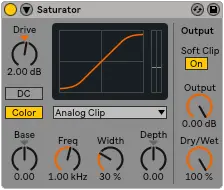
Saturation can be used to add extra harmonic content and warmth to a kick. It’s a great way to get that extra 10% out of your mixes. If your kick is sounding dull and monotonous, try adding some saturation.
In instances where saturation is accompanied by compression and/or EQ, ensure the saturation is placed first in your processing order.
| Using A Reference Track
If you’re struggling to know how your kick should be sounding, using a reference track can be an exceptionally helpful tool.
Simply search your song library for a track similar to the style of your project and analyse how the producer has crafted their kick drum. A song with a similar bass sound will allow for a more exact replication of the kick’s elements.
| Creating a Kick Drum
| Making A Kick From Scratch
If you’re not able to round up the funds to purchase sample packs and expensive plugins, there are a variety of ways inside and outside of Ableton to create your own kick samples from scratch.
Building a kick drum allows for complete control and customizability. Creating a kick can be very time consuming and involve a lot of trial and error but we believe the following 12-step procedure is the best way to go about it:
Step 1: Find a reference kick
Find a well grounded kick sample suitable for the style you are aiming for.

Step 2: Generate a sine wave
We are going to start by creating the kick’s decay. Open Ableton’s Analog and change the shape to ‘Sine’. Then select ‘Amp1’ and adjust the ‘Sustain’ option to 1.00. You also need to turn off ‘Osc2’.

Step 3: Convert sine wave to audio
Create a MIDI clip and draw a long note of any pitch. Right-click your track and select ‘Freeze Track.’ Next, right-click your track again and select ‘Flatten Track.’ Unwarp your new audio clip if required.

Step 4: Match sine wave to reference kick
Zoom into your two audio clips and match the shape of the soundwaves of your sine wave as close to your reference kick as possible.
You can increase and decrease the length of each wave by transposing the audio clip. Use CMD + E (mac) or CNTRL + E (windows) to make quick clip slices where the sine wave shape changes length. The length of each sine wave should increase throughout the kick’s decay.

Step 5: Create fades
Create a short fade between all your slices to remove popping and clicking. Fade out the final sine wave clip to conclude your kick.

Step 6: Consolidate your clips
Select your sine wave clips and consolidate by pressing CMD + J (mac) or CNTRL + J (windows). Fade out your new audio clip to conclude the sustain of your kick.

Step 7: Creating the transient
Create a new track and select the sine wave you created before. Next, transpose it to a higher pitch so the wavelengths become quite short.

Step 8: Processing
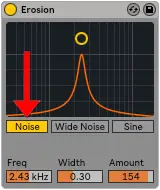
This step depends on how you intend your kick should sound but use the following plugins as a recommendation. Add Ableton’s ‘Erosion’ plugin and select ‘Noise’.
Adjust the yellow circle so it is placed near the top centre of the Erosion grid. Duplicate this plugin as desired.
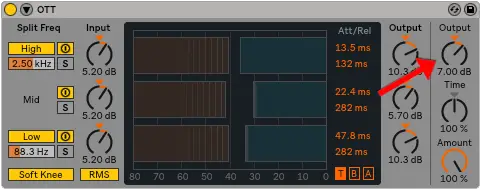
Next add Multiband Dynamic’s preset ‘OTT’ and increase the main ‘Output’ until the volume of your transient reaches near 0 track volume.
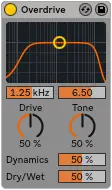
Then add several of the plugin ‘Overdrive’.
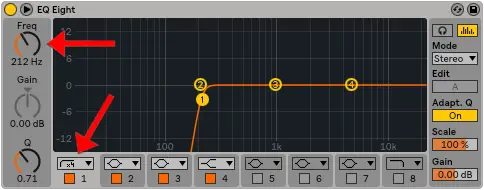
Add an ‘EQ Eight’ and remove the low frequencies.
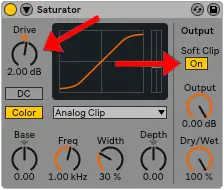
Now add a ‘Saturator’ plugin and turn the ‘Soft Clip’ option ‘On’. Adjust the ‘Drive’ knob to adjust the amount of saturation.
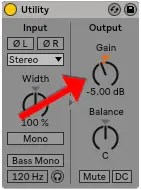
If your track is clipping, add a ‘Utility’ and decrease the ‘Gain’ of the track as desired.
Step 9: Convert transient to audio
Right-click your track and select ‘Freeze Track.’ Next, right-click your track again and select ‘Flatten Track.’ Unwarp your new audio clip if required.

Step 10: Combine transient and sustain
Move your new transient and your kick’s sustain onto a new audio track. Create a fade between these two elements and adjust until your two clips are sounding like a kick drum.
If required, create new clip slices and re-adjust the sustain’s wavelengths.

Step 11: Post-processing
This step is dependent on the outcome of your kick so far but the following recommendations can be used to increase the strength of your new kick.
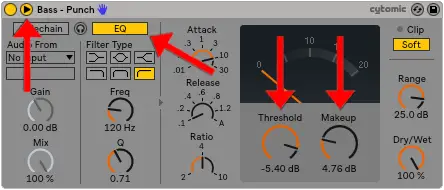
Add Glue Compressor’s preset ‘Bass – Punch’, turn the EQ on and adjust the ‘Threshold’ and ‘Makeup’ values as desired. This gives your kick more punch.
Add a ‘Saturator’ plugin and turn the ‘Soft Clip’ option ‘On’. Adjust the ‘Drive’ knob to adjust the amount of saturation.
Step 12: Convert track to audio
For your final step, select your new transient and decay and consolidate. Now right-click your track and select ‘Freeze Track.’ Next, right-click your track again and select ‘Flatten Track.’ Unwarp your new audio clip if required.

Congratulations, your new kick drum is complete! Use this procedure as a guide only and be sure to experiment with different processing plugins to achieve the result you’re aiming for.
| Sonic Academy: Kick 2 Plugin
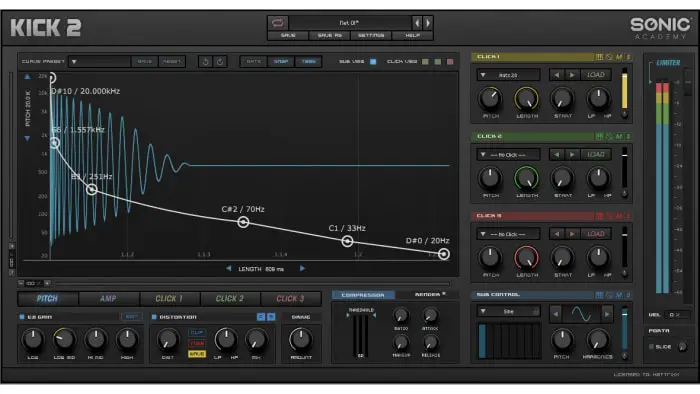
If you are looking for a way to have complete control over the sound of your kick within a single plugin, we highly recommended Sonic Academy’s ‘Kick 2’ plugin. You can grab this fantastic plugin for a little under $60.
This versatile tool has all the controls you need to create the perfect kick drum. Tools like a subtone generator, multiple click transients, full envelope control, additional harmonics section, in-built EQ and compression.
It features easy WAV export, 230+ factory kicks, external sample folder browsing, 180+ click samples and much more. Easily sculpt shape, create, manipulate and mangle your way to the perfect kick drum with Sonic Academy’s ‘Kick 2’.
If you’d like to check out the amazing features of Sonic Academy’s ‘Kick 2’ free for 7 days, click here.
Your options are endless when searching for the perfect kick. Feel confident knowing you have the know-how to create memorable drum beats with kicks that audiences will love.
Next time you’re looking for the right kick for your track, keep these tips in mind!
Want To Know More?
Here at Live Aspects, we have dozens of useful lessons and tutorials created to enhance your music production skills and help speed up the learning process. You can access our huge range of music theory lessons and production tips and tricks here.