Audacity is a free, open-source audio editing software that comes with an incredible range of audio editing effects, including a number of different ways to speed up and slow down audio. Whether you’re looking to speed up a recorded lecture or slow down the tempo of a song, Audacity can be used to change the speed of any audio file in seconds.
In this guide, we’ll outline how you can use Audacity to speed up or slow down audio without altering pitch.
Without further ado, let’s get started!
| How To Speed Up Audio In Audacity
Step 1: Import Audio
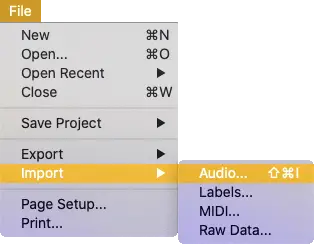
To speed up audio in Audacity, start by importing an audio sample. You can do this by dragging and dropping an audio file from your computer into Audacity or by selecting ‘Import’ > ‘Audio’ from the File menu.
Step 2: Select Audio
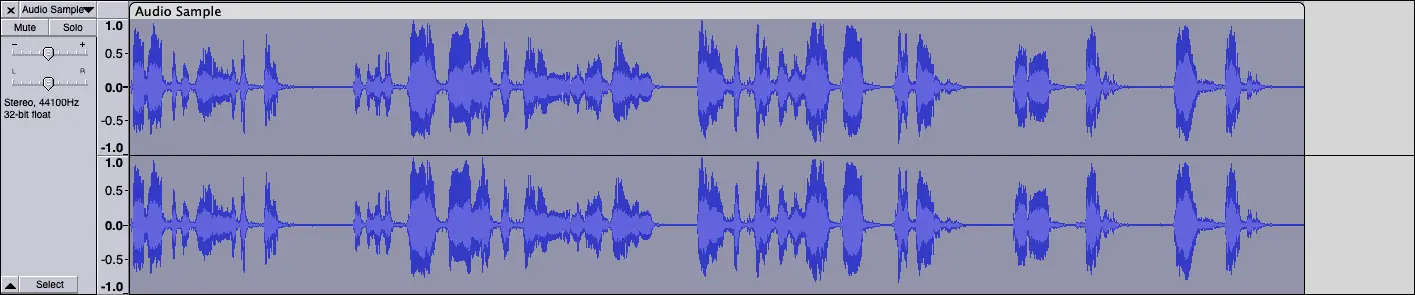
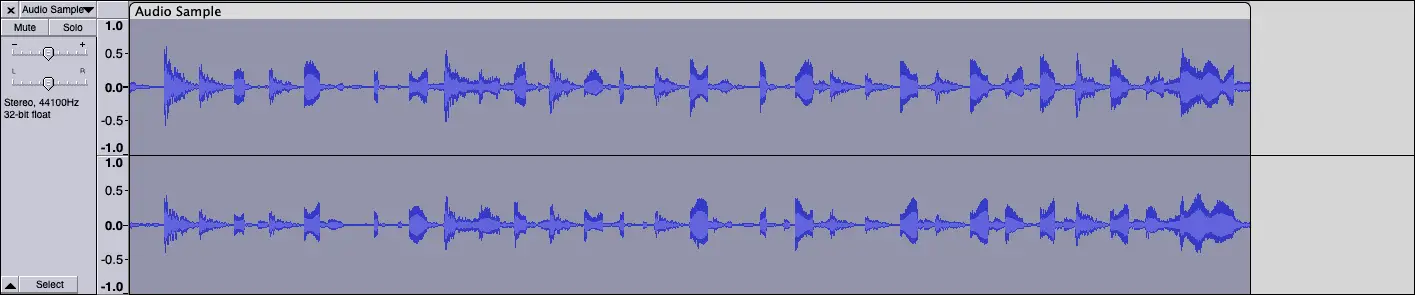
Next, select all or part of the audio sample. Double-click anywhere on a waveform to select the entire sample or left-click and drag to make a selection.
Step 3: Open ‘Change Tempo’ Effect
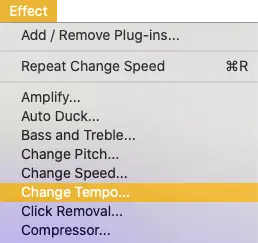
Navigate to the Effect menu at the top of your screen and select the ‘Change Tempo‘ effect.
Optional: If you want to speed up the audio sample while affecting pitch, select ‘Change Speed‘ from the Effects menu instead.
Step 4: Speed Up Audio
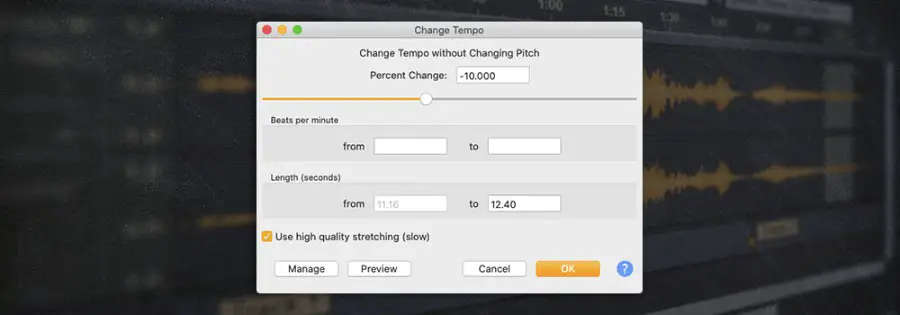
Lastly, adjust the settings of the ‘Change Tempo’ effect to your liking.
• Percent Change: You can use the slider or type in what percent you would like the audio to be sped up by.
• Beats Per Minute: Type in the audio’s tempo into the ‘from’ box, then type a new tempo into the ‘to’ box.
• Length (Seconds): Here you can input how long you would like the audio to go for, with its current duration stated in the ‘from’ box.
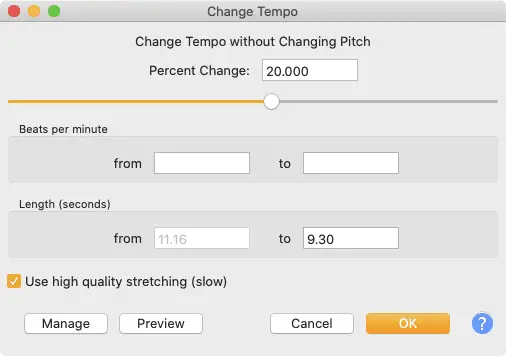
Additional: Although it takes longer to process, enabling ‘Use high quality stretching’ will ensure the quality of the audio sample is maintained when sped up.
| How To Slow Down Audio In Audacity
Step 1: Import Audio
To slow down audio in Audacity, start by importing an audio sample. You can do this by dragging and dropping an audio file from your computer into Audacity or by selecting ‘Import’ > ‘Audio’ from the File menu.
Step 2: Select Audio
Next, select all or part of the audio sample. Double-click anywhere on a waveform to select the entire sample or left-click and drag to make a selection.
Step 3: Open ‘Change Tempo’ Effect
Navigate to the Effect menu at the top of your screen and select the ‘Change Tempo‘ effect.
Optional: If you want to slow down the audio sample while affecting pitch, select ‘Change Speed‘ from the Effects menu instead.
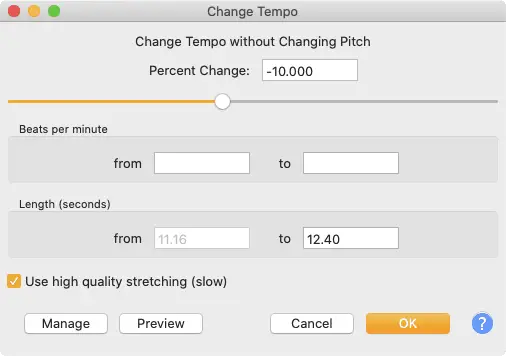
Step 4: Slow Down Audio
Lastly, adjust the settings of the ‘Change Tempo’ effect to your liking.
• Percent Change: You can use the slider or type in what percent you would like the audio to be slowed down by.
• Beats Per Minute: Type in the audio’s tempo into the ‘from’ box, then type a new tempo into the ‘to’ box.
• Length (Seconds): Here you can input how long you would like the audio to go for, with its current duration stated in the ‘from’ box.
Additional: Although it takes longer to process, enabling ‘Use high quality stretching’ will ensure the quality of the audio sample is maintained when slowed down.
Related Posts:
How To Change Key In Audacity
How To Add Multiple Files In Audacity
How To Make Audio Louder In Audacity
Want To Know More?
Here at Live Aspects, we have dozens of useful lessons and tutorials created to enhance your music production skills and help speed up the learning process. You can access our huge range of music theory lessons and production tips and tricks here.