Have you ever wondered what component of dance music causes your subwoofer to shake the entire house? What is it about bass that makes dance music so appealing to large audiences? Sub bass is the component of electronic music productions that makes your neighbours unhappy and causes hair-raising goosebumps.
It is responsible for the repetitive thuds that you can hear miles away from the nightclub. Sub bass is the element of music that you can feel, particularly at large music events.
I’m Ben from Live Aspects and I’ll be explaining everything you need to know about sub bass in Ableton and how to create and use it.
- | What Is Sub Bass?
- | The Difference Between Bass & Sub Bass
- | Sidechain Your Sub Bass
- | Best Frequency For Your Sub Bass
- | Creating Sub Bass In Ableton
- | Sub Bass Tips
- | What Is An 808?
Without further ado, let’s dive in!
![]()
| What Is Sub Bass?
Sub bass is a bassline layer that occupies the lowest frequencies of the frequency spectrum. Together with the kick drum, the sub bass layer is responsible for the low frequency exhilaration that defines the EDM genre.
Having a sub bass is an integral part of any EDM song as it is responsible for creating an auditory experience that no other layer in your tracks can produce.
| The Difference Between Bass & Sub Bass
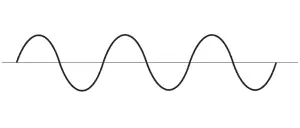
Sub bass is generally made up of a single sine wave or square wave and is limited to the lowest region of the frequency spectrum. A normal bass sound would include additional harmonics and would have noticeable mid and high frequencies.
While your bass and sub bass may be melodically identical, they each occupy a unique frequency range. Your sub bass should generally sit an octave (or more) lower than your main bass layer.
It is important to ensure your sub bass remains smooth and clean. While the main bass layer of a song often requires additional effects such as Saturation, EQ’ing or Reverb, editing a sub bass signal too much can cause muddiness in the low end and can harm the relationship between your sub bass and the other layers of your track.
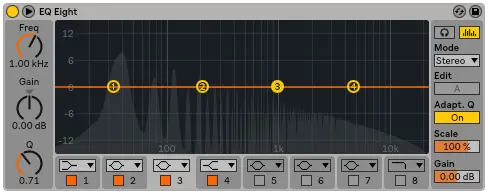
Below is an example of a traditional sounding bass preset playing a D#:
Below is an example of a sub bass Operator preset playing the same note:
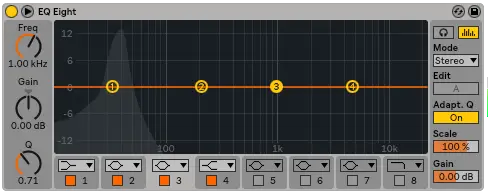
You will notice in the screenshots above that the sub bass has no harmonics compared to a traditional main bass layer which contains harmonics across the entire frequency spectrum.
| Sidechain Your Sub Bass
It is likely that your kick drum and sub bass will occupy some of the same low frequencies, so it’s important that you make space for these frequencies to achieve punch, presence, and clarity. You can achieve this by sidechaining your bass layers to your kick.
Having multiple layers in the same low frequency range creates unwanted disturbance and unpleasant distortion and can cause your track to clip. A quick and easy way to sidechain your sub bass to your track’s kick drum is by using Ableton’s Glue Compressor.
Step 1: Add Glue Compressor To Your Sub Bass
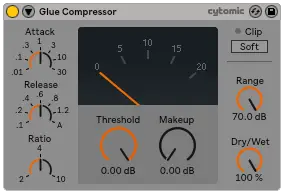
Click in the browser search bar and type ‘Glue Compressor’ then select ‘Audio Effects’ on the left of the screen. Double-click Glue Compressor or drag & drop it onto your sub bass track.
Step 2: Sidechain Your Sub Bass To Your Kick
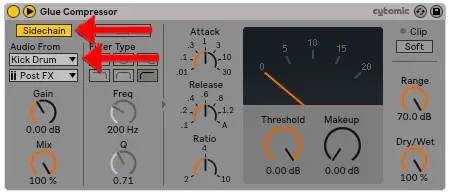
Select the triangle in the top left corner to access the advanced features. Firstly, select the ‘Sidechain’ button then open the drop-down box titled ‘Audio From’. Choose the layer that you want your sub bass volume to be triggered by. In this instance, select your kick drum.
Step 3: Edit The Parameters
Depending on the length of your kick and the strength of its transient, adjust the Attack, Release and Threshold parameters to ensure your sub bass and your kick drum leave room for each other in the mix.
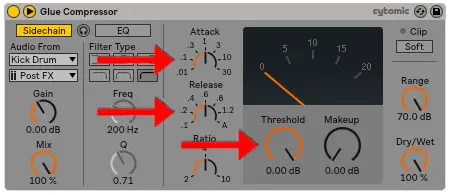
The Threshold value is responsible for the strength or amount of sidechain, Attack is how quickly the sub bass volume responds to the kick drum and Release determines how quickly the sub bass returns to its original volume after being sidechained.
| Best Frequency For Your Sub Bass
The optimal frequency range for your sub bass is between 20Hz and 60Hz. Sounds in this range tend to be felt more than heard. Many instruments aren’t able to reach this low on the frequency spectrum so it’s important to include sub bass in your productions to ensure these low frequencies are occupied.
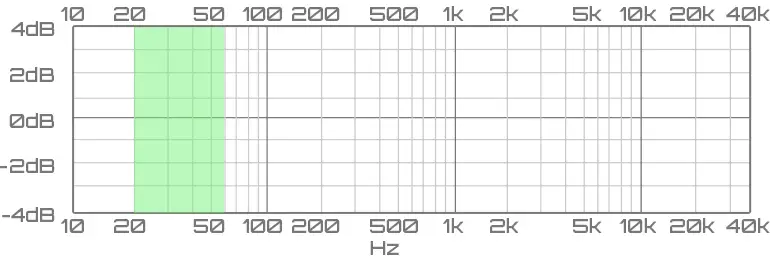
The human ear is not able to hear any sound below 20Hz so producers often low-cut these frequencies out to ensure their mixes remain as clean as possible.
| Creating Sub Bass In Ableton
The quickest and most simple way to create a sub bass melody is with Ableton’s Operator plugin. Operator is an easy-to-use software instrument that combines classic analog sounds and frequency modulation synthesis. Operator’s default patch is a simple sine wave which is all you need for a perfect sub bass.
Step 1: Create A MIDI Track
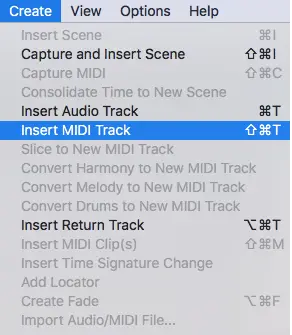
Start by creating a MIDI track on your Ableton project by pressing [COMMAND + SHIFT + T] on Mac or [CNTRL + SHIFT + T] on Windows. Another way to do this is to select the ‘Create’ menu at the top of your screen then press ‘Insert MIDI Track.’
Step 2: Insert Operator
Next, insert Operator onto your new MIDI track. Click in the browser search bar and type ‘Operator’ then select ‘Instruments’ on the left of the screen. Double-click Operator or drag & drop it onto your MIDI track.

Step 3: Create A MIDI Clip
Start by accessing Ableton’s arrangement view by pressing [TAB]. Next, select the number of bars that you would like your sub bass melody to be. Create a MIDI clip by pressing [COMMAND + SHIFT + N] on Mac or [CNTRL + SHIFT + N] on Windows.

Step 4: Start Creating!
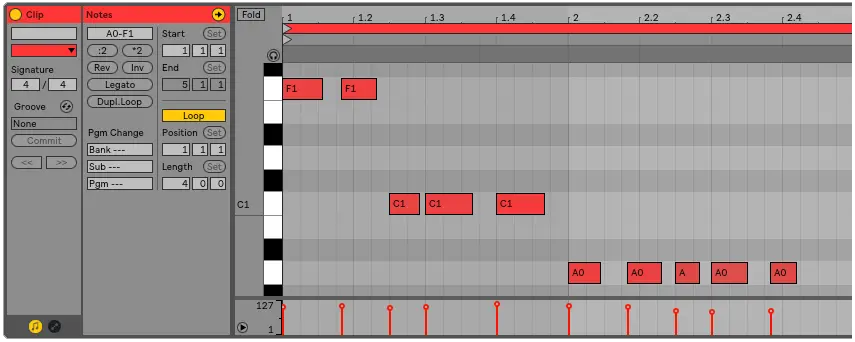
Use the piano roll to draw in your sub bass melodies or simply copy an existing bassline from another layer of your project.
| Sub Bass Tips
Always make sure your sub bass is in Mono. Bass frequencies have a lot of energy and will take up more space in a mix than mid or high frequencies. Panning your sub bass can also sound very disorienting on headphones.
Use panning and stereo widening on higher frequency elements of your track such as your synths or vocals. Quickly and easily make any layer mono using Ableton’s Utility plugin.
Try to avoid using notes below D#1 in your sub bass melodies as the pitch of these notes become close to inaudible and lose their tone. Raising the octave of notes that may fall below a D#1 creates a more clear and defined pitch.
It’s important to always create your sub bass melodies monophonic, meaning only play a single note at any one time. Playing chords or overlapping notes creates significant disturbance in the mix and an uncomfortable rumble unpleasant to the ears.
You can do this in Operator by selecting the bottom right tab then clicking on ‘Voices’ and selecting ‘1’. This makes it impossible to play multiple notes at once.

| What Is An 808?
Generally found in Trap and Hip-Hop music, an 808 is a sustained and distorted sub bass shot often paired with an additional kick drum at its onset.
They traditionally contain more harmonics than a standard sub bass and are most commonly used as the sole bass layer in Trap and Hip-Hop productions. 808’s are responsible for the window-shattering bass tones found in these genres.
808 samples are often included in sample packs dedicated to Trap and Hip-Hop music and can easily be crafted into a melodic bassline using Ableton’s Simpler plugin. Try generating more harmonics to your sub bass and adding effects such as distortion, saturation and overdrive to create an 808 bass instrument.

Want To Know More?
Here at Live Aspects, we have dozens of useful lessons and tutorials created to enhance your music production skills and help speed up the learning process. You can access our huge range of music theory lessons and production tips and tricks here.
1 comment
Look up sharpnbrite music they are the original sub bass producers