Swing has the ability to completely transform all the rhythmic elements of your projects. Enhance any project and create musical interest by adding swing to your drum beats, synths or basslines. Swing is an often overlooked production technique that is easy to incorporate into any genre of music.
I’m Ben from Live Aspects and today I’ll be telling you everything you need to know about swing in Ableton and how to use it in your productions.
- | What Is Swing?
- | Grooves In Ableton
- | Groove Pool
- | Add Swing To MIDI
- | Add Swing To Audio
- | Commit Your Groove
- | Create Your Own Groove Clips
Let’s get into it!
| What Is Swing?
Swing is a musical technique that involves lengthening and shortening the first and second consecutive notes within the 1/8th or 1/16th subdivisions of a beat. Essentially, the duration of the first beat subdivision is longer than the duration of the second. This longer-shorter pattern forms the foundation for all rhythmic elements throughout the duration of a piece of music.
Generally, all elements of a piece of music adhere to the amount of swing dedicated to a song. Swing helps to add bounce and groove to rhythmic elements such as percussion or a bassline. It is a very popular musical concept in electronic dance music, particularly in all subgenres of House music such as Tech House or Minimal House.
It’s difficult to truly define the term ‘Swing’ but it is simple to audibly identify and even easier to apply to your Ableton productions.

| Grooves In Ableton
Ableton makes it possible to achieve swing rhythm through the use of Grooves, which appear as .agr files in the browser. A groove clip stores a unique set of timing and velocity values. These files can be applied to both MIDI and audio to achieve swing. Ableton’s library of grooves contains every possible variation of swing, anywhere from gentle to extreme swing.
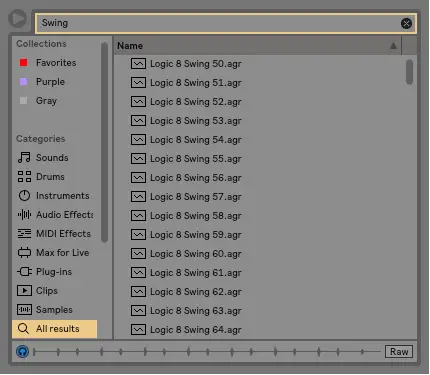
These groove clips display either an ‘8’ or a ‘16’ which constitute whether the swing would be applied to 1/8th or 1/16th note rhythms. It also shows a number between 50 and 75 which represents the amount of swing a specific groove clip would generate.
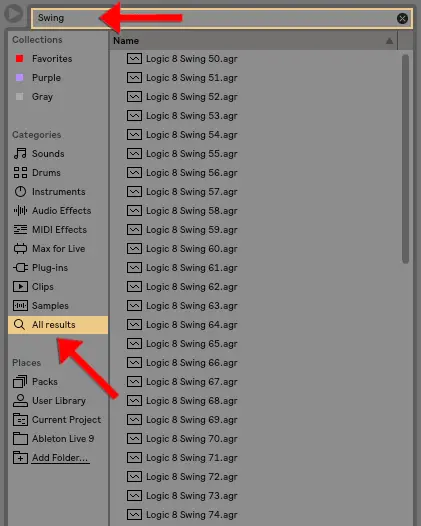
To access these swing patterns, simply search ‘Swing’ in the browser by first clicking in the search bar or pressing [COMMAND + F] on Mac or [CTRL + F] on Windows. Make sure to search through ‘All Results.’ Single click on a pattern to hear a preview of the swing intensity of a particular groove.
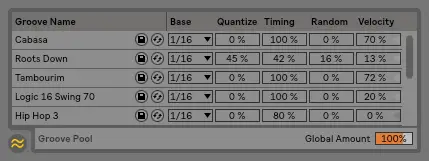
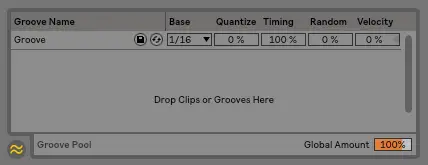
| Groove Pool
The Groove Pool contains all grooves that are used throughout an Ableton project. This makes it quick and easy to re-use grooves between different elements of your track.
The Groove Pool interface contains a variety of editable parameters to change the sound of a particular groove. These parameters grant the potential to create randomization, increase quantization, timing alterations and more.
You can quickly access your project’s Groove Pool by pressing [COMMAND + ALT + G] on Mac or [CTRL + ALT + G] on Windows or by selecting the icon below the browser.
The easiest way to activate grooves is to drag and drop them from the browser directly onto an audio or MIDI clip.
| Add Swing To MIDI
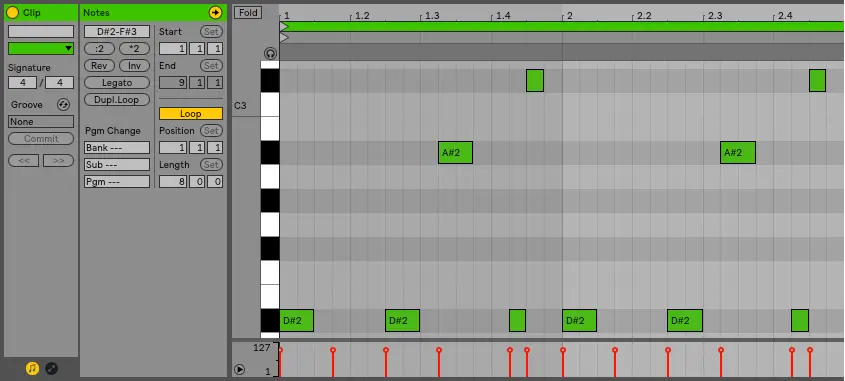
Step 1: Select MIDI Clip
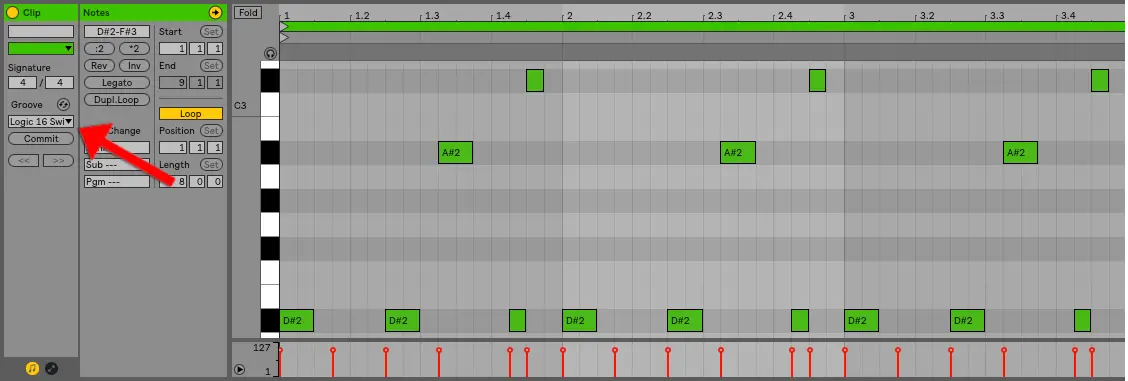
Double-click on your MIDI clip to access the Clip View. You should now be able to see the piano roll with editable parameters on the left side.
Step 2: Find Your Swing Groove
Search ‘Swing’ in Ableton’s browser by first clicking in the search bar or pressing [COMMAND + F] on Mac or [CTRL + F] on Windows. Make sure to search through ‘All Results.’
Step 3: Insert Groove Onto MIDI Clip
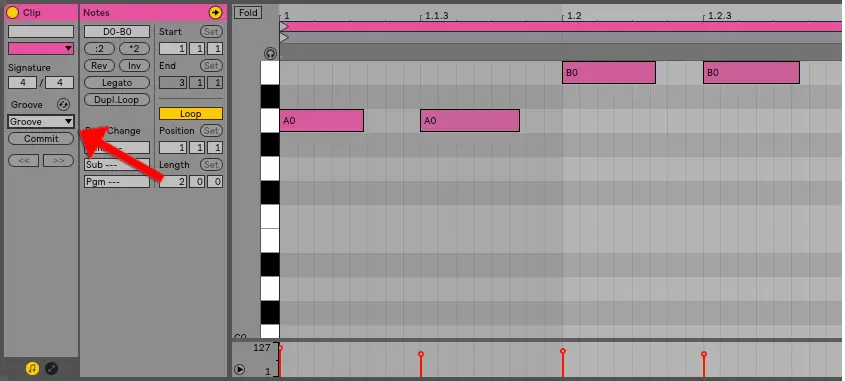
Once you have decided on the perfect swing groove for your MIDI clip, simply drag & drop your new groove into the ‘Groove’ box on the ‘Clip’ tab of your MIDI clip.
If you need to change your clip’s groove at any time, drag & drop a new groove onto the name of the previous one to replace it. The drop-down box will display all grooves previously used on your MIDI clip.
| Add Swing To Audio
Step 1: Select Audio Clip
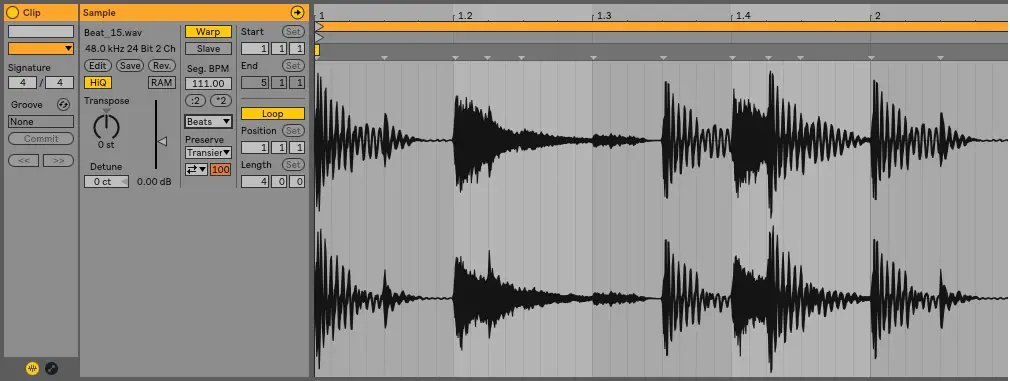
Double-click on your audio clip to access the Clip View. You should now be able to see the audio’s waveform with editable parameters on the left side. Ensure your audio sample is warped but not in Re-Pitch warp mode.
Step 2: Find Your Swing Groove
Search ‘Swing’ in the browser by first clicking in the search bar or pressing [COMMAND + F] on Mac or [CTRL + F] on Windows. Make sure to search through ‘All Results.’
Step 3: Insert Groove Onto Audio Clip
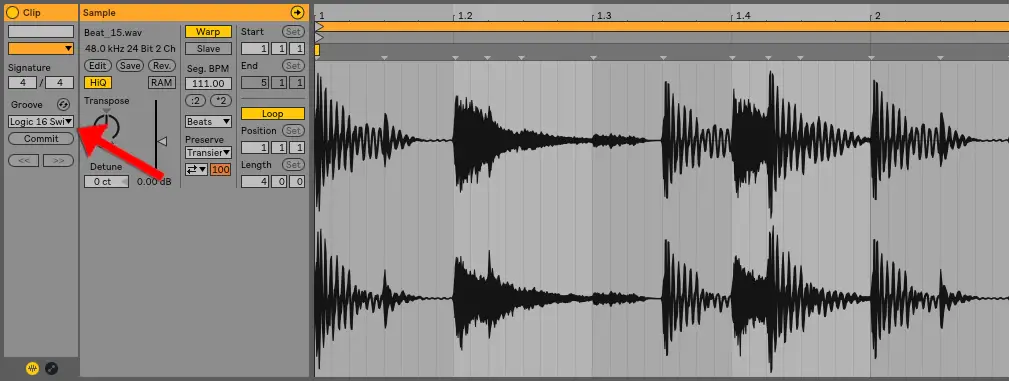
Once you have decided on the perfect swing groove for your audio sample, simply drag & drop your new groove into the ‘Groove’ box on the ‘Clip’ tab of your audio clip. If you need to change your clip’s groove at any time, drag & drop a new groove onto the name of the previous one to replace it. The drop-down box will display all grooves previously used on your audio clip.
| Commit Your Groove
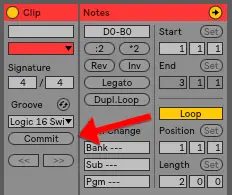
You will notice that your audio and MIDI clips will sound different to how they appear when a groove is active. Ableton maintains the waveform of audio clips and the quantization of MIDI clips when a groove is applied. Pressing the Commit button essentially writes your groove parameters to the clip.
For MIDI clips, the commit function moves the notes accordingly. For audio clips, this creates Warp Markers at the appropriate positions in the clip. If you would like your audio and MIDI clips to appear how they sound when a groove is active, simply manoeuvre to the ‘Clip’ tab on your clip and under ‘Groove,’ select ‘Commit’.
| Create Your Own Groove Clips
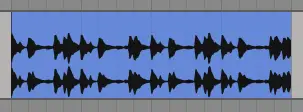
Step 1: Find A Loop
Search your sample packs for a loop that contains the swing pattern that you’re after. This method is most effective when a loop contains clear and precise transients so try using a drum loop or a simple bassline.
The BPM of your loop doesn’t need to match your project as Ableton will extract the velocity and timing values and make it possible to apply it to any audio or MIDI clip, regardless of the tempo.
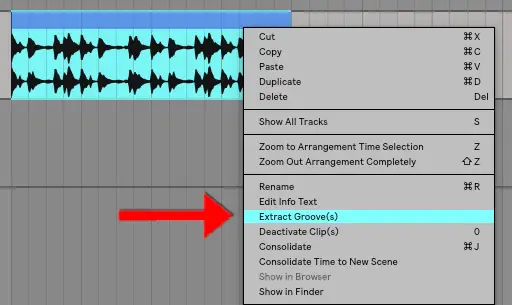
Step 2: Extract Groove
Place the loop onto an audio track in your Ableton project. Next, right-click on your audio clip and select ‘Extract Groove(s)’. Your new groove has now been saved into your project’s groove pool.
Step 3: Open Groove Pool
Access your project’s Groove Pool by pressing [COMMAND + ALT + G] on Mac or [CTRL + ALT + G] on Windows or by selecting the icon below the browser.
Step 4: Insert Groove Onto Audio/MIDI Clip
Finally, double-click on your audio or MIDI clip and simply drag & drop your new groove into the ‘Groove’ box on the ‘Clip’ tab.
Want To Know More?
Here at Live Aspects, we have dozens of useful lessons and tutorials created to enhance your music production skills and help speed up the learning process. You can access our huge range of music theory lessons and production tips and tricks here.