If you have recently purchased an Ableton Live license, you will need to authorize your new software. Authorizing Ableton Live ensures users have access to all features the software has to offer. While most users traditionally choose to authorize online, Live provides an easy solution to authorize its software on a device without an internet connection.
Hi, I’m Ben from Live Aspects and in this guide, I’ll be showing you the best way to authorize any version of Ableton Live offline.
- | Step 1: Open Ableton Live
- | Step 2: Select ‘No Internet On This Computer’
- | Step 3: Head To Ableton User Account
- | Step 4: Select License From Ableton Account
- | Step 5: Select ‘Offline Authorization’
- | Step 6: Enter Hardware Code
- | Step 7: Download Authorization File
- | Step 8: Copy Authorization File To USB
- | Step 9: Authorize Ableton Live
Without further ado, let’s dive in!

| Step 1: Open Ableton Live
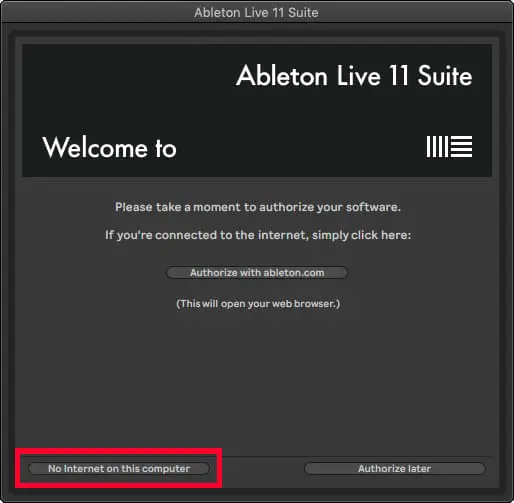
To authorize Ableton Live offline, start by installing and opening the software. Once open, a welcome window will appear prompting you to authorize your software.

| Step 2: Select ‘No Internet On This Computer’
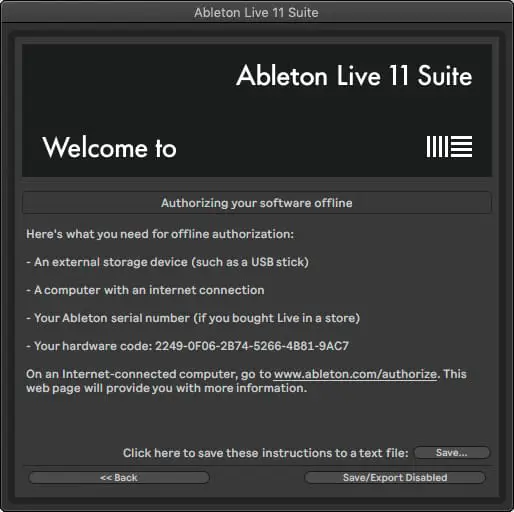
Next, select ‘No internet on this computer’ from the bottom-left corner of the authorization window. You will then be provided a short list of things required to complete authorization offline. You can save this list to a text file by selecting ‘Save’ in the bottom right corner.
| Step 3: Head To Ableton User Account
On an internet-connected computer, login to your Ableton User Account on Ableton’s website. Offline authorization can be performed on the same computer, as long as it has an internet connection. Take note of your hardware code and Ableton serial number (if you purchased Live in a store).
| Step 4: Select License From Ableton Account
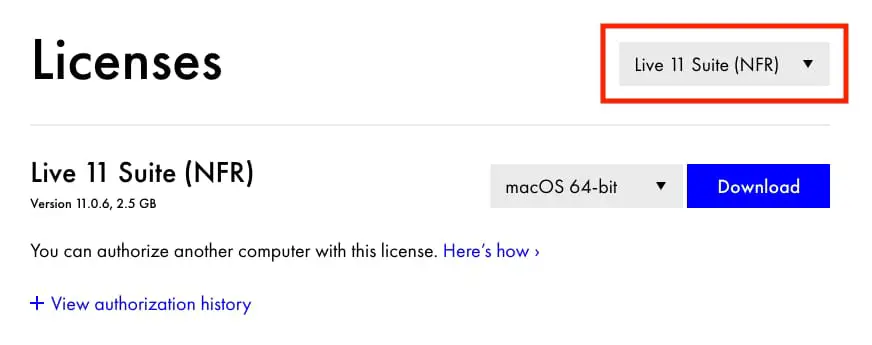
Once you have logged in to your Ableton account, select the version of the software you are authorizing from the drop-down box.
| Step 5: Select ‘Offline Authorization’
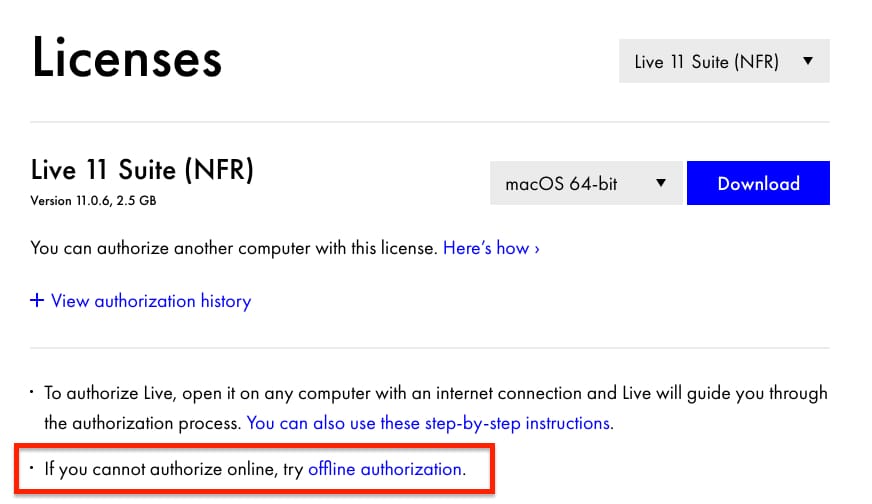
Scroll down and select ‘Offline Authorization’.
| Step 6: Enter Hardware Code
Enter the 24-digit hardware code that was displayed in the authorization window of your Ableton Live software.

| Step 7: Download Authorization File
Once you have typed in your hardware code, click the blue ‘Download’ button. An Authorize.auz file will be saved to your computer.

| Step 8: Copy Authorization File To USB
Copy and paste the authorization file onto an external storage device such as a USB, an external hard-drive or an SD card. Alternately, you can upload the file to an online storage service like Google Drive or Dropbox.

| Step 9: Authorize Ableton Live
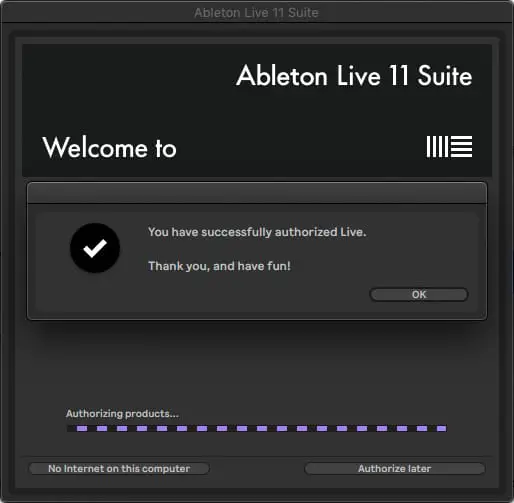
On the computer with Ableton Live installed, plug in the external storage device containing the Authorize.auz file. Lastly, double-click the authorization file or drag and drop it onto the authorization window in Ableton Live. Your Live software will now be authorized!
Want To Know More?
Here at Live Aspects, we have dozens of useful lessons and tutorials created to enhance your music production skills and help speed up the learning process. You can access our huge range of music theory lessons and production tips and tricks here.