Stems are groups of audio files that make up the individual elements of a song. Exporting stems is an essential step when collaborating with others or having a track officially remixed. They give a mastering engineer complete control over all aspects of a track, resulting in a well balanced and higher-quality master. FL Studio has implemented a way for producers to create stems from their projects in no time.
Hi, I’m Ben from Live Aspects and this step-by-step guide shows you exactly how to export stems in FL Studio.
- Step 1: Route All Channels To The Mixer
- Step 2: Highlight Duration Of Project
- Step 3: Open Export Window
- Step 4: Select Export Location
- Step 5: Enable ‘Split Mixer Tracks’
- Step 6: Export Stems
Without further ado, let’s get started!
Step 1: Route All Channels To The Mixer
Select all channels by double-clicking the box to the right of any channel. Next, press [CNTRL +L] on Windows or [COMMAND + L] on Mac to route each of your project’s channels to the mixer.
If your mixer has already routed a number of channels, select the non-routed channels by holding down [SHIFT] on your keyboard and left-clicking the box to the right of individual channels.
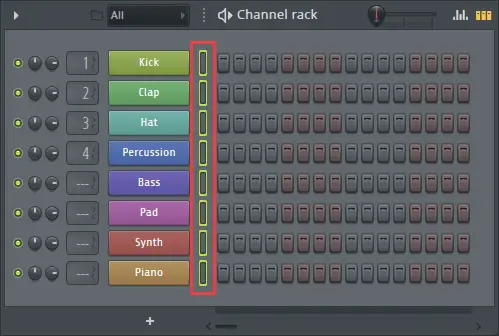
You will now see each of the channels from your channel rack in the mixer window. If you cannot see your project’s mixer window, press F5.

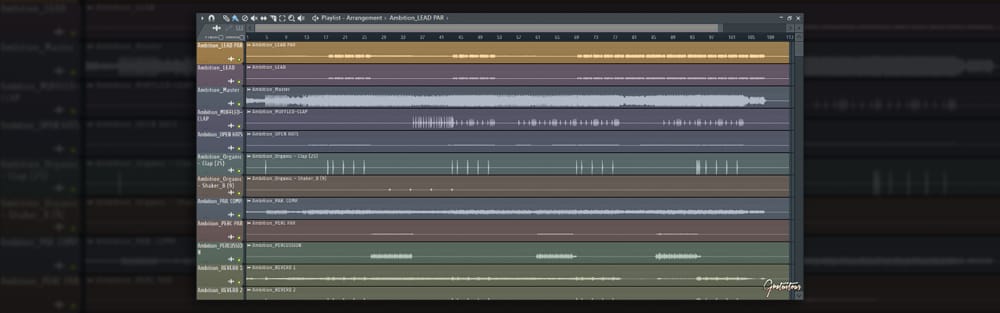
Step 2: Highlight Duration Of Project
Highlight the entire duration of your project in the playlist window. You can do this by double-clicking on the first beat of your project and dragging out the length of your track.
![]()
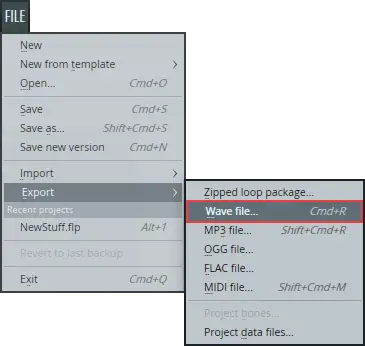
Step 3: Open Export Window
Open the export window by first accessing the ‘File’ menu, then selecting ‘Export’ > ‘Wave file…’. Alternatively, you can use the keyboard shortcut [CNTRL + R] on Windows or [COMMAND + R] on Mac.
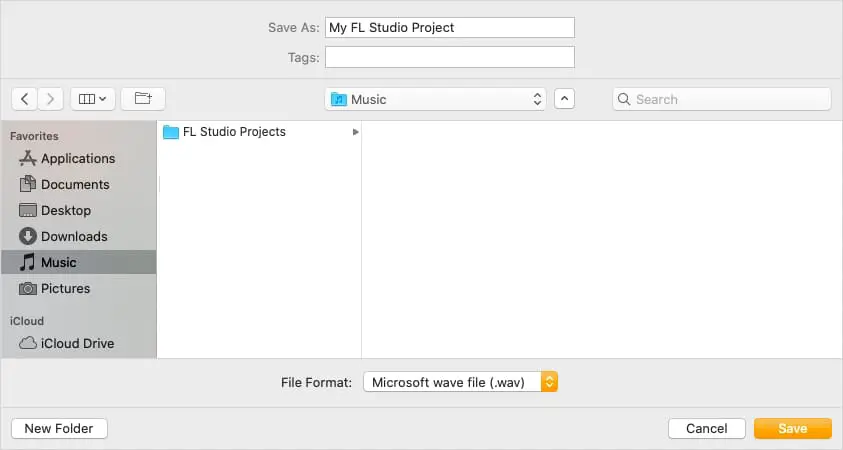
Step 4: Select Export Location
Select the location on your computer where you would like to export your stems. You can rename the title of your stems by typing in the box beside ‘Save As:’. Save your stems to a new folder by selecting ‘New Folder’ in the bottom left corner of the window. Once you have selected a save location, hit ‘Save’.
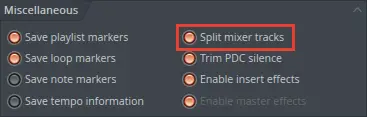
Step 5: Enable ‘Split Mixer Tracks’
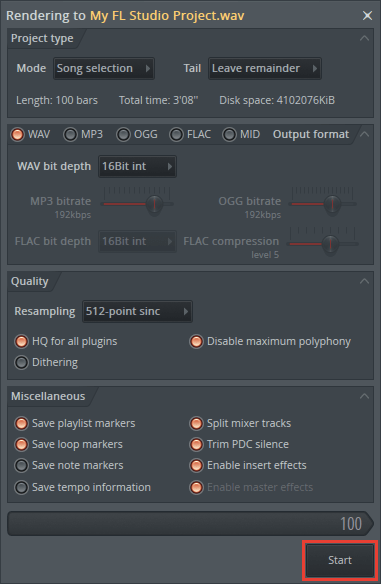
In the export window, make sure you enable ‘Split Mixer Tracks’. This will tell FL Studio to export each insert in the mixer to its own wave file.
To ensure your exported stems are high quality, select ‘512-point sinc’ from the ‘Resampling’ drop-down box.
Step 6: Export Stems
It’s time to export your stems! Click the ‘Start’ button at the bottom of the export window.
| Sharing Your Stems
If you’re looking to share your stems with a friend, another artist or a mastering engineer, your best option is to upload them to an online file storage service. Popular file storage websites include Google Drive, DropBox and OneDrive.
Make sure to compress the folder containing your stems before storing and distributing it online. You can compress a folder by right-clicking it in Finder/File Explorer and selecting Compress. This will reduce the size of your stems folder and make it easier to upload.

Related Posts:
What Are Stems In Music?
10 Ways To Reduce Latency In FL Studio
Top 10 Artists That Use FL Studio In 2022
Want To Know More?
Here at Live Aspects, we have dozens of useful lessons and tutorials created to enhance your music production skills and help speed up the learning process. You can access our huge range of music theory lessons and production tips and tricks here.
1 comment
Thank you for helping producers with your posts, they are really educative.