An Ableton Live project isn’t complete without automation. Skilfully crafting automation will boost the energy of your track and improve the professionalism of your productions. A strong understanding of Live’s automation capabilities is key to creating chart-topping hits.
In this guide, we will be answering the most common questions producers have about automation and unpacking everything you need to know about employing valuable automation into your projects. Take your production game to the next level using Live’s automation features.
- | What Is Automation?
- | How To Hide/Show Automation
- | How To Automate In Ableton Live
- | How To Curve Automation
- | Why Is My Automation Grey?
- | How To Record Automation
- | How To Copy Automation
- | How To Automate Pitch
- | How To Automate Tempo
- | Skew & Stretch Envelopes
Without further ado, let’s dive in!
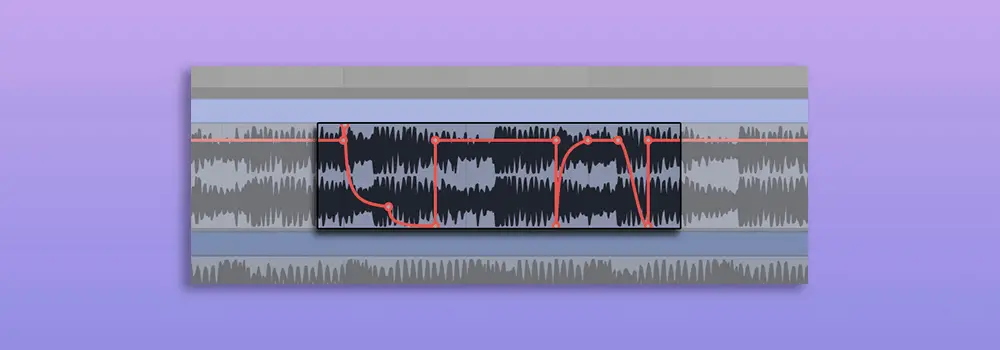
| What Is Automation?
Automation is a powerful tool found in popular DAWs that automatically controls parameters across the timeline of a mix. It is used to automatically adjust faders, knobs or buttons that control parameters within a track or plug-in. Automation can help avoid repetition, create variation and build a sense of anticipation
Popular uses of automation include fading in or out volume, turning on and off audio effects, adjusting auto-filter cutoff or panning a track. Almost any parameter in Live’s interface and collection of effects and plugins can be automated. Many third-party plugins (eg. Serum, Nexus or Massive) also support automation in Ableton.
| How To Hide/Show Automation
To hide or show automation, simply toggle Automation Mode by pressing ‘A’ on your keyboard or selecting the automation icon above the tracks list in arrangement view. Enabling Automation Mode will activate the Automation Lane and is the first step to creating your own automation. Disabling Automation Mode can neaten the appearance of arrangement view and make it easier to work with clips.

| How To Automate In Ableton Live
Step 1: Enable Automation Arm
To create automation in Ableton Live, start by enabling Automation Mode by pressing ‘A’ on your keyboard or selecting the automation icon above the tracks list in arrangement view. Automation lanes will now be displayed on each track.
![]()
Step 2: Select Parameter
Next, left-click on the parameter you would like to automate. This could be anything from the Dry/Wet knob on the Reverb plugin to the Filter Cutoff on the Auto Filter plugin. Many parameters in third-party plugins can also be automated.
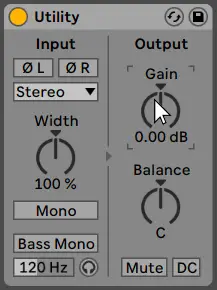
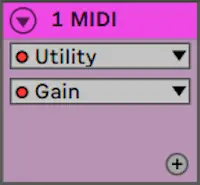
Your selected parameter will appear in the Device Chooser and Automation Control Chooser of the target track and will display its automation lane in the arrangement view.
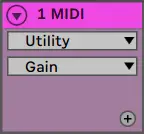
Step 3: Create Automation
You are now ready to create automation! Click on the dotted red line to start creating your automation envelope. To create automation breakpoints and a more accurate automation envelope, make sure Draw Mode is disabled by toggling the pencil icon in the top bar. With Draw Mode enabled, you can click and drag to “draw“ an envelope curve and create steps as wide as the visible grid.
A small red dot will appear on the Device and Automation Control to indicate that automation has been created.

| How To Curve Automation
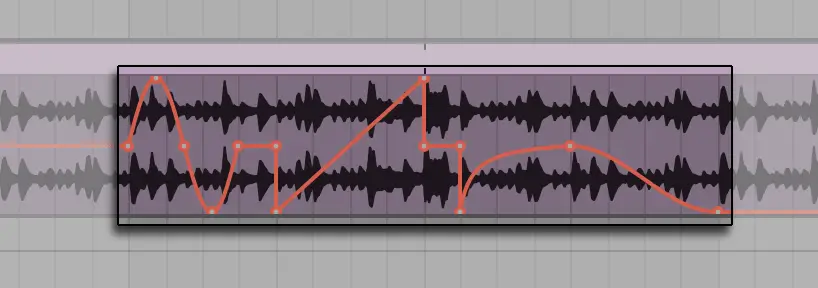
To create a curved automation envelope between two breakpoints, simply left-click on the envelope and drag up or down while holding [OPTION/ALT].

Live has a selection of shapes that can be instantly inserted onto an automation envelope. To access the Insert Shape menu, highlight where on the automation lane you would like the shape to be inserted and right-click the envelope.

| Why Is My Automation Grey?
Automation appears grey when you have manually adjusted a parameter that has been automated. When automation is overwritten, the original automation is temporarily disabled and appears grey.

The Re-Enable Automation icon in the top bar will appear orange when your project contains grey automation. To re-enable automation, simply select the orange arrow icon in the top bar.
![]()
| How To Record Automation
Step 1: Enable Automation Arm
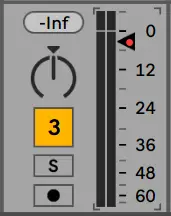
To record automation, start by enabling Automation Arm. This will enable manual parameter changes to be recorded in arrangement view.
![]()
Step 2: Enable MIDI Arrangement Overdub
Next, enable MIDI Arrangement Overdub by clicking the plus icon above the arrangement view. This will ensure that MIDI notes in MIDI clips won’t be replaced with newly recorded notes.

Step 3: Start Recording
Once you have decided which parameter you want to record automation for, hit the arrangement record button at the top of the Live window. Automation has now begun recording.
![]()
Step 4: Adjust Parameter
It’s time to record automation! Automation will now be recorded in unison to the changes made to your chosen parameter. The Device Chooser and Automation Control Chooser will automatically display the parameter you have selected to automate. A small red dot will appear on the parameter to indicate automation has been created.
If you are using a MIDI controller, you can record automation with your device using Live’s MIDI Mapping feature. Select the ‘MIDI’ icon in the top right corner of Live, left-click on your chosen parameter then manually adjust a knob or fader on your controller to map it. You can now use your MIDI controller to record automation.
| How To Copy Automation
To copy automation in Ableton, start by highlighting the beats/bars that contain the automation you wish to copy. Press [COMMAND + C] on Mac or [CNTRL + C] on Windows to copy the automation to your clipboard. You can paste the automation elsewhere by pressing [COMMAND + V] on Mac or [CNTRL + V] on Windows.
You can also duplicate a highlighted region of automation by pressing [COMMAND + D] on Mac or [CNTRL + D] on Windows.

| How To Automate Pitch
| Audio
To automate the pitch of an audio clip, start by double-clicking the top section of the clip on Arrangement View to open the clip view. Next, select the ‘Show Envelopes Box’ icon in the bottom left and under the ‘Envelopes’ heading, select ‘Clip’ and ‘Transposition’. You can now draw in pitch automation over the audio clip waveform. (Ensure Warp mode is enabled)

| MIDI
To automate the pitch of a MIDI clip, start by double-clicking the top section of the clip on Arrangement View to open the note editor. Next, select the ‘Show Envelopes Box’ icon in the bottom left and under the ‘Envelopes’ heading, select ‘MIDI Ctrl’ and ‘Pitch Bend’. You can now draw in pitch automation over your selection of MIDI notes.

| How To Automate Tempo
Step 1: Enable Automation Mode
Automating the master tempo allows you to change the BPM of your entire track at any point throughout its duration. To automate tempo, start by enabling Automation Mode by selecting ‘A’ on your keyboard or selecting the automation icon above the tracks list in arrangement view.
![]()
Step 2: Unfold Master Track
Next, in arrangement view, unfold the master track by selecting the triangular icon beside the Master track.
![]()
Step 3: Select Device & Automation Control
Two drop-down boxes will appear in the Track Title Section of the Master track. For the first drop-down box, select ‘Mixer’ and for the second drop-down box, select ‘Song Tempo’.

Step 4: Set Tempo Range
Next, set the tempo range. Input the minimum and maximum BPM values that you would like to automate between.
![]()
Step 5: Create Automation
Now you’re ready to create some automation! To create automation breakpoints, ensure Draw Mode is turned off by toggling ‘B’ on your keyboard or selecting the pencil icon in the top right corner of the Live window.
Hold down [SHIFT] while adjusting an automation breakpoint for a more precise tempo adjustment.

| Skew & Stretch Envelopes
If you are looking for more creative ways to edit and create automation, be sure to experiment with skew and stretch envelopes. When a region of automation is highlighted on the arrangement view, skew and stretch markers appear in the corners and sides of the selection. These markers allow you to adjust the length or height of the selected automation or skew its shape. Refer to Live’s Info View for a variety of helpful automation keyboard commands.

| Featured Keyboard Shortcuts
A – Show/Hide Automation Lanes
B – Draw Mode On/Off
[COMMAND/CNTRL + C] – Copy Automation
[COMMAND/CNTRL + V] – Paste Automation
[COMMAND/CNTRL + D] – Duplicate Automation
[COMMAND/CNTRL + M] – Toggle MIDI Map Mode On/Off
If you want to learn more about the automation capabilities in Ableton Live, you can read chapter 21 of the Ableton Live Manual here.
Want To Know More?
Here at Live Aspects, we have dozens of useful lessons and tutorials created to enhance your music production skills and help speed up the learning process. You can access our huge range of music theory lessons and production tips and tricks here.