Beat Matching is the action of synchronizing the tempo of two or more songs in order to create a seamless transition and continuous playback. It is the most important step in creating a mixtape, remix or DJ’ing live. Beat Matching is essential in achieving professional-sounding audio and creating a musically sound experience. By following the six-step procedure in this guide, you’ll be able to mix, edit and mashup tracks flawlessly.
Hi, I’m Ben from Live Aspects and in six simple steps, I’ll show you the best way to beat match tracks in Ableton Live.
- | Step 1: Import Tracks
- | Step 2: Open Clip View
- | Step 3: Adjust Start Markers
- | Step 4: Enable Warp Mode
- | Step 5: Type In Song’s BPM
- | Step 6: Arrange Tracks
Without further ado, let’s dive in!

| Step 1: Import Tracks
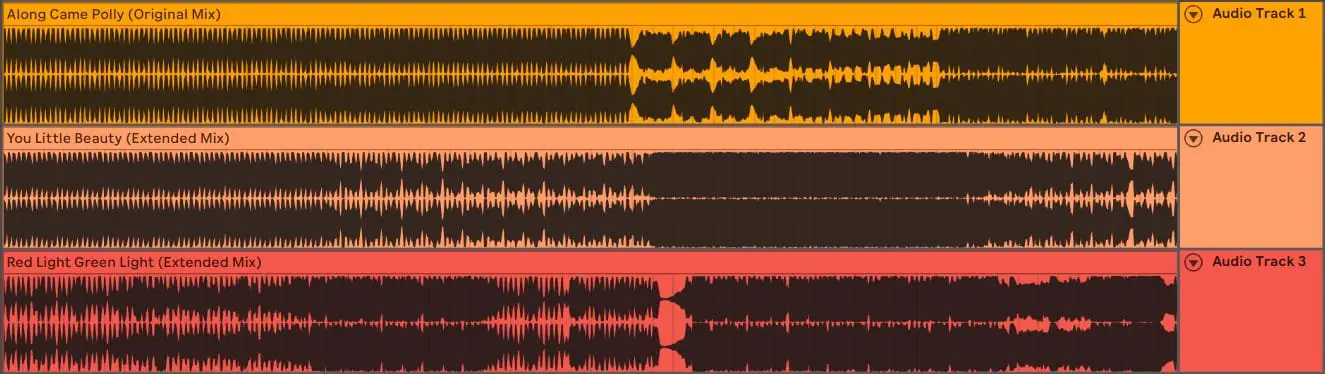
Start by importing two or more songs onto seperate Audio Tracks in Arrangement View. This will allow you to edit each track individually and overlap the songs where necessary. To create an Audio Track, head to the Create menu and select ‘Insert Audio Track’. Alternatively, press [COMMAND + T] on Mac or [CNTRL + T] on Windows. Next, simply drag and drop songs from Finder/File Explorer or Live’s Browser onto your new Audio Tracks.
| Step 2: Open Clip View
Open the Clip View of your first song by double-clicking the top part of the audio clip in Arrangement View. You will now have access to edit the track’s properties and waveform.
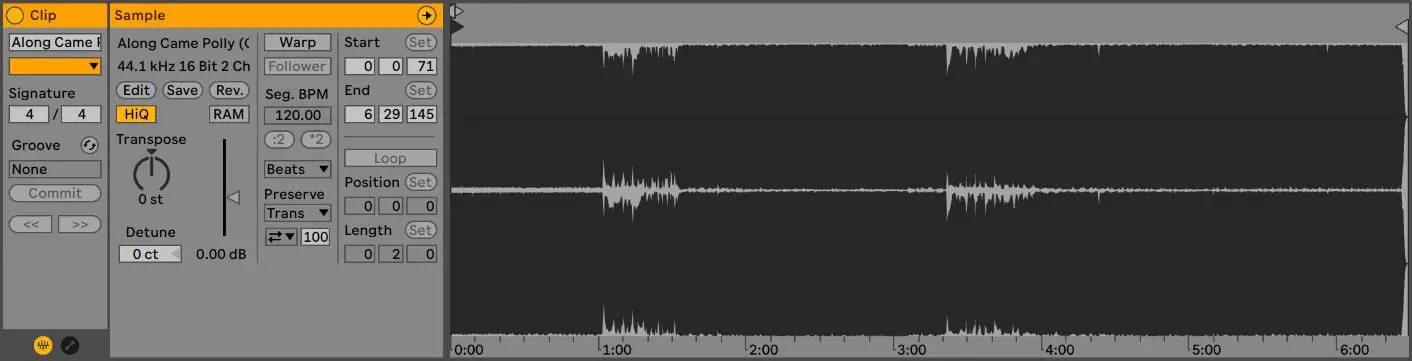
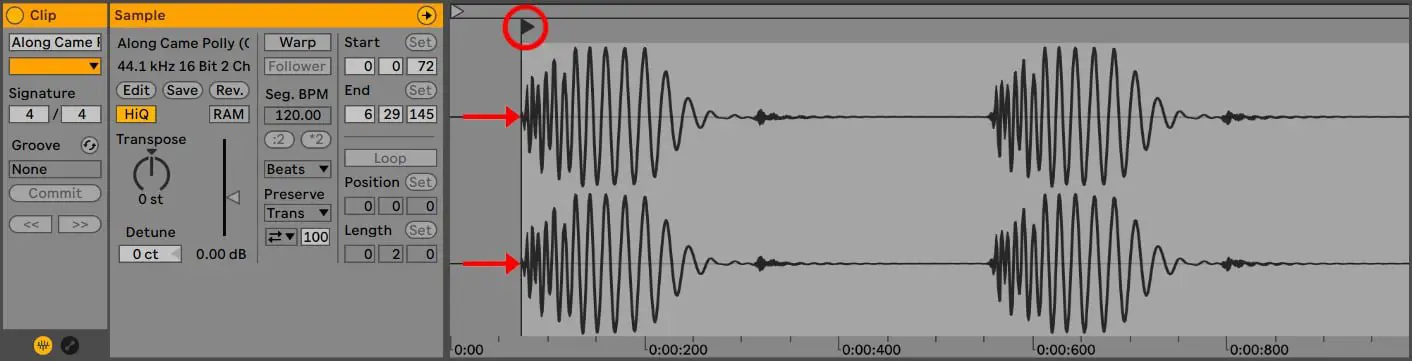
| Step 3: Adjust Start Markers
Adjust the track’s start marker to begin precisely on beat one. Removing the silence at the beginning of each track will cause each beat to line up precisely with the grid. Simply drag the lower grey triangle to the first transient of the waveform. Zoom in on the waveform by clicking and dragging down.
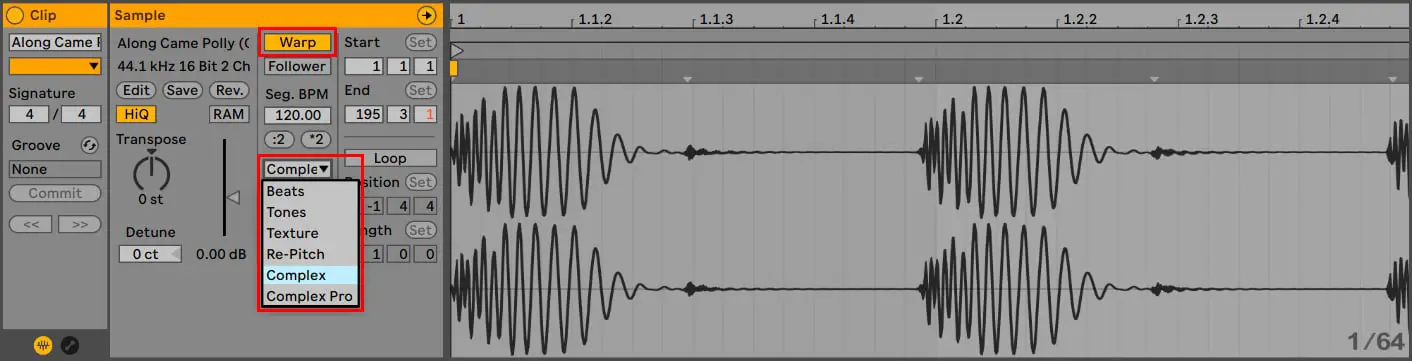
| Step 4: Enable Warp Mode
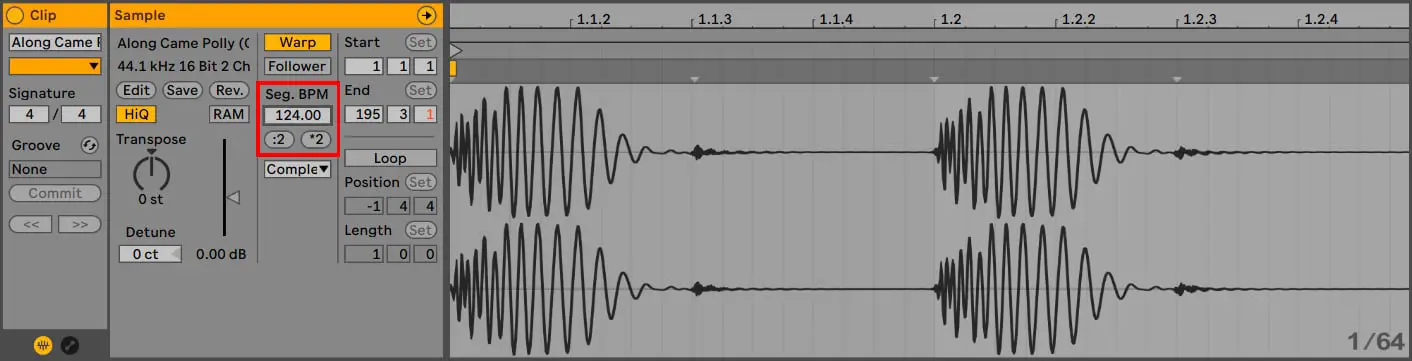
Once you have adjusted your first song’s start marker, enable warp mode by selecting ‘Warp’ button to the left of the waveform. Next, select the warp mode drop-down box and select ‘Complex’. If Live has automatically enabled Warp mode, skip to the next step. Ableton Live’s warp feature time-stretches and quantizes your tracks to the tempo of your project, removing the hassle of manually syncing tracks.
| Step 5: Type In Song’s BPM
With Clip View still opened, type in the song’s tempo into the Seg. BPM box. By default, the segment BPM will display your project’s tempo. Your first track will now be synced to the tempo of your Ableton session.
If you are unsure of a track’s tempo, simply left-click on the Seg. BPM box and press up/down on your keyboard until the beats line up with the grid in the sample editor. Hold down [SHIFT] for a more precise tempo adjustment.
Repeat steps 2 to 5 for each of the tracks you would like to beat match.
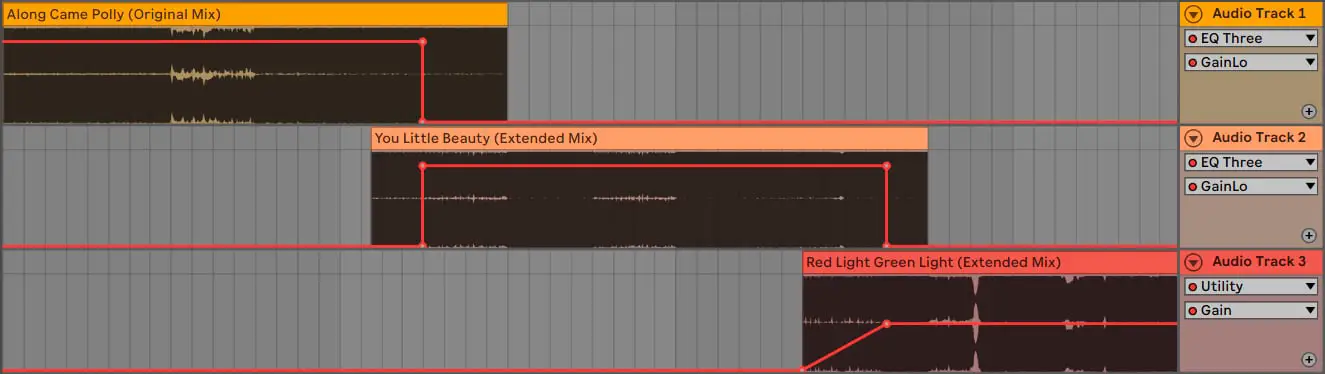
| Step 6: Arrange Tracks
Once you have beat matched each imported track, use the timeline in Arrangement View to arrange them however you’d like. Whether you’re creating a remix, mashup or mixtape, your tracks will stay beat matched when arranging to a fixed grid. To adjust the size of the grid, simply right-click anywhere on Arrangement View and select a value under the ‘Fixed Grid’ heading.
To read more about the different ways to edit audio, visit our previous post titled ‘How To Edit Audio In Ableton Live’.
If you’re looking for an in-depth tutorial on how to create a Mixtape in Ableton Live, visit our previous guide on ‘How To Create A Mixtape In Ableton Live’.
Beat Match
Want To Know More?
Here at Live Aspects, we have dozens of useful lessons and tutorials created to enhance your music production skills and help speed up the learning process. You can access our huge range of music theory lessons and production tips and tricks here.