Tempo is a foundational aspect of music that helps distinguish genre and feel. Tempo can be just as important as the melodic, harmonic and rhythmic elements of a composition. Ableton Live assigns tempo to almost every element of your project so you have complete flexibility over speed and synchronization.
Whether you’re looking to synchronize clips to your master tempo or manipulate a clip’s tempo independently, this guide will teach you everything you need to know about tempo in Ableton Live.
- | How To Change Tempo
- | How To Change The Tempo Of An Audio Clip
- | How To Change The Tempo Of A MIDI Clip
- | How To Change Tempo Mid-Song
- | How To Change Default Tempo
Without further ado, let’s get started!

| How To Change Tempo
| Type BPM
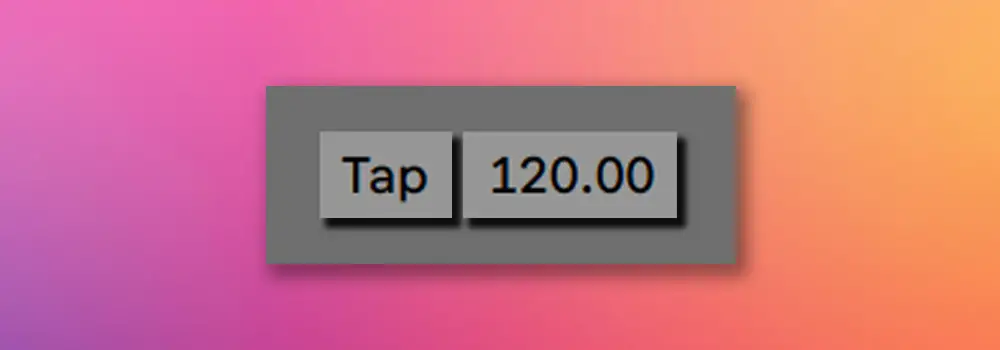
The most common way to change tempo in Ableton Live is by using the project tempo in the top bar. The tempo is measured in Beats Per Minute (BPM) and all warped audio clips and MIDI clips adhere to the project tempo.
To change the tempo of your project, simply left-click on the tempo value and type in a new tempo. You can also hold left-click and drag the tempo value up and down or press up and down on your keyboard to adjust the tempo by 1bpm. Hold down [SHIFT] while increasing or decreasing the tempo for a more fine-tune adjustment of 0.1bpm.

| Tap Tempo
Another way to change tempo is to tap tempo. Rather than entering a number, the tap tempo function records the tempo of your mouse clicks. Live will identify the speed at which you click the ‘Tap’ button and display the average tempo of four mouse clicks in the project tempo box.
The Key Map Mode Switch allows you to map the Tap button to any button on your keyboard or MIDI controller. Simply select the ‘Key’ button in the top-right corner of Live, left-click on the ‘Tap’ button then press the button you would like it mapped to. Re-select the ‘Key’ button to toggle the Key Map Mode off.

| How To Change The Tempo Of An Audio Clip
Adjusting the tempo of an audio clip can be achieved using Live’s Warp function and the Segment BPM feature.
Step 1: Open Sample Editor
To change the tempo of any audio sample, open the sample editor by double-clicking on the top part of an audio clip in Arrangement View or anywhere on an audio clip in Session View. Here you will see the waveform and the properties of the selected clip.

Step 2: Enable Warp Mode
Next, enable Warp mode by clicking on the grey ‘Warp’ button to the left of the waveform. Select the most appropriate Warp Mode for the sample by selecting the drop-down menu below the Warp button. Once Warp Mode is enabled, Live will estimate the original tempo of the sample and display it under ‘Seg. BPM’.

Step 3: Adjust Segment BPM
To change the tempo of the selected audio clip, left-click on the ‘Seg. BPM’ value and type in the new tempo you would like the sample to playback at. You can also press the up and down buttons on your keyboard or click and drag to adjust the tempo by 1bpm. Holding down shift while adjusting the tempo will allow you to fine-adjust its value by 0.10bpm.

| How To Change The Tempo Of A MIDI Clip
The tempo of all MIDI clips are automatically synced to the master tempo. If you need to change the tempo of a MIDI clip independently from the tempo of your project, follow the steps below:
Step 1: Open MIDI Clip
To change the tempo of a MIDI clip, open the clip’s piano roll by double-clicking on the top part of a MIDI clip in Arrangement View or anywhere on a MIDI clip in Session View.

Step 2: Select All MIDI Notes
Next, select all MIDI notes in the piano roll by pressing [COMMAND + A] on Mac or [CNTRL + A] on Windows. Alternatively, you can click and drag to highlight a selection of MIDI notes.

Step 3: Drag MIDI Stretch Marker
Finally, click and drag the MIDI Stretch Marker left or right to manually adjust the tempo of your MIDI clip. Hold down [COMMAND] on Mac or [CNTRL] on Windows while dragging to temporarily disable the grid. Hold down [SHIFT] while dragging to move the position of the MIDI Stretch Marker.

| How To Change Tempo Mid-Song
To change the tempo mid-song, you need to automate your project’s master tempo. Automating the master tempo allows you to change the BPM of your entire track at any point throughout its duration.
Step 1: Enable Automation Mode
To change your project’s tempo mid-song, start by enabling Automation Mode by selecting ‘A’ on your keyboard or selecting the automation icon above the tracks list in arrangement view.
![]()
Step 2: Unfold Master Track
Next, in arrangement view, unfold the master track by selecting the triangular icon beside the Master track.
![]()
Step 3: Select Device & Automation Control
Two drop-down boxes will appear in the Track Title Section of the Master track. For the first drop-down box, select ‘Mixer’ and for the second drop-down box, select ‘Song Tempo’.

Step 4: Set Tempo Range
Next, set the tempo range. Input the minimum and maximum BPM values that you would like to automate between.
![]()
Step 5: Create Automation
Now you’re ready to create some automation! To create automation breakpoints, ensure Draw Mode is turned off by toggling ‘B’ on your keyboard or selecting the pencil icon in the top right corner of the Live window.
Hold down [SHIFT] while adjusting an automation breakpoint for a more precise tempo adjustment.

| How To Change Default Tempo
The tempo of a new Ableton Live project is 120.00bpm by default. If you find that you often create songs using a different tempo (eg. 128bpm or 140bpm), consider adjusting the default master tempo for all your future projects.
Step 1: Create New Live Set
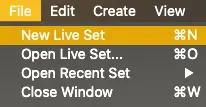
To change the default master tempo, start by creating a new project. You can do this by opening the File menu and selecting New Live Set. Alternatively, you can press [COMMAND + N] on Mac or [CNTRL + N] on Windows.

Step 2: Set New Tempo
Head to the top bar, left-click on the current tempo value and type in the tempo you would like to set as the new default. You can also press the up and down buttons on your keyboard or click and drag to adjust the tempo by 1bpm. Holding down shift while adjusting the tempo will allow you to fine-adjust its value by 0.10bpm.

Step 3: Save Set As Default
Next, open Live’s Preferences and select the File Folder’ tab. Finally, Select ‘Save’ next to ‘Save Current Set As Default’.
![]()
If you’re looking to learn about Ableton Live’s Metronome, visit our previous guide ‘Using The Metronome In Ableton’.
Want To Know More?
Here at Live Aspects, we have dozens of useful lessons and tutorials created to enhance your music production skills and help speed up the learning process. You can access our huge range of music theory lessons and production tips and tricks here.