Live’s extraordinary video editing functionality is an overlooked feature that sets it apart from other DAWs. Import, adjust playback speed, trim, warp and more, all within Live’s arrangement view. If you’re looking to edit video or compose soundtracks or scores then Ableton Live is the perfect choice.
In this guide, we’ll be covering everything there is to know about importing and editing video in Ableton Live.
- | How To Import Video
- | Acceptable Video File Formats
- | The Video Window
- | Editing Video
- | How To Export Video
Without further ado, let’s dive in!
| How To Import Video
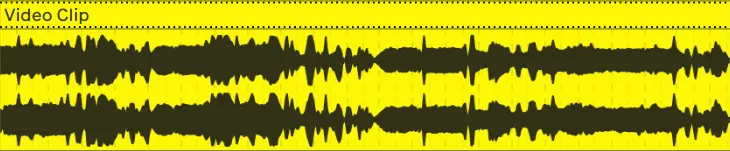
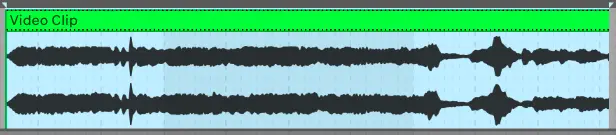
To import video into Ableton, simply drag and drop a video from Finder/File Explorer or Live’s Browser anywhere on Arrangement View. Video clips in the Arrangement View look just like audio clips, except for the dotted edge around the title bar.
Importing video is possible in both Standard and Suite editions of Live 10 and 11. Ableton has also added video editing capabilities to Live 11 Intro.
| Acceptable Video File Formats
QuickTime File Format (.mov) and MPEG-4 (.mp4) are currently the only compatible video file types for Live on Mac and Windows devices. H.264 videos in .mp4 format are also compatible. Consider converting videos in other formats in order to edit video in Ableton Live. There are a variety of free and paid video converters available online or to install on your computer.

| The Video Window
Live displays video in a separate, floating window that stays above the main Live interface. It can be easily moved, resized, minimized and even placed onto a second monitor for a more convenient editing arrangement.
Move Video Window
If you would like to move the video window onto a second monitor or simply want to move it to a more suitable location, left-click on the white top bar, hold, and move the window to the desired location.
![]()
Resize Video Window
To resize the video window, simply hover your mouse over any one of the four corners and drag the window to the desired size. You can also select the green plus button in the top left corner of the video window to instantly resize it to full screen.
![]()
Hide/Reveal Video Window
The visibility of the video window can be toggled by the keyboard shortcut [COMMAND + OPTION + V] on Mac or [CNTRL + ALT +V] on Windows. Alternatively, you can access the View Menu at the top of your screen and select ‘Video Window’.
![]()
| Editing Video
While video clips can generally be treated like audio clips, there are three editing commands that cause a video clip to be replaced by an audio clip: Consolidate, Reverse or Crop.
Trim Video Clip
To trim the start or end of a video clip, start by hovering your mouse over the left or right side of the video clip’s title bar until your cursor becomes a square bracket. Finally, click and drag the video clip to reduce or increase it’s length. If you don’t want your video to trim to a set grid, right-click anywhere on the arrangement view and select ‘Off’ under ‘Fixed Grid’.

Add Effects
To add effects such as reverb, EQ or compression to your video clip’s audio, navigate to Live’s Browser and select the ‘Audio Effects’ tab. Once you have chosen an effect, drag and drop it anywhere on the track containing your video clip.
![]()
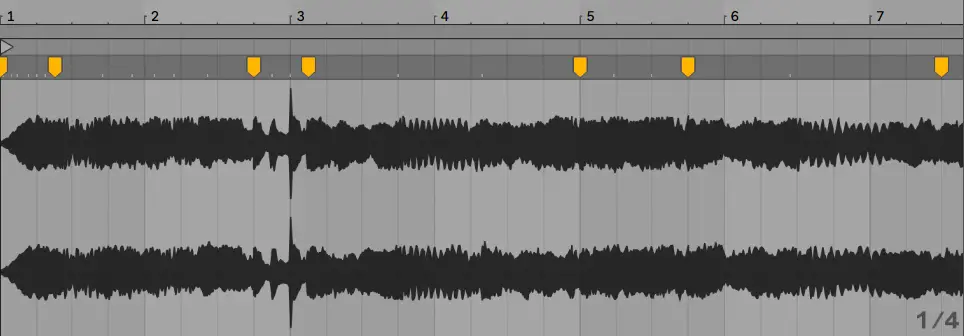
Edit Warp Markers
When warp mode is enabled on a video clip, editing the warp markers on the audio waveform will also adjust the playback of the video. When the distance between two warp markers is increased or decreased, the video playback speed is modified at the same rate. For example, doubling the distance between two warp markers will cause the video to playback at 0.5x speed until the following warp marker.
Edit Audio Separate To Video
To make adjustments to the audio content of a video clip without it affecting the video, start by duplicating the track that contains your video clip. You can do this by right-clicking the track name and selecting ‘Duplicate’.
![]()
Next, right-click on the duplicated video clip and select ‘Consolidate’. This will turn the video clip into an audio clip, removing the video content.
![]()
Lastly, mute the original track containing the video clip by selecting the yellow numbered rectangle in the mixer section. You can now edit the audio and video clips separately.
![]()
| How To Export Video
Step 1: Select Video Region
Start by highlighting the region of the arrangement view that you would like to export. Left-clicking the title bar of a video clip will instantly highlight the region of the timeline that your video clip occupies.
Step 2: Open Export Window
Next, open the export window by selecting the ‘File’ menu at the top of your screen and clicking ‘Export Audio/Video’. Alternatively, you can press [COMMAND + Shift + R] on Mac or [CNTRL + Shift + R] on Windows.
![]()
Step 3: Create Video ‘On’
Under the ‘Video’ category on the export window, make sure to select ‘On’ next to the ‘Create Video’ option.
![]()
Step 4: Select Video Encoder
Select the drop-down box beside the ‘Video Encoder’ option. Here you will be able to select the format your video will be exported as. Below are each of the file types and their extensions:
MPEG-4 movie = .mp4
Apple MPEG-4 movie = .m4v
QuickTime movie = .mov
![]()
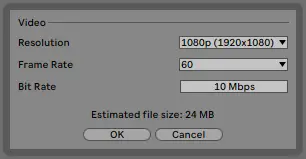
Step 5: Edit Encoder Settings
Next, click ‘Edit’ next to ‘Encoder Settings’. Select the Resolution, Frame Rate and Bit Rate that you would like. An estimation of the video’s file size will be displayed at the bottom of the encoder settings window. Once you have selected each of the encoder settings, press ‘OK’.
Step 6: Export
Lastly, select ‘Export’. You will be prompted to select the location on your computer where you would like your video to be saved. Live will also export the video’s audio by default.
![]()
Want To Know More?
Here at Live Aspects, we have dozens of useful lessons and tutorials created to enhance your music production skills and help speed up the learning process. You can access our huge range of music theory lessons and production tips and tricks here.