Remixes are a great way to gain recognition as an artist and expand your fanbase. They also allow musicians to develop their signature sound and set themselves apart from others in the industry. Creating a remix gives you the opportunity to put your own spin on a track and reinvent another producer’s creation.
From importing stems to mixing and mastering, this guide features everything you need to know about creating a remix in Ableton Live. In just 10 steps, you could be well on your way to establishing yourself as an artist and tapping into a brand new market of listeners.
- | 1. Identifying Key & Tempo
- | 2. Getting Stems
- | 3. How To Import Stems
- | 4. Adding A Chord Progression
- | 5. Adding A Bassline
- | 6. Adding Drums
- | 7. Structuring Your Remix
- | 8. Adding FX
- | 9. Mixing & Mastering
- | 10. Sharing & Distributing
Without further ado, let’s get started!

| 1. Identifying Key & Tempo
Before you get started in Ableton Live, we recommend identifying the key and tempo of the song you would like to remix. This make it easier to create chord progressions, melodies and to sync stems to your project’s tempo.
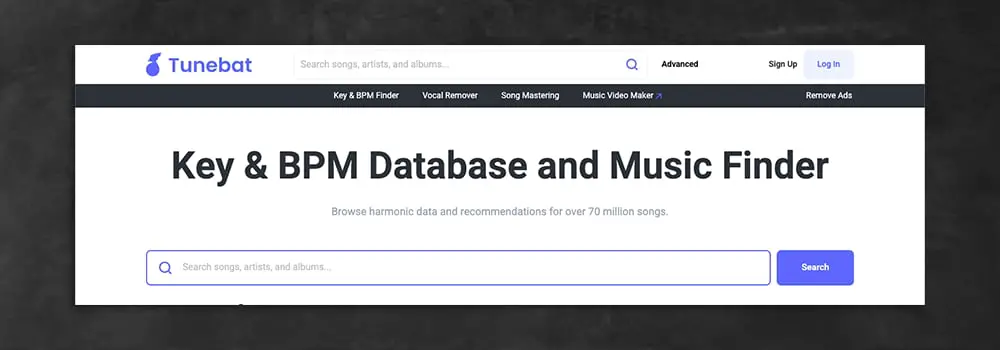
Tunebat.com is a powerful detection tool that instantly displays the key and tempo of any song. Simply type in the track name, as well as the artist and the track’s key and tempo will be displayed.
| 2. Getting Stems
The next step in creating a remix is obtaining stems. Stem files make up each of the individual elements or instruments of an original track. These files allow you to select particular elements of the original track and embed them into your remix. A popular practice when creating a remix is taking the vocals (also known as the ‘acapella’) from the original track and composing a completely new instrumental underneath.
When artists create official remixes, the original composers will often send them a number of stems. If you’re looking to create a remix but don’t have access to the original song’s stems, they can sometimes be found online with a simple Google search.
If you’re looking to acquire a song’s acapella, Voclr.it has a library of more than 15,000 acapellas that can be downloaded for free. If you cannot find the acapella you’re looking for online, you can also extract it from the original song using a variety of tools. You can read more about this by visiting our previous post titled ‘The BEST Way To Extract An Acapella From Any Song’.
| 3. How To Import Stems
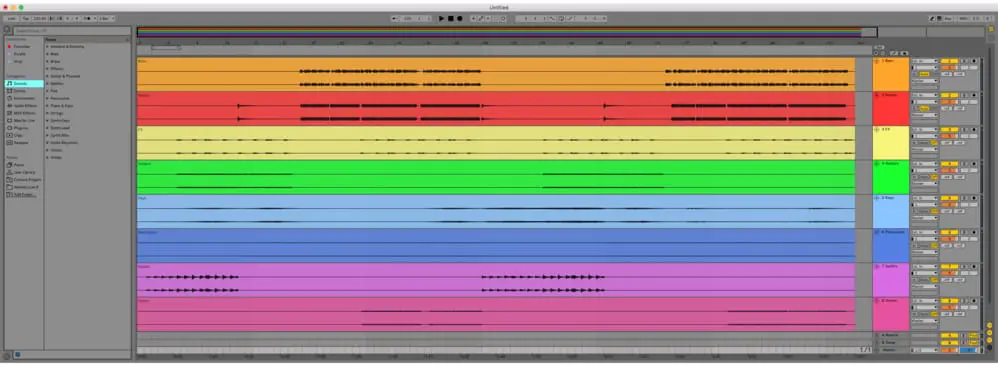
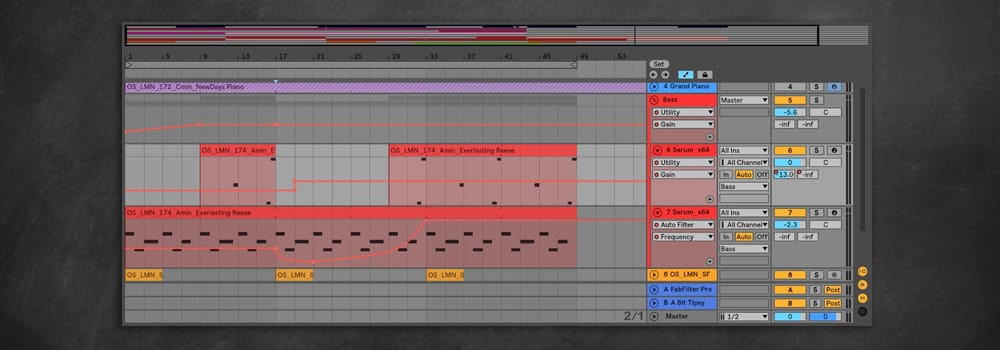
To import stems, simply drag and drop your stems from Live’s Browser or Finder/File Explorer into the Arrangement View of your project. If you have highlighted multiple stems, make sure to hold down [COMMAND] on Mac or [CTRL] on Windows to ensure each stem is imported onto its own audio track.
Make sure to input the original track’s tempo into the ‘Seg. BPM’ of each stem. This will ensure each of your stems stay in time with the other elements of your remix. To do this, first access the clip view by double-clicking on the top part of your first stem. Ensure Warp mode is enabled and Complex mode is selected from the drop-down box. Lastly, type in the original track’s tempo into the box below ‘Seg. BPM’. Repeat this process for each stem you imported into your project.
If you have used an acapella downloaded from Voclr.it, the original song’s tempo and key will be specified on the download page.

| 4. Adding A Chord Progression
Now it’s time to start creating your remix! The following three steps can be completed in an order that works best for you. Chord progressions are used to add harmonic content to a song, as well as convey a particular set of emotions.
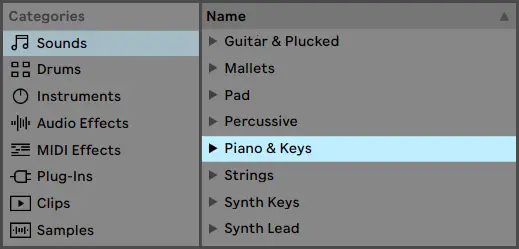
Ableton comes with a number of instrument presets that can be used to create chord progressions. Try experimenting with polyphonic sounds from the Pianos & Keys, Synth Keys, Strings, Pad, Mallets or Brass categories located in the Sounds tab in Live’s Browser. Double-click on a sound to add it to a new MIDI track or the currently selected MIDI track.
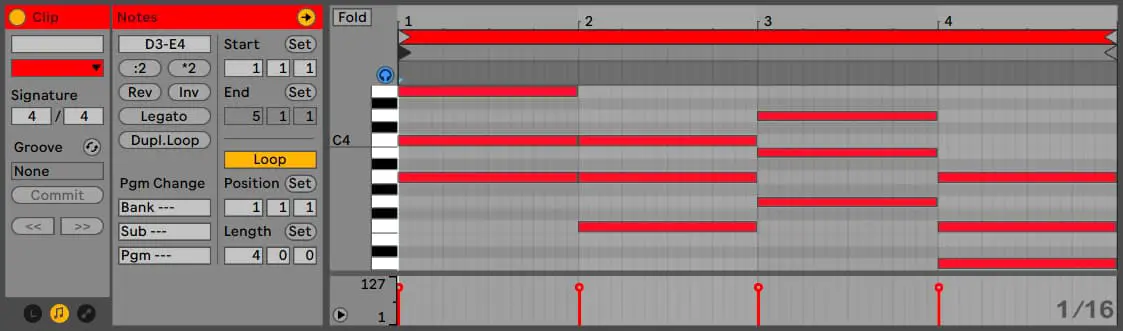
Once you have loaded a sound, double-click on one of the empty slots on the MIDI track in Session View. This will create a MIDI clip and open the piano roll. Use your mouse to pencil in chords or record using a MIDI keyboard or your computer’s QWERTY keyboard.
If you need help finding the perfect chord progression for your remix, try importing a MIDI file onto your MIDI track. Click here to download a free MIDI chord pack that contains hundreds of MIDI files across all major and minor keys.
| 5. Adding A Bassline
Bass controls the whole groove and feel of a track, occupying the lower frequencies of the frequency range. Songs without a bassline tend to feel hollow and incomplete.
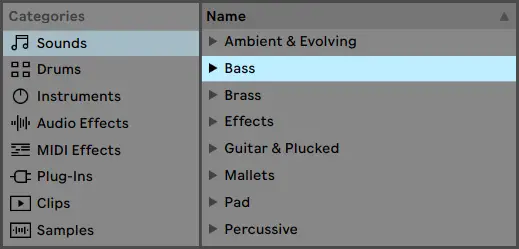
For an extensive list of bass presets, head to Live’s Browser and select the Sounds tab. Next, click on the arrow beside the Bass category and single-click on each preset to hear a preview. Once you have selected a bass preset, double-click it to add it to a new MIDI track or the currently selected MIDI track.
A bassline can be derived from the root notes of a chord progression. For example, to create a bassline from the chords Amin, Fmaj, Gmaj and Dmin, simply take the notes A, F, G and D and choose a bassline rhythm that compliments the chords and the other elements of your remix.
| 6. Adding Drums
Drums create and maintain the tempo, adding a rhythmic foundation to a composition. In electronic music, drum beats are traditionally crafted using a variety of samples or loops.
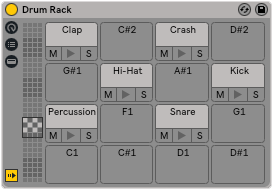
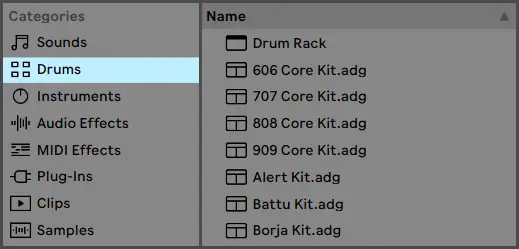
Ableton Live’s Drum Rack makes it possible to create beats using the piano roll. Simply select a variety of drum one-shot samples, drag and drop them onto vacant drum rack pads, then pencil in beats directly from the piano roll. Live’s Drum Rack instrument can be found at the top of the Drum category in Live’s Browser. To access Live’s library of drum one-shot samples, select the drop-down arrow beside Drum Hits.
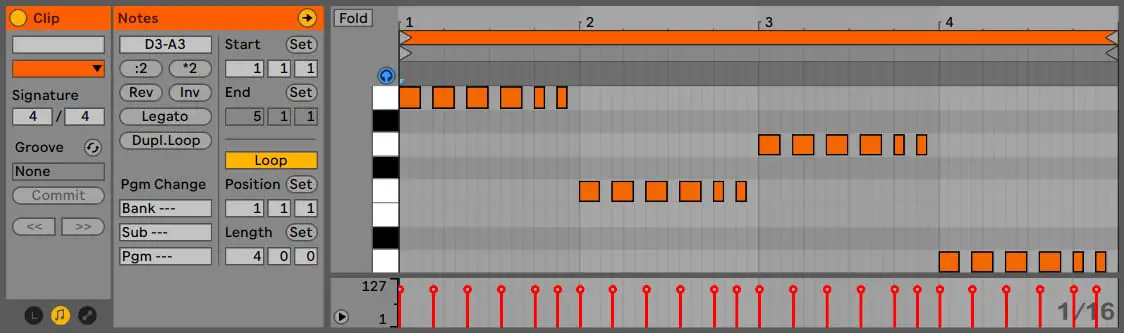
To load a complete pre-made drum kit, double-click on a drum kit from the Drums category in Live’s Browser. Once loaded, a series of alike drum one-shots will be loaded in Live’s Drum Rack. To create beats in the piano roll, double-click on one of the empty slots on the MIDI track in Session View. Use your mouse to pencil in chords or record using a MIDI keyboard or your computer’s QWERTY keyboard.
| 7. Structuring Your Remix
If you haven’t already, start structuring your remix by dragging clips from the Session View into the Arrangement View. The Arrangement View shows all of your project’s tracks laid out along a song timeline. This way, you can build your remix from start to finish. You can toggle between Session and Arrangement View by pressing [TAB] on your keyboard.
Many sub-genres of EDM (eg. Dance, Mainroom, Tech-House) follow this structure:
• Intro, Breakdown 1, Build-Up, Drop 1, Breakdown 2, Build-Up, Drop 2, Outro
Pop and more commercial genres often follow this structure:
• Intro, Verse 1, Pre-Chorus, Chorus, Verse 2, Pre-Chorus, Chorus, Bridge, Chorus, Outro
If you need some help editing and arranging clips in Arrangement View, click here to watch one of Ableton’s official video tutorials.
| 8. Adding FX
Try adding various FX to the different sections of your track. FX are used to create more interesting transitions between sections and enhance the major elements of a track. Common FX include uplifters, downlifters, white-noise, risers, impacts etc.
Ableton Live also comes with a number of FX samples which can be accessed from the Sounds category of Live’s Browser. If you’re looking to expand your FX library with a free collection of royalty-free FX samples, make sure to check out Echo Sound Works FX Toolkit.
| 9. Mixing & Mastering
Mixing and mastering is the final step when creating a remix. Mixing is the process of optimizing each layer of a track into a final product. This step generally includes balancing the volume of each track in your project, applying EQ where necessary and using effects such as reverb, compression and limiting. Try utilizing Live’s stock effects by selecting the Audio Effects and MIDI Effects tabs from Live’s Browser.
When it comes to mastering, producers will often send their complete track to a mastering engineer. This step will ensure your remix sounds as good as possible on any set of speakers. Having a single track mastered usually costs between $50 and $200. Try searching online for a mastering engineer that fits your budget.

| 10. Sharing & Distributing
So you’ve finished your remix and now you want to share it with the world! Unfortunately, unofficial remixes cannot be uploaded to a number of streaming services like Spotify, Pandora and Apple Music. You must obtain permission from the original artist in order to upload to these platforms.
However, unofficial remixes can be posted to sites such as SoundCloud and YouTube under certain agreements (eg. without monetization, citing fair use). Share your remix with friends, perform it live and send it to other DJ’s to help generate streams and recognition as an artist.

Want To Know More?
Here at Live Aspects, we have dozens of useful lessons and tutorials created to enhance your music production skills and help speed up the learning process. You can access our huge range of music theory lessons and production tips and tricks here.