Popular in Hip-Hop and EDM genres, sampling is used to repurpose portions of an existing track into a new creation. Utilize published drum hits and beats from other songs and put your own artistic taste on other musician’s ideas. If you’re looking for the perfect kick sample, a drum loop to fatten up your mix or a short snare for a drum roll, sampling can help you find the perfect element for your track.
In this guide, we’ll be outlining the three best ways to sample drums using a selection of Ableton Live’s tools and plugins.
- | Method 1: Slicing In Arrangement View
- | Method 2: Simpler Slice Mode
- | Method 3: Simpler One-Shot Mode
Without further ado, let’s dive in!
| What Is Sampling?
Sampling is a technique in music production that involves extracting a portion of a pre-existing piece of audio for use in a new recording. Commonly sampled elements include drum hits, whole drum beats, melodies, vocal hooks and chords. Samples are traditionally edited and manipulated to avoid copyright infringement and to better fit within a composition.
Ableton’s extraordinary collection of tools, functions and effects makes it easy for users to manipulate samples in unique and creative ways.

| Method 1: Slicing In Arrangement View
Using Arrangement View is the most accurate way to sample drums. It involves manually slicing the portions of an audio sample that you would like to use in your project. Live’s Slice tool allows you to create precise slices of an audio clip and maintain complete control over all elements of your project.
Step 1: Import Audio
To sample drums in the arrangement view, start by importing the audio you would like to sample. First, navigate to the ‘Create’ menu and select ‘Insert Audio Track‘. Alternatively, press [COMMAND + T] on Mac or [CNTRL + T] on Windows. Next, drag and drop the audio you would like to sample from Finder/File Explorer or Live’s Browser onto the audio track.

Step 2: Warp Audio
The next step is to Warp your audio sample to your project’s master tempo. Double-click on the top part of your audio clip to open Clip View and enable the ‘Warp’ button under the sample properties. Next, type in the audio sample’s original tempo under ‘Seg. BPM’. Alternatively, you can click and drag the Seg. BPM value up or down until the waveform lines up with the grid.

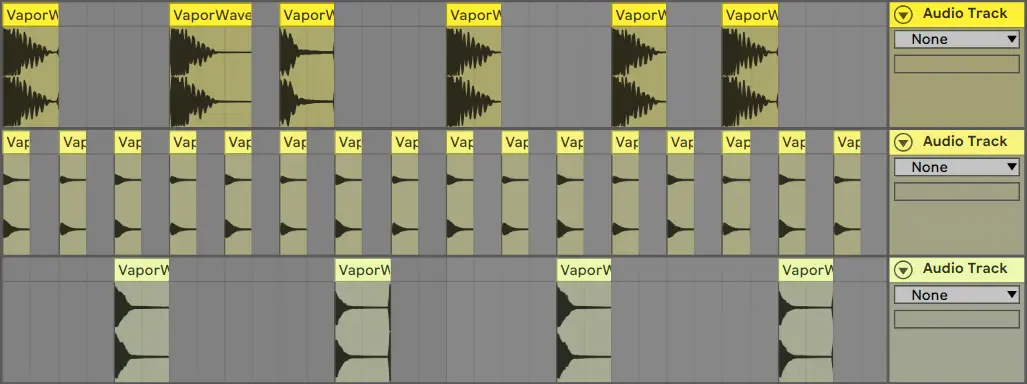
Step 3: Create Slices
Head back to arrangement view and highlight the first region of the audio clip you would like to sample. Next, press [COMMAND + E] on Mac or [CNTRL + E] on Windows to create a slice. Repeat this step for each of the drum hits you would like to sample.
If you need a more precise grid to create accurate slices, simply right-click on the arrangement view timeline and select a new fixed grid fraction.

Step 4: Using Slices
It’s time to use your new drum samples! Create new beats and arrange your slices to fit the other elements of your project. Add unique sets of audio effects to different drum samples by distributing your slices across multiple audio tracks. This way you can create automation, adjust parameters and edit each sample type individually.
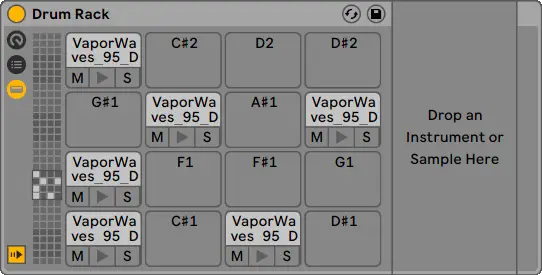
Another way to use your new samples is to create a Drum Rack. This will allow you to use your new drum samples with a MIDI device such as drum pads or a keyboard. Simply head to Live’s Browser, select ‘Instruments’ and double-click on ‘Drum Rack’. Drag each drum sample onto the clip slots that correspond to your MIDI device.
| Method 2: Simpler Slice Mode
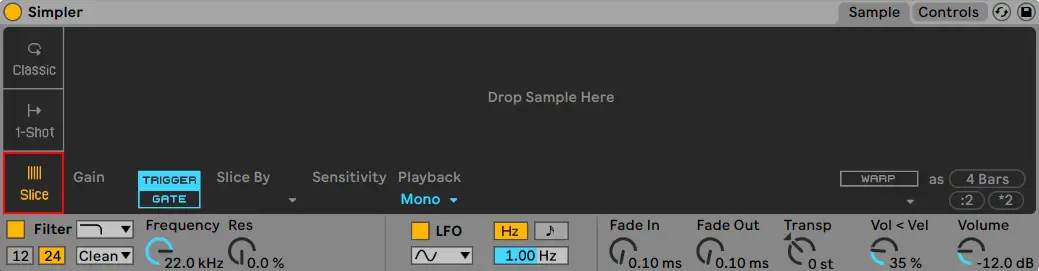
Simpler’s Slice Mode can instantly create slices of each drum hit within a sample. This results in a playable drum kit with each slice automatically mapped to its own MIDI note. This method of sampling drums works best if you are looking to perform or create new drum beats using the drum sounds from an existing song or loop.
Step 1: Load Simpler
To sample using Simpler’s Slice Mode, first navigate to Live’s Browser by toggling the triangular icon in the top left corner. Next, select the ‘Instruments’ tab and double-click on ‘Simpler’.
Step 2: Select Slice Mode
Once Simpler has loaded onto a MIDI track, select the ‘Slice’ tab on the left of the instrument.
Step 3: Import Sample
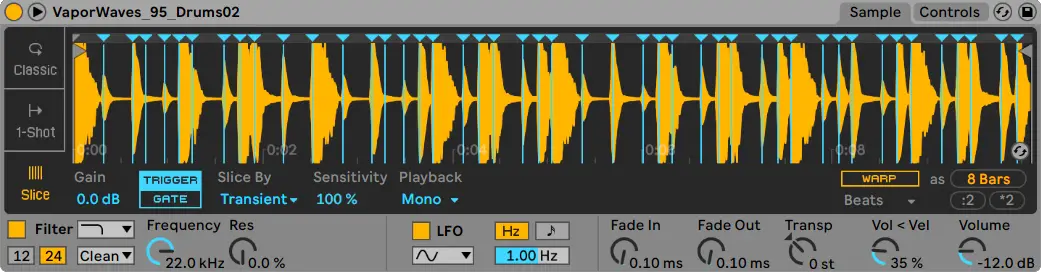
Drag and drop or copy and paste an audio file from Finder/File Explorer or Live’s Browser onto the centre of the Simpler instrument. Your audio sample will now be analysed and sorted into slices. Slices will be chromatically allocated to the note on the piano roll starting at note C1. This means you can use a MIDI device or your computer’s keyboard to trigger each slice.
Step 4: Adjust Simpler Settings
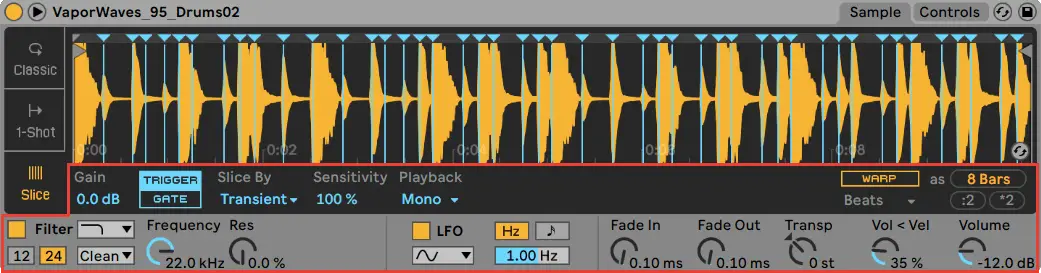
Feel free to experiment with the many Simpler parameters that are accessible below the sample display.
To change the algorithm by which Simpler determines how your audio is sliced, adjust the ‘Slice By’ drop-down box. By default, slices are placed at each of the sample’s transients.
When ‘Trigger’ mode is selected, the sample will continue playing even after the note is released. With ‘Gate’ mode enabled, the sample will begin fading out as soon as the note is released.
Use the Warp function to sync the sample with your project’s master tempo. Simpler’s Warp mode functions the same way as it does in audio clips in session or arrangement view.
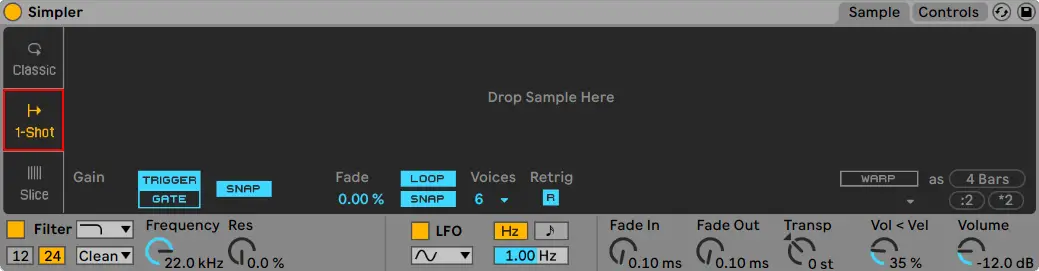
| Method 3: Simpler One-Shot Mode
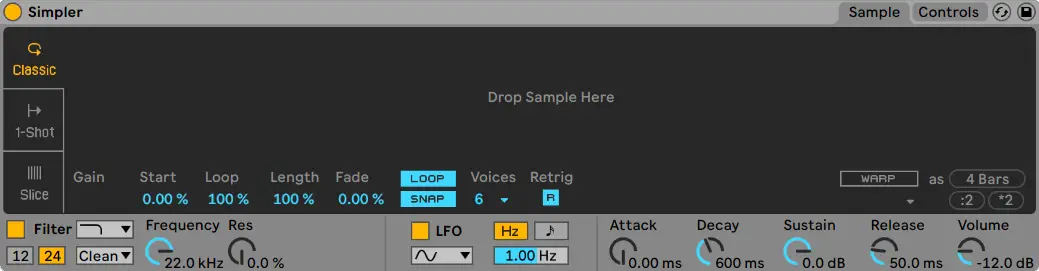
This method is perfect for extracting a single one-shot or small section of a song or loop. Simpler’s 1-Shot mode can be used to sample a kick from a house track, a dubstep snare, a bass shot etc. It can also be used to turn any one-shot sample into a playable instrument.
Step 1: Load Simpler
To sample using Simpler’s One-Shot Mode, first navigate to Live’s Browser by toggling the triangular icon in the top left corner. Next, select the ‘Instruments’ tab and double-click on ‘Simpler’.
Step 2: Select 1-Shot Mode
Once Simpler has loaded onto a MIDI track, select the ‘1-Shot’ tab on the left of the instrument.
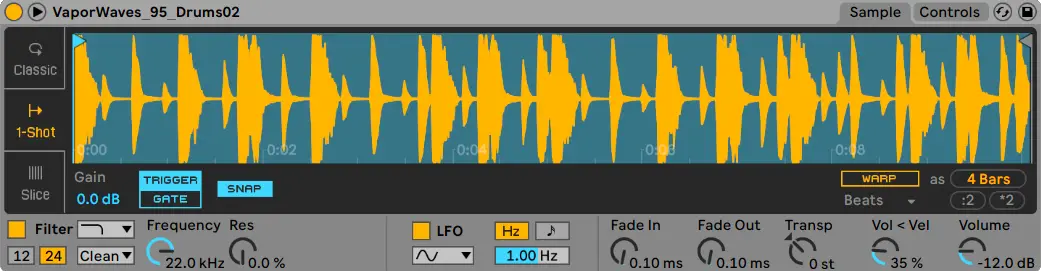
Step 3: Import Sample
Drag and drop or copy and paste an audio file from Finder/File Explorer or Live’s Browser onto the centre of the Simpler instrument. The waveform of the imported audio will appear in the sample display.
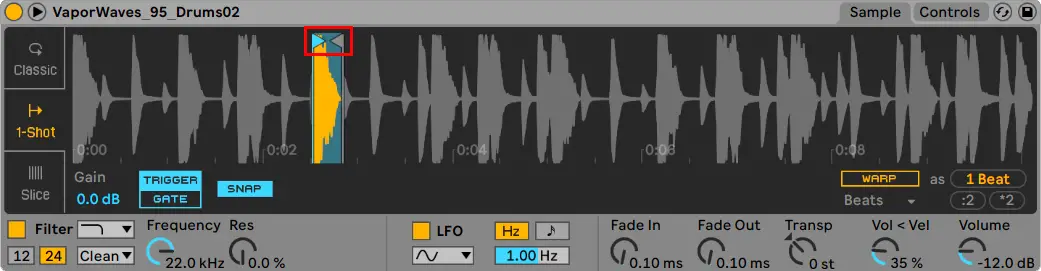
Step 4: Adjust Start & End Flags
In One-Shot Playback Mode, the left and right flags set the playback region. The left flag dictates where playback begins and the right flag determines where the one-shot will end. Adjust the start and end flags to crop the region of the audio clip you would like to sample.
To more accurately position the flags, zoom into the clip’s waveform by clicking anywhere on the waveform and dragging up and down.
Your new one-shot will be can now be played as an instrument using a MIDI device or your computer’s keyboard. You can also create MIDI clips and record your MIDI performances.
Step 5: Adjust Simpler Settings
Feel free to experiment with the many Simpler parameters that are accessible below the sample display.
When ‘Trigger’ mode is selected, the sample will continue playing even after the note is released. With ‘Gate’ mode enabled, the sample will begin fading out as soon as the note is released.
Use the Warp function to sync the sample with your project’s master tempo. Simpler’s Warp mode functions the same way as it does in audio clips in session or arrangement view.

If you would like to learn more about editing audio in Ableton Live, you can view our previous post ‘How To Edit Audio In Ableton Live’.
Want To Know More?
Here at Live Aspects, we have dozens of useful lessons and tutorials created to enhance your music production skills and help speed up the learning process. You can access our huge range of music theory lessons and production tips and tricks here.