Whether you’re new to music production or experienced in the industry, it’s likely you’ve heard of sidechain compression. Sidechain compression is a vital part of any electronic composition. While it is most commonly used in EDM, it can be useful in any genre of music. Sidechain can be used it to add excitement and energy to your mixes, as well as control dynamics and create a professional sounding mix.
Hi, I’m Ben from Live Aspects and in this guide, I’m going to give you a brief introduction to sidechain compression, discuss when you should use it and talk about how it can be utilized in your Ableton Live productions. While there are a number of ways to sidechain, using Ableton Live’s stock plugin Glue Compressor is a free and powerful way to create sidechain compression.
- | What Is Sidechain Compression?
- | How To Sidechain In Ableton Live
- | Should I Be Using Sidechain Compression?
- | External Sidechain Plugins
Without further ado, let’s get started!

| What Is Sidechain Compression?
Sidechain compression is a popular production technique used to reduce the volume of an audio signal when another is played at the same time. It is known to create a “pumping’ effect and reduces the level of one signal to make space for another signal to be heard. While professional musicians often use third party plugins to sidechain, popular DAWs like Ableton Live come with stock plugins that can be used to create the same effect.
Sidechain compression is most commonly used in EDM. In electronic dance music, sidechaining is typically applied to the bass layers of a track to ensure the kick drum can punch through the mix. It also helps reduce muddiness in the low frequencies and keeps your master track from clipping. Sidechaining can be a powerful tool to add to your mixing and mastering arsenal.

| How To Sidechain In Ableton Live
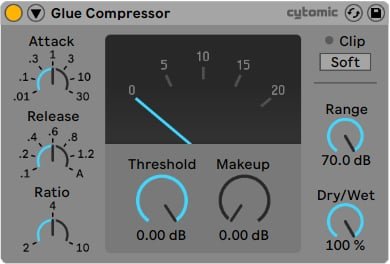
| Step 1: Add Glue Compressor
Start by adding the Glue Compressor plugin onto the track you would like to sidechain. Sidechain can be utilized in many different ways but more often than not, the Glue Compressor plugin is used to sidechain bass, harmonic or melodic elements. Head to Live’s Browser, select the Audio Effects tab and locate Glue Compressor. Lastly, drag and drop the plugin onto the desired track.
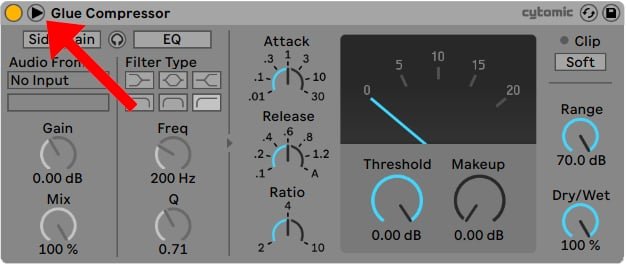
| Step 2: Reveal Sidechain Settings
Once Glue Compressor has loaded in the device view, reveal the sidechain compression controls by toggling the triangular icon in the top left corner of the plugin.
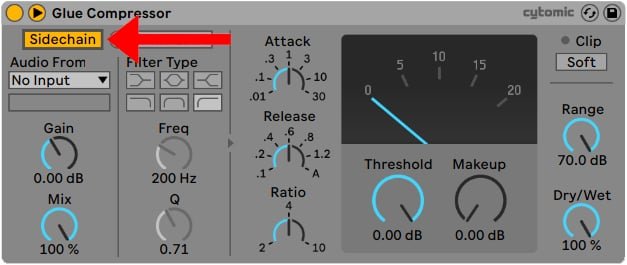
| Step 3: Enable ‘Sidechain’
Next, enable sidechaining by selecting the ‘Sidechain’ button. The button will turn yellow when active.
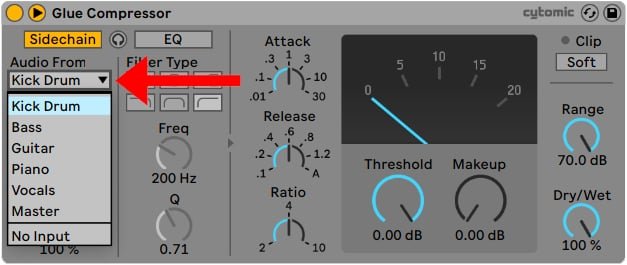
| Step 4: Route Audio From
Expand the ‘Audio From’ drop-down box and select the source signal that you would like to send to the Glue Compressor. This track will determine when the Glue Compressor will trigger the sidechain effect.
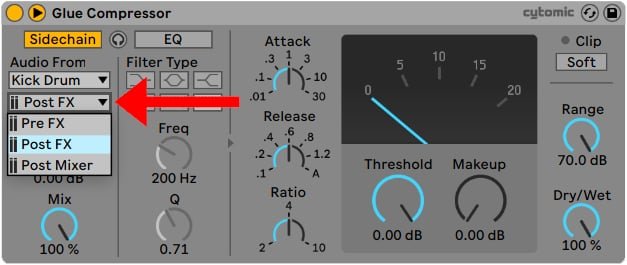
From the second drop-down box, select the external tapping point. This determines the point at which the sidechain source’s signal is sent to the Glue Compressor.
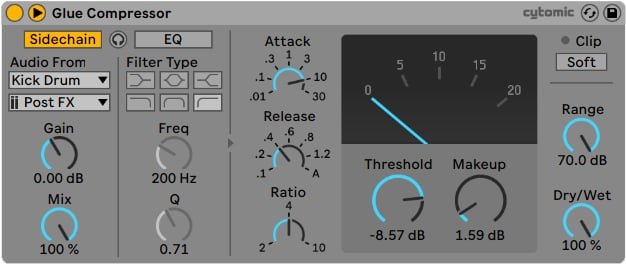
| Step 5: Adjust Sidechain Settings
Lastly, adjust the parameters of the Glue Compressor plugin to create your desired sidechain effect. Below you will find a brief outline of the main Glue Compressor parameters:
• Threshold is responsible for the strength or amount of sidechain
• Attack sets how long it takes to reach maximum sidechain compression once the signal exceeds the threshold
• Release determines how quickly the audio signal returns to its original volume after being sidechained
• Makeup sets the amount of volume added to the signal after being sidechain
• Dry/Wet adjusts the balance between the sidechained and unsidechained signals
| Should I Be Using Sidechain Compression?
While sidechaining is by no means compulsory, it can certainly help you with problems you may encounter while mixing. Not only does sidechaining help balance out bass frequencies, it also makes your track sound more professional. Sidechaining can help alleviate muddiness in the low frequencies, which is caused by multiple layers occupying similar frequencies. It’s like two people are trying to shout over each other. Don’t be afraid to experiment with it and see what works best for your music!

| External Sidechain Plugins
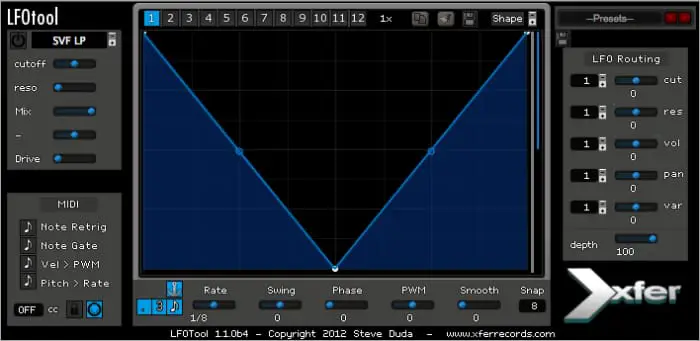
| Xfer Records LFOTool
LFOTool is a powerful LFO shaping plugin that allows users to visually craft the shape of sidechain compression. It is also a powerful tool for creating tremolo, auto-pan, and trance-gate effects with minimal effort. It contains more than 100 presets and features a sleek and simple user interface. It is extremely light on CPU and is used by a number of famous music producers around the world.
Xfer Record’s LFOTool can be download for $49.95 USD. If you’d like to find out more about LFOTool or purchase it for yourself, click here.
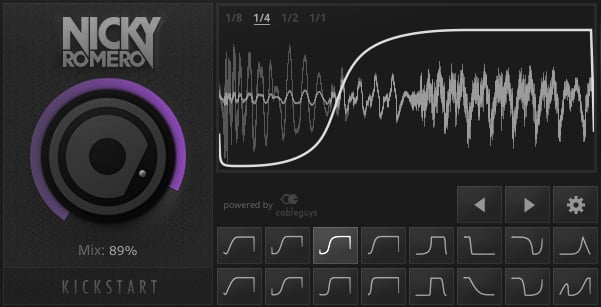
| Nicky Romero Kickstart
Nicky Romero’s Kickstart is a low-cost external plugin that allows for easy and instant sidechain compression. It removes the need to route an audio source and instead, offers a selection of sidechain shapes that can be quickly selected and trialled. Kickstart is used by many big name artists including Knife Party, Don Diablo, Showtek, Timbaland and more.
If you are looking for a more simple way to sidechain in Ableton Live and aren’t wanting to spend a fortune, Nicky Romero’s Kickstart can be download for just $15 USD. If you’d like to find out more about Kickstart or purchase it for yourself, click here.
Want To Know More?
Here at Live Aspects, we have dozens of useful lessons and tutorials created to enhance your music production skills and help speed up the learning process. You can access our huge range of music theory lessons and production tips and tricks here.