If you’re looking at making a song in Ableton Live in a time signature other than 4/4, then you’ll need to know how to change time signature.
In this guide, we’ll describe what time signature means in music and outline how you can change it in your Ableton Live projects. We’ll also introduce you to Live’s time signature markers and show you how they can be used to change the time signature mid-song.
Without further ado, let’s get started!

What Is Time Signature?
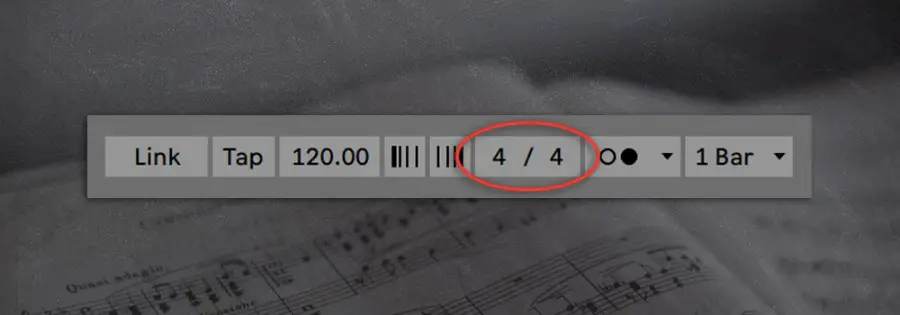
Time signature tells you how many beats are in a bar and what type of note is equal to one beat. In sheet music, a time signature is made up of two numbers: one above the middle line of the staff and one below. In Ableton Live, the time signature is displayed horizontally in the top left corner of the interface, defaulting to 4/4 each time the DAW is opened up.
Left Number:
The left number of Live’s time signature indicates how many beats are in a bar. In 4/4 time, for example, there are four beats in each bar. This means that if you count the beats out loud while listening to a song in 4/4, after four counts, you will reach the start of a new bar.

Right Number:
The right number indicates what type of note is equal to one beat. A ‘4’ would mean a quarter note (or crotchet) is equal to one beat. This is the case for more than 90% of music made today. An ‘8’ on the bottom means an eighth note (or quaver) is equal to one beat.
For example, the notes in a single bar of a song in 4/4 add up to four beats. However, the notes in a single bar of a song in 4/8 add up to two beats.

How To Change Time Signature In Ableton Live
To change the time signature of your Ableton Live project, start by locating the time signature in the top left corner of the Live window. Then simply left-click on the left and/or right numbers of the time signature and type in a new value using your computer’s keyboard.

Changing Time Signature Mid-Song
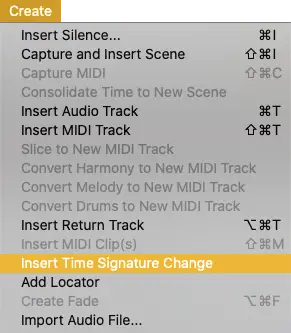
Live’s time signature can be changed at any point during in the arrangement view using time signature markers. These can be added at the highlighted beat|bar by accessing the Create menu and selecting ‘Insert Time Signature Change.’

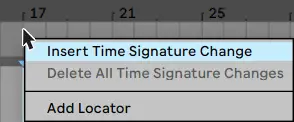
Alternatively, right-click below the beat-time ruler at the location you want to insert a marker and select ‘Insert Time Signature Change.’ Once a marker has been inserted, type in the new time signature.

You can edit a time signature marker by right-clicking it and selecting ‘Edit Time Signature’. Alternatively, you can single click a marker and use the keyboard shortcut [COMMAND + R] on Mac or [CNTRL + R] on Windows.

Related Posts:
How To Use Ableton Live | Top 100 FAQ
Ableton Live 101 | The Complete Beginner’s Guide
30 Ableton Live Keyboard Shortcuts You Need To Know
Want To Know More?
Here at Live Aspects, we have dozens of useful lessons and tutorials created to enhance your music production skills and help speed up the learning process. You can access our huge range of music theory lessons and production tips and tricks here.