Ableton Live is a digital audio workstation that allows you to create, record, and perform music. It’s used by professional musicians and hobbyists alike, and it’s a great place to start if you’re interested in making your own music.
For many new users, opening Ableton Live for the first time can be a little confusing. The layout of the software may seem unfamiliar at first, but it is easy to get the hang of after you spend some time with it.
Whether you’re brand new to Ableton Live or simply looking for a refresher on the basics, this guide will teach you the fundamentals of the software so you can start making music. This step-by-step tutorial will provide you with the knowledge you need to take an empty project and turn it into a finished track.
Part 1. Getting Started
Part 1. Getting Started
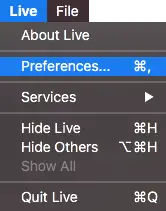
In order to get the most out of Ableton Live, you first need to configure your audio settings. This will ensure Ableton can output your projects through your preferred speaker system. Head to the Live (Mac)/File (Windows) menu and select ‘Preferences’. Alternatively, you can use the keyboard shortcut [COMMAND] + , on Mac or [CNTRL] + , on Windows.
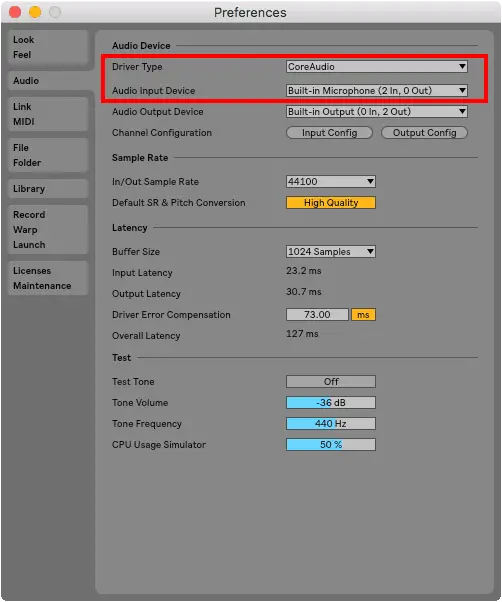
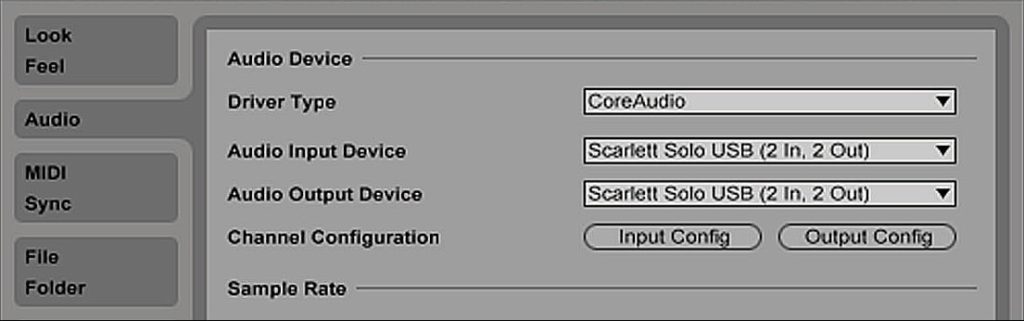
Once the Preferences window has appeared, click on the ‘Audio’ tab. From the Driver Type and Audio Output Device drop-down boxes, select your speaker system. If you’re using an external audio interface, this will be listed here (providing your drivers are installed). Otherwise, select ‘Built-in Output.’
Now that you’re all set up, it’s time to start learning the ins and outs of Ableton Live. Close the Preferences panel by selecting the ‘x’ in the top left corner of the window.
Part 2. Learning The Ableton Live Interface
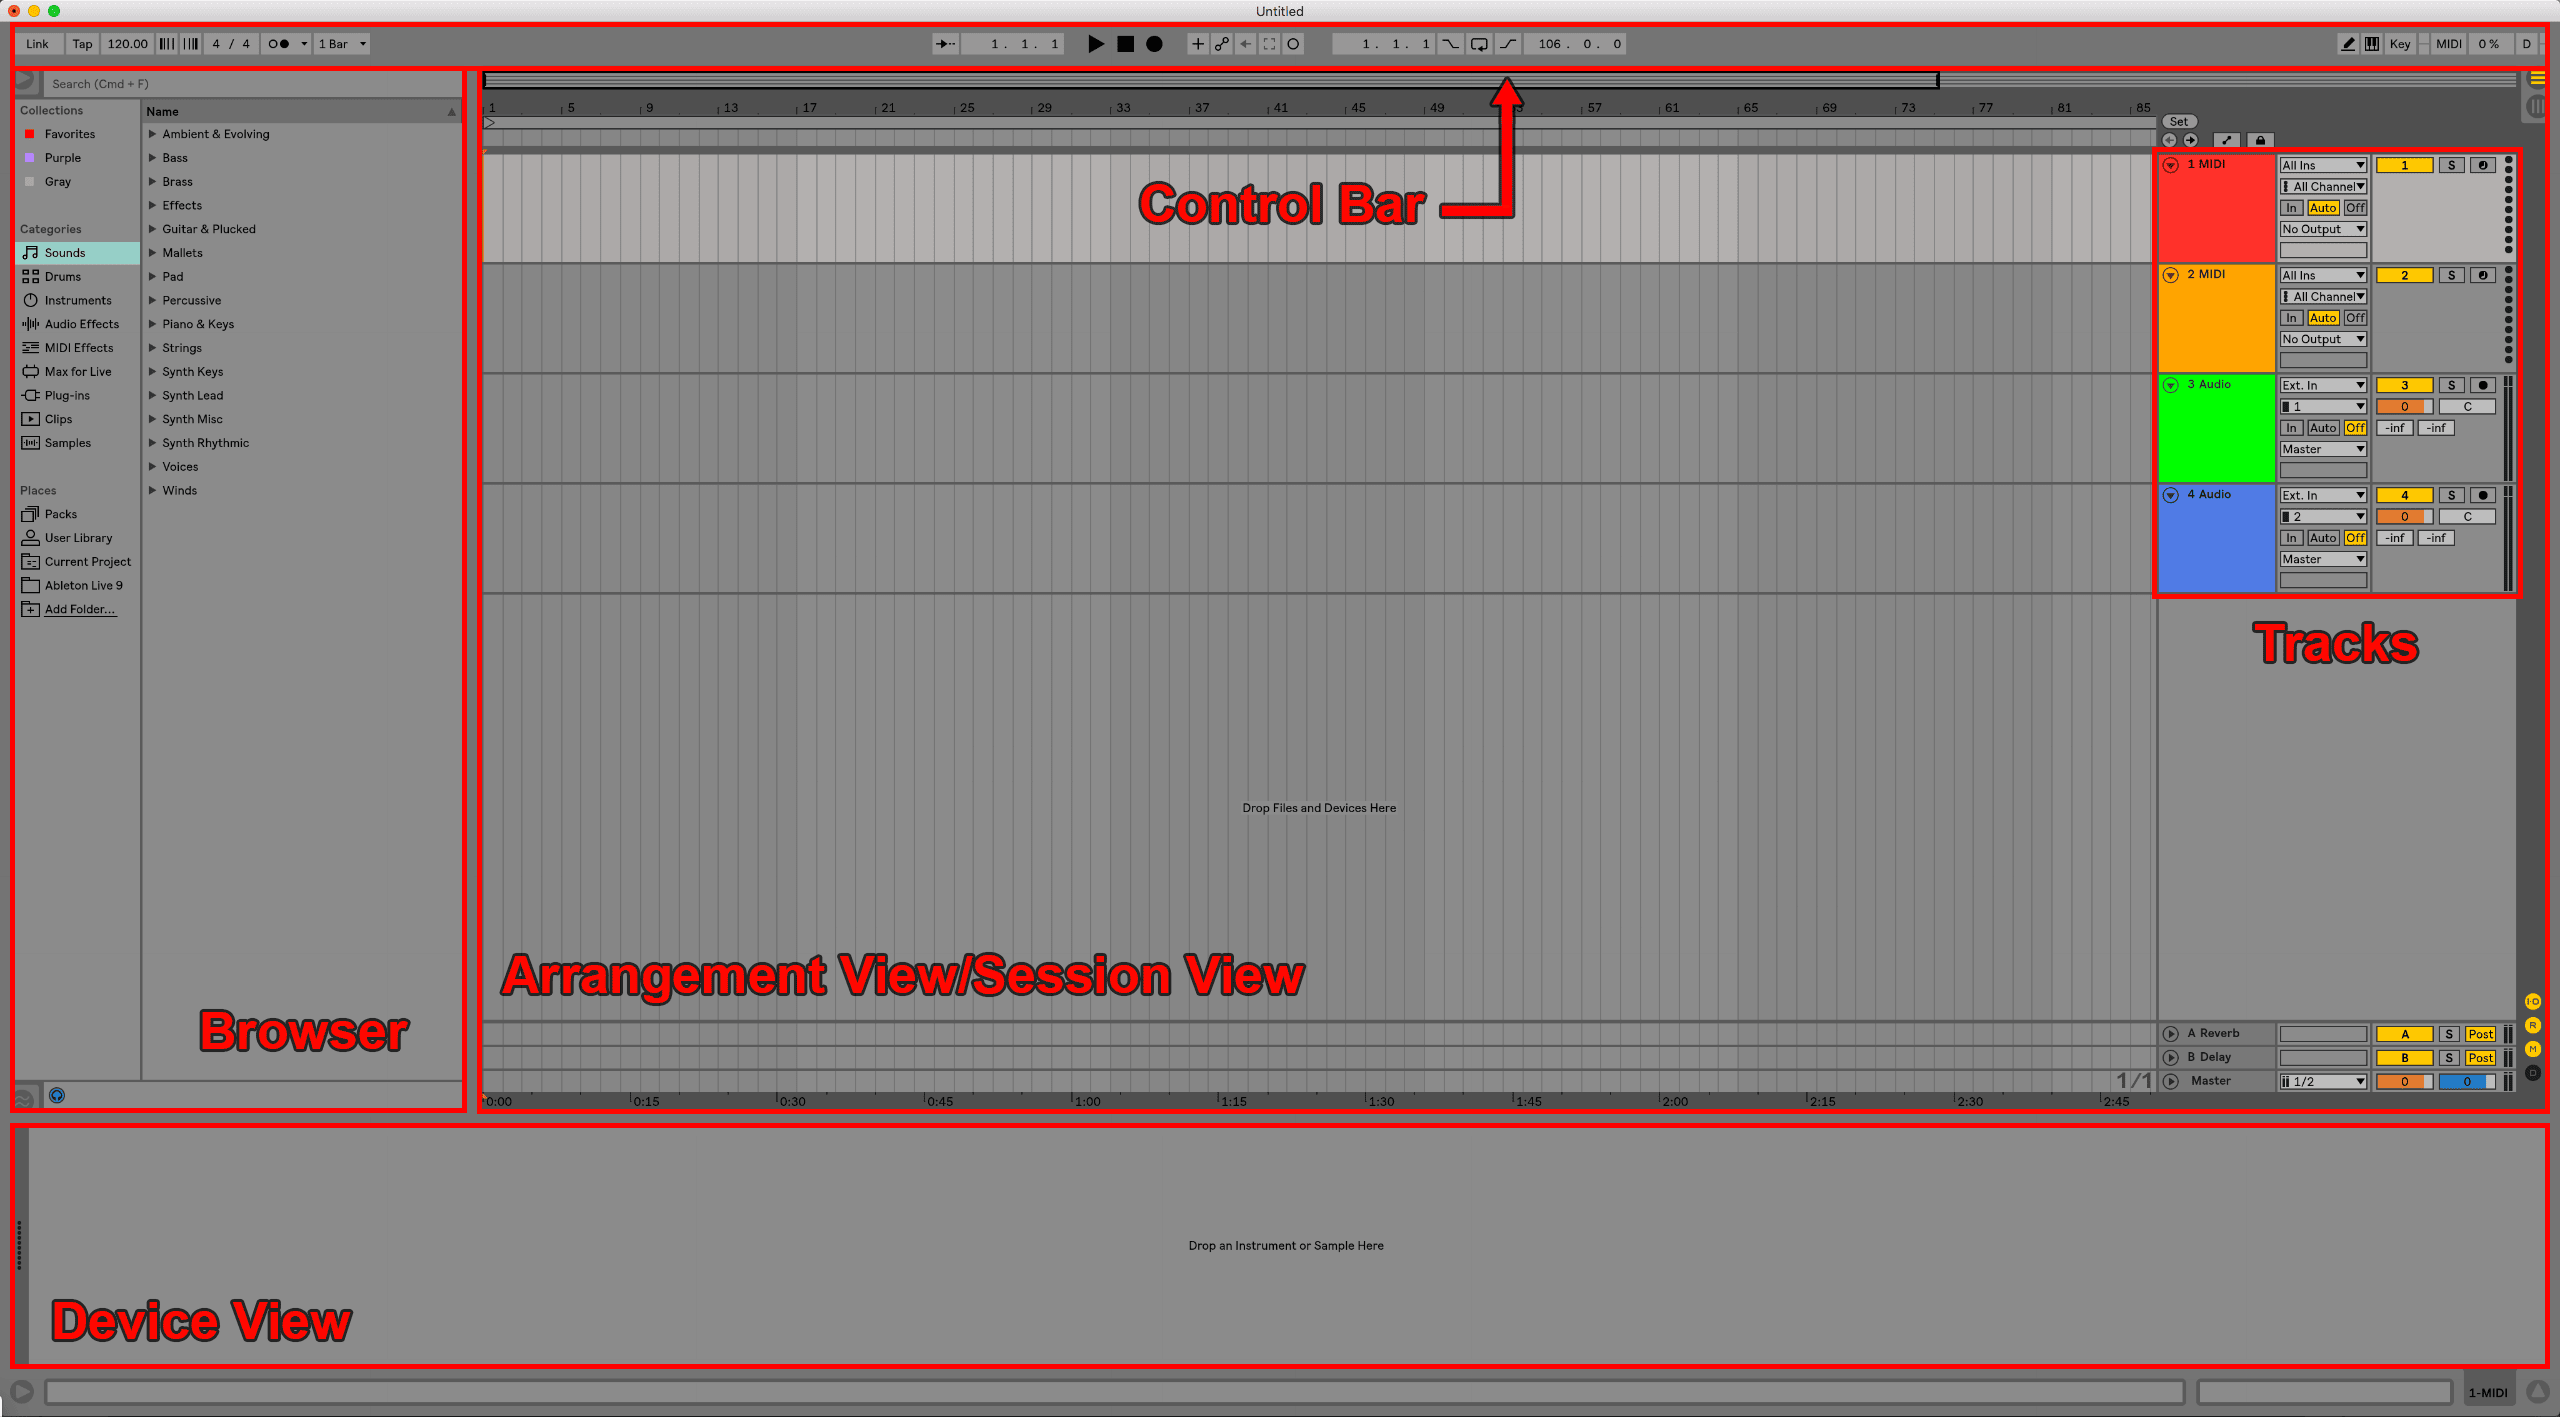
If you’re new to Ableton Live, the first thing you should do is familiarize yourself with the software’s interface. The Ableton Live workspace can be broken down into six main sections: the Browser, Arrangement View, Session View, Tracks, Device View and Control Bar. Understanding each of these core sections will give you the foundational knowledge to start making music using Ableton Live.
| Browser
Located on the left side of the Ableton window, the browser is where you can access instruments, sounds, presets and effects to create music, as well as the factory content that comes with Live. You can also use the browser to access folders on your computer without having to leave the software.
You can toggle the browser by pressing the triangular icon in the top left corner or by using the keyboard shortcut [COMMAND] + [ALT] + B on Mac or [CTRL] + [ALT] + B on Windows.
| Arrangement View
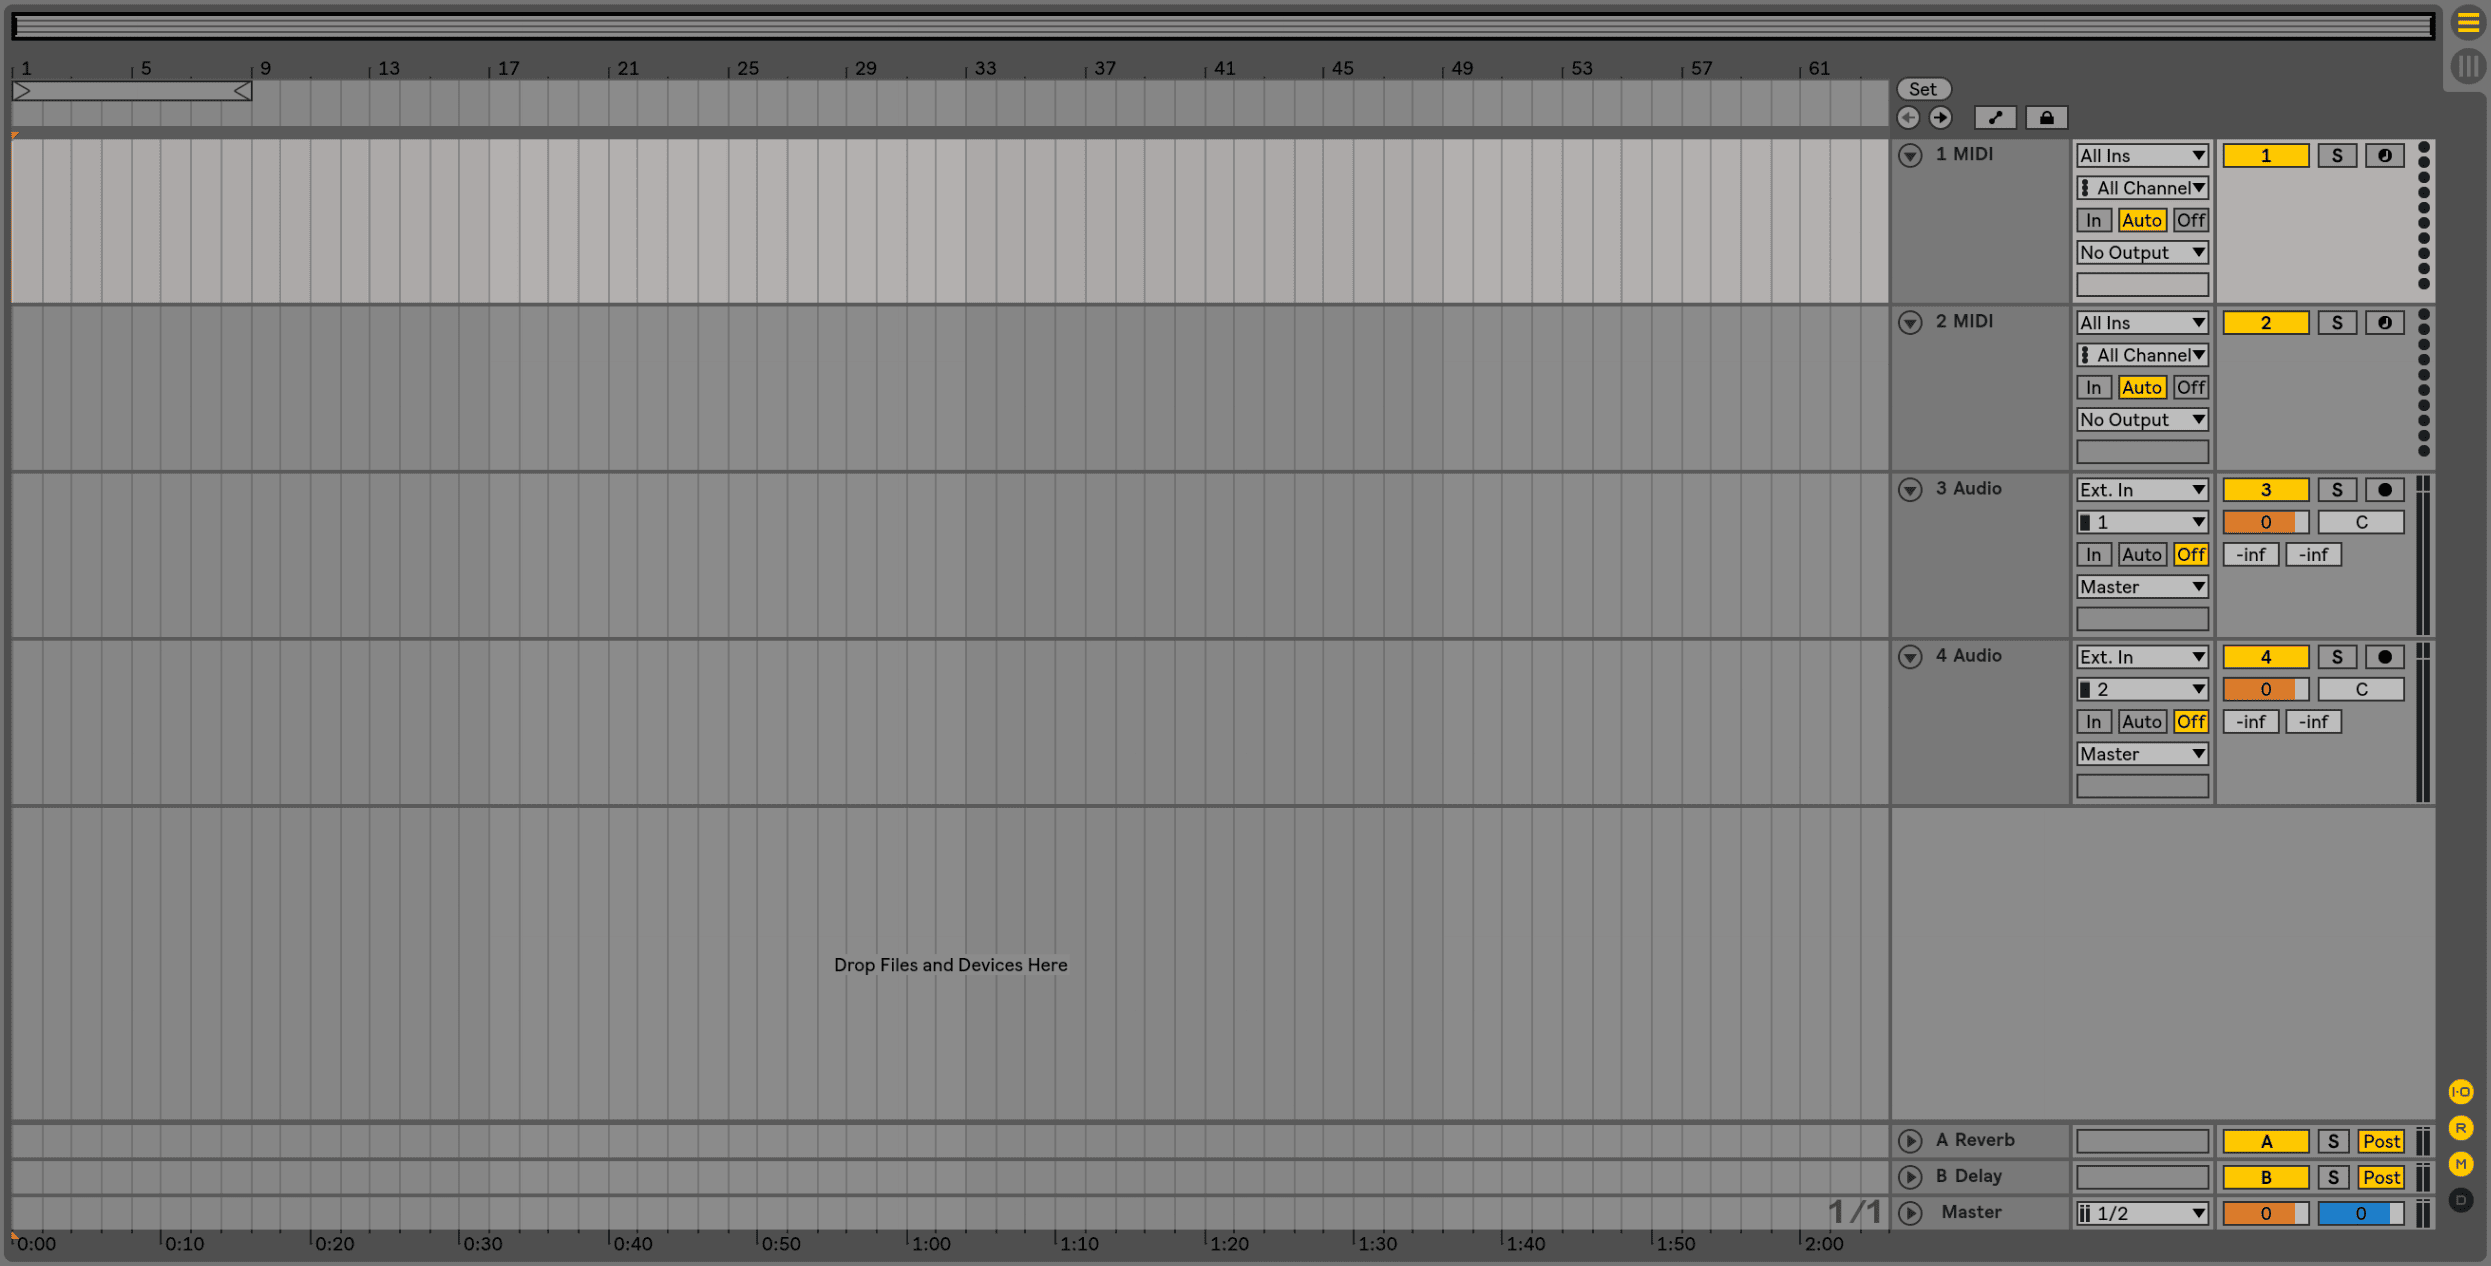
The arrangement view is where you build, compose and arrange songs along a linear timeline. You can add MIDI, loops, sound effects, video and entire songs into the arrangement view, as well as record audio and MIDI using external recording devices.
The horizontal axis displays time measured in minutes and seconds. The vertical lines of the arrangement view represent beats and bars.
Playback moves from left to right, triggering the output of any audio or MIDI content it hits. Content can be added into the arrangement view by dragging and dropping compatible files from Finder/File Explorer or from Live’s browser. You can also double-click instruments, sounds, presets and effects from the browser to instantly insert them into the arrangement view.
| Session View
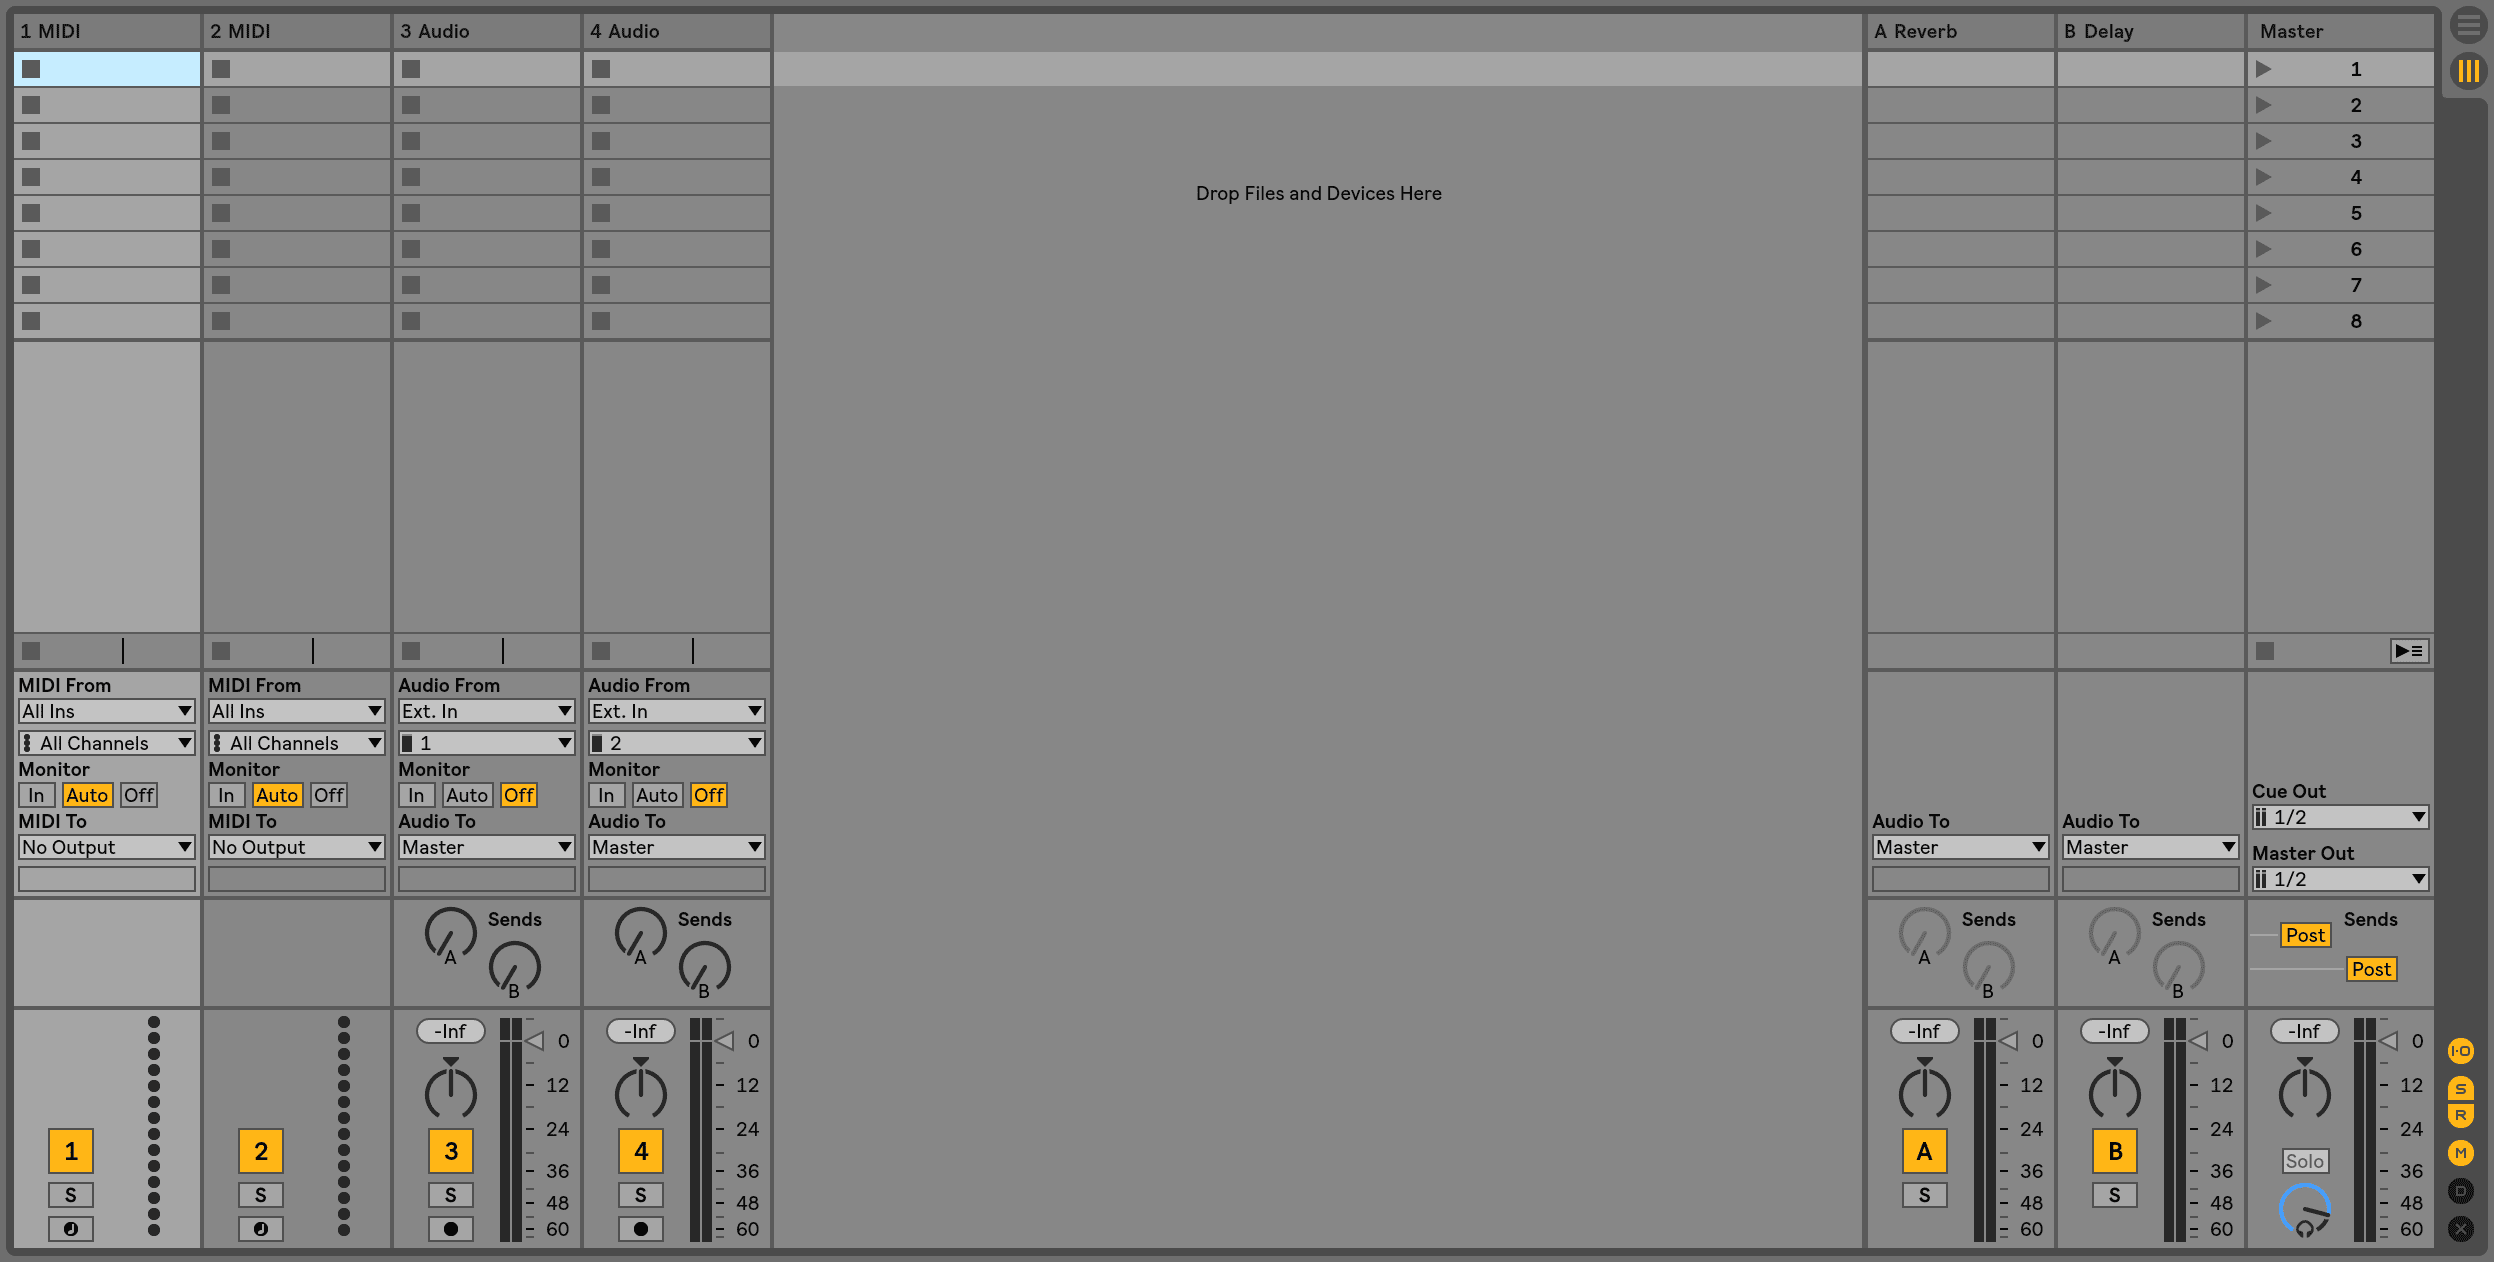
The session view is an alternative workspace to the arrangement view and allows performers to build, audition and experiment with loops in clip slots that can be played back using a MIDI device.
It is a unique and fast way to lay down ideas and makes starting a track a lot easier for many producers. Rehearse and compare different ideas against each other, arrange your tracks or stack various layers of recording.
You can toggle between the session and arrangement views by using the icons in the top right corner of the main workspace. Alternatively, press [TAB] on your keyboard.
| Tracks
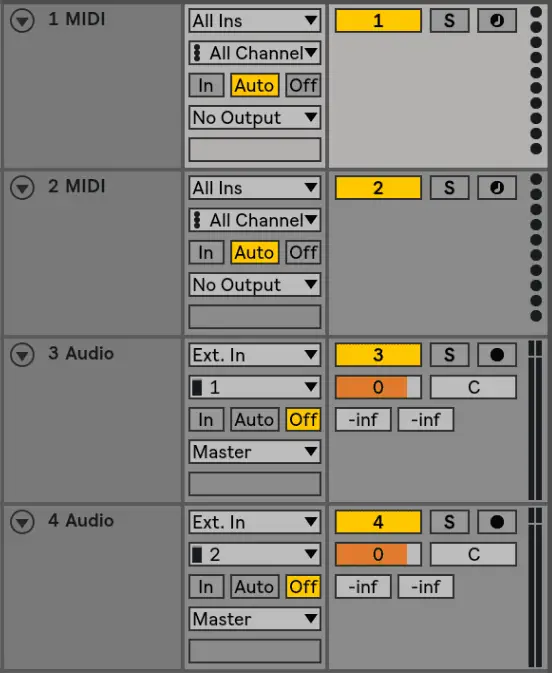
Tracks contain the many sets of MIDI and audio layers that make up an Ableton Live project. There are two main types of tracks available in Ableton Live: MIDI and Audio tracks.
MIDI tracks can host MIDI clips that contain recorded, important or hand-drawn MIDI patterns. Audio tracks can host recorded audio, loops, samples or entire songs.
Beside each track’s name is the routing section for inputs and outputs. Directly next to that is the mixer section for controlling volume, panning, muting, arming recording and soloing.
You can insert MIDI and audio tracks by accessing the Create menu from the top of your screen. You can rename and change the color of a track by right-clicking it and selecting from the various menu options.
| Device View
The Device View is where you insert, view and adjust the devices for a selected track. It is where you can access any instruments, plugins and/or effects that have been inserted onto a track. You can access the device view by double-clicking on a track’s name.

| Control Bar
The Control Bar is where you can control certain parameters of your entire project. It is the small and long area located at the top of the Live interface. It contains tempo and metronome settings, play, stop and record buttons, time signature, a CPU load meter and more.

Part 3. Understanding Clips
Understanding the role of clips in an Ableton project is the second step of learning Ableton Live. Clips are the building blocks of a project, representing your recordings, samples, loops, MIDI patterns and other media files you add to a project. Any piece of audio or MIDI is represented in the session and the arrangement view as a clip. There are two types of clips: audio and MIDI clips.
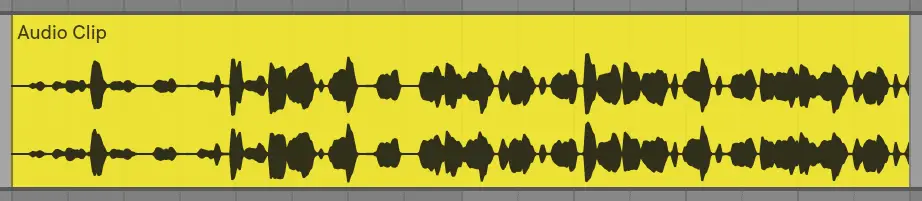
| Audio Clips
An audio clip represents an audio sample that is located on your computer. In the arrangement view, an audio clip displays an audio file’s waveform. Audio formats supported by Ableton Live include WAV, AIFF, FLAC, OGG, MP3, and M4A/MP4.
Clip View
The Clip View is where you can access all the properties of an audio clip and make certain adjustments to a particular audio sample. Here you can adjust things like volume, pitch, playback speed, start and end markers, warp mode and more. You can access the clip view by double-clicking on the top half of an audio clip.

Importing Audio
Audio can be imported into Ableton Live by dragging and dropping files from Live’s browser onto an audio track, as well as directly from Finder(Mac)/File Explorer(Win). You can also record external audio using an audio interface or your computer’s built-in microphone. To find out more about recording in Ableton Live, skip to Part 7.
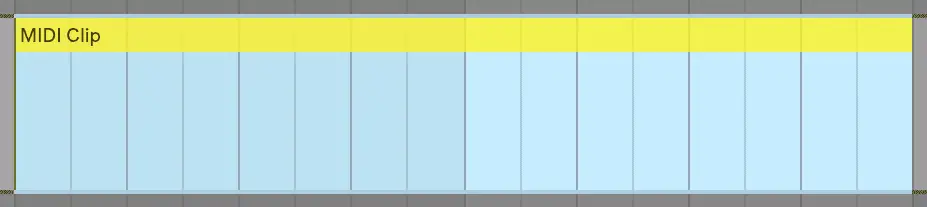
| MIDI Clips
A MIDI clip contains notes that can be played back using a virtual instrument. They are used to create chord progressions, melodies, basslines, drum beats and more. MIDI notes in a MIDI clip can be recorded using a MIDI instrument or hand-drawn using the piano roll.

To create a MIDI clip in the arrangement view, highlight a region of a MIDI track in the arrangement and press [COMMAND] + [Shift] + M on Mac or [CNTRL] + [Shift] + M on Windows. Alternatively, you can right-click the highlighted beat|bars and select ‘Insert MIDI Clip(s)’.
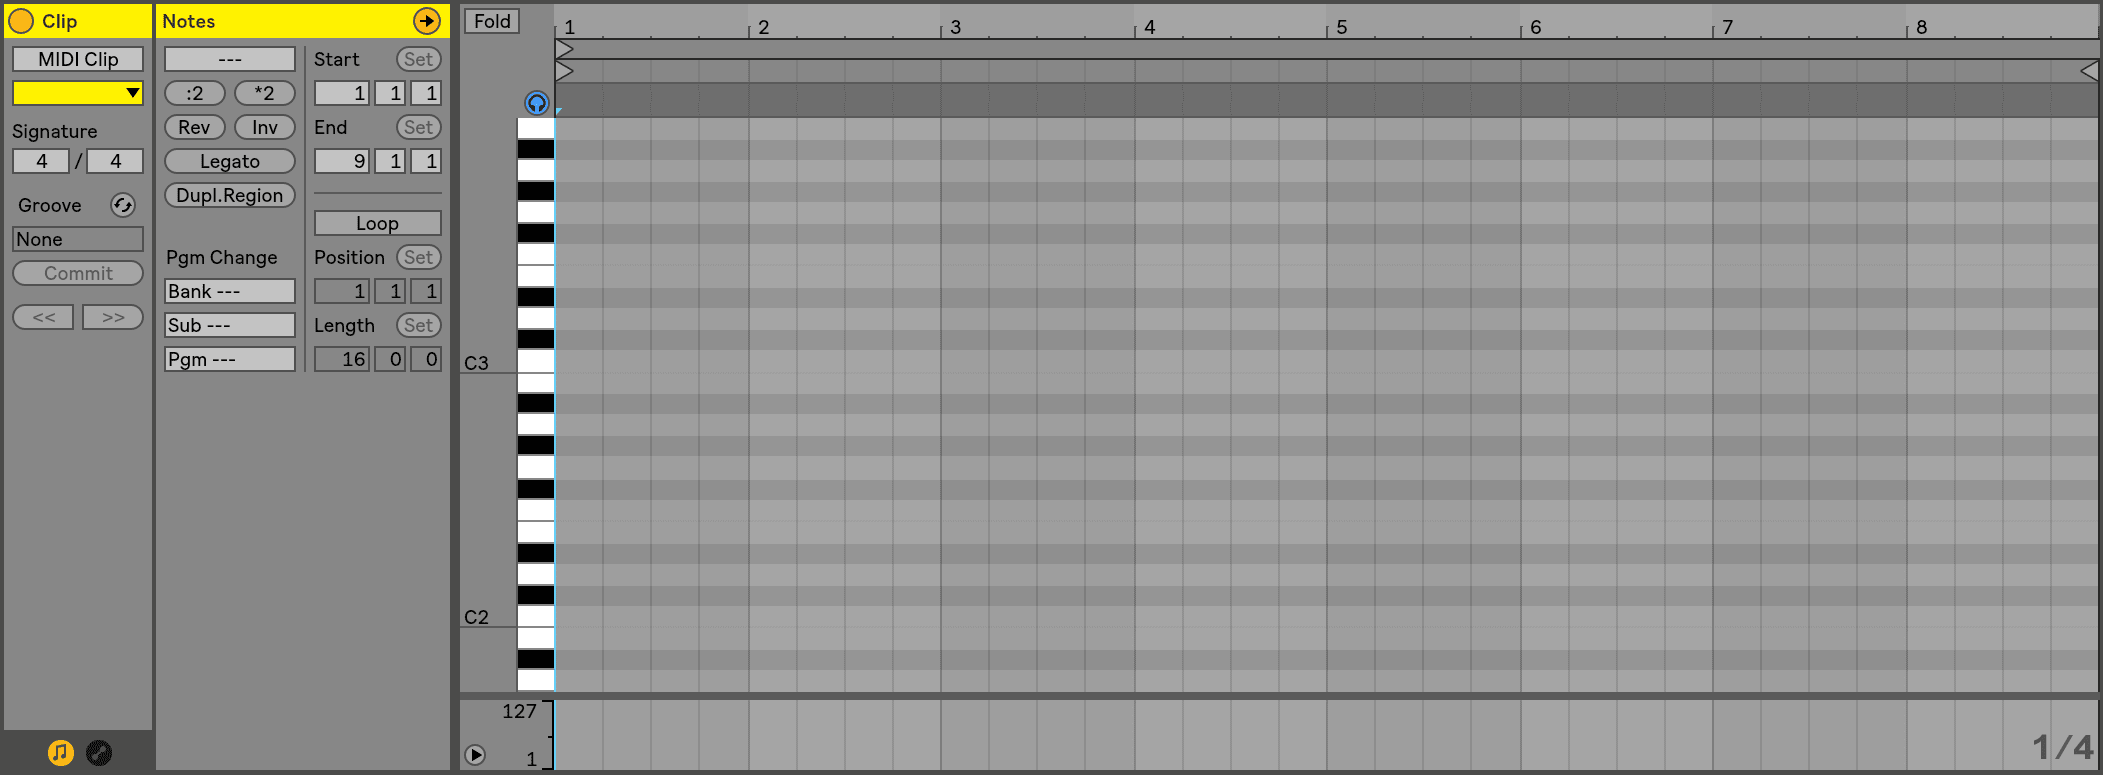
Piano Roll
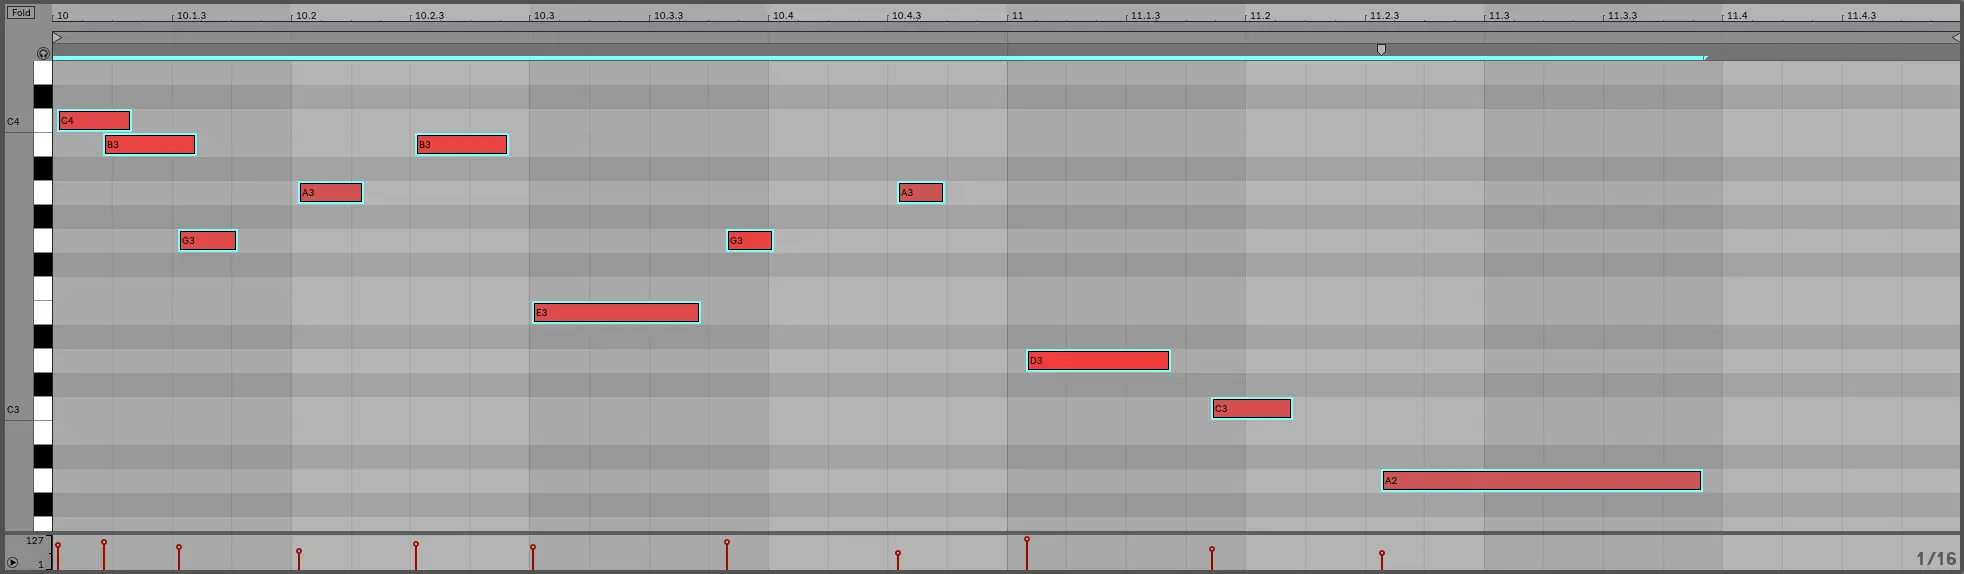
The Piano Roll is a graphical display of MIDI note data used to manually enter the pitch, length and velocity of notes. It is commonly used to create melodies, harmonies and chord progressions. It can also be utilized to create beats and rhythms. You can record MIDI using a MIDI controller or pencil in patterns using your mouse.
The vertical axis displays each note on the piano, while the horizontal axis displays time measured in beats|bars, like the arrangement view.
The piano roll can be accessed by double-clicking on the top half of a MIDI clip in the arrangement view. Alternatively, you can open the piano roll from session view by double-clicking on an empty MIDI clip slot or an existing MIDI clip.
If you would like to learn more about the piano roll in Ableton Live, visit our tutorial titled ‘How To Use The Piano Roll In Ableton Live.’
Part 4. Editing Clips In The Arrangement View
Learning how to edit clips in the arrangement view will allow you to manipulate and arrange audio and MIDI clips to form a finished song. The arrangement view is where you will spend most of your time when composing, recording, and mixing music in Ableton Live as it shows all of your clips arranged across a timeline.
| Reposition A Clip
To move a clip in the arrangement view, hover your mouse over the top half of a clip until your cursor becomes a hand, then click and drag it to a new position on the timeline.

| Slice
To slice a portion of an audio or MIDI clip, highlight the region of a clip that you would like to remove and press [DELETE] on your keyboard.

| Split
To split an audio or MIDI clip, click the beat|bar where you want to split the clip and press [COMMAND] + E on Mac or [CNTRL] + E on Windows.

| Crop
To crop a clip, start by hovering your mouse over the top left or top right corner of the clip. Once your cursor turns to a crop symbol, simply left-click and drag left or right to crop the clip.

| Fade In & Out (Audio Clips Only)
Fading an audio clip in or out can be achieved using the fade handles. Fade handles appear as small square boxes in the corners of an audio clip. Simply hover over an audio clip with your mouse to reveal the fade handles, then click and drag left or right to create a fade. You can change the shape of the fade by adjusting the diamond-shaped fade handles.

| Crossfade (Audio Clips Only)
To create a crossfade, start by placing two adjacent or overlapping audio clips in the arrangement view. Alternatively, you can split a single audio clip. Finally, left-click and drag the fade handles in the top corners of the connected clips. Adjust the diamond-shaped fade handles between the two clips to change the shape of the crossfade.

| Context Menu
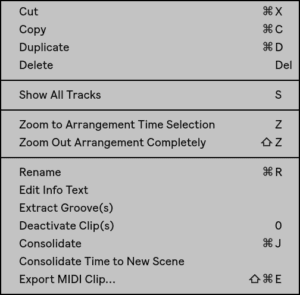
The context menu allows you to execute particular commands on many different parts of the Live interface. In the case of clips, the context menu allows you to rename, consolidate, freeze, duplicate, cut, copy and more. To access a clip’s context menu, simply right-click on the top half of a clip.
Part 5. Instruments
Ableton Live comes with a set of virtual instruments that you can use to create chord progressions, melodies, basslines and more. Instrument devices receive MIDI input from a controller or MIDI clip, then output audio. When you place MIDI data onto a MIDI track, it is played by the instrument that resides in the device view of that track.
To add an instrument to your Live project, double-click an instrument from the browser to add it to a new/selected MIDI track or simply drag and drop it onto an existing MIDI track.
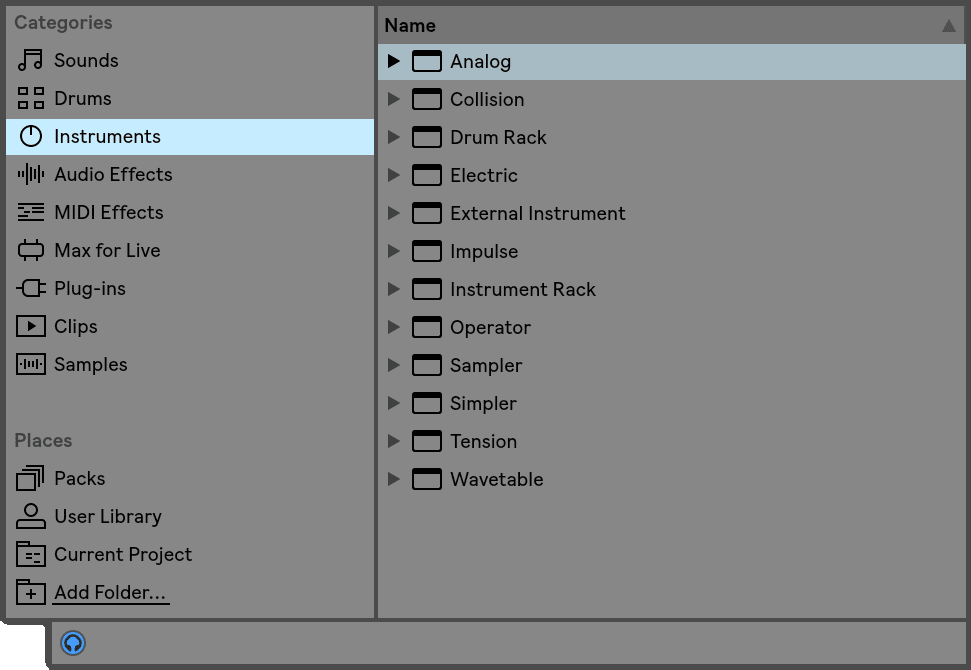
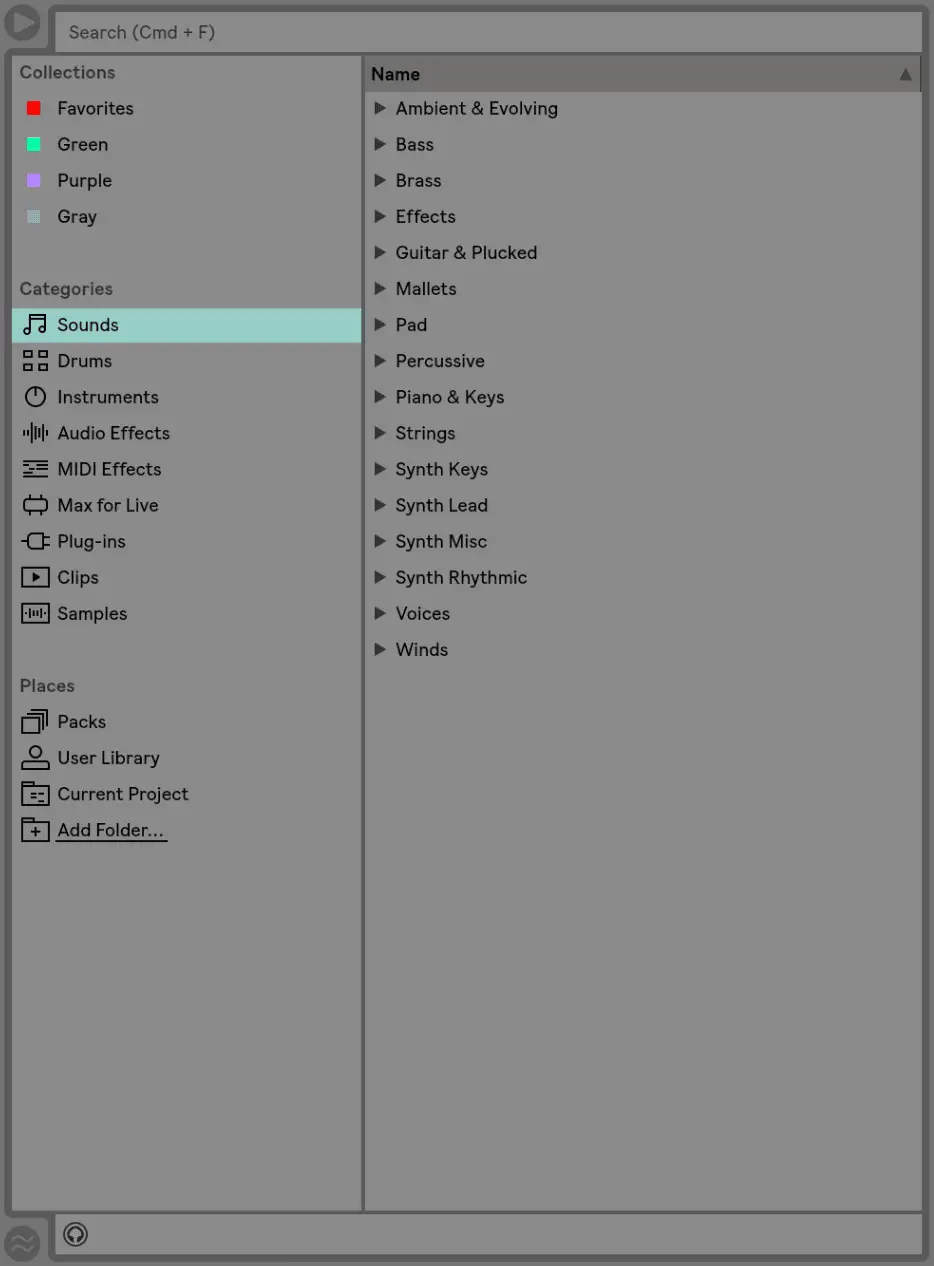
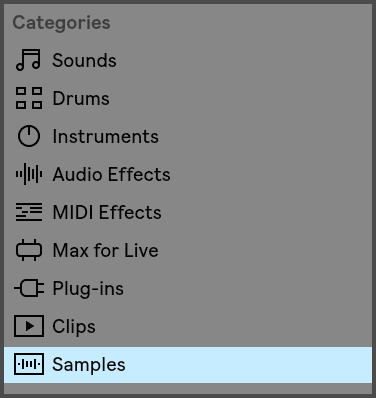
The Sounds tab in Live’s browser lists all of the presets from all of Live’s instruments, organized by the type of sound they make. The Drums tab shows all of your installed drum presets, including full drum kits and individual drum hits. You can preview sounds from these two tabs by first enabling the preview switch (headphones icon), then single-clicking sounds from the browser.
Use Your Computer’s Keyboard As A MIDI Keyboard
With Ableton Live, you can use your computer’s keyboard as a MIDI keyboard. This will allow you to test out and record using the many instruments and presets that come with Ableton Live.
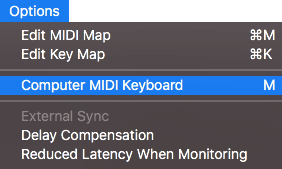
You can play the black keys from a typical piano using the top row of letters and the white keys using the second row. The bottom row of letters (Z to V) contains octave and velocity controls. To enable the computer MIDI keyboard, simply press ‘M’ or select the piano icon in the control bar.
Part 6. Effects
Effects are used to manipulate and enhance the clips on audio and MIDI tracks. Live comes with an incredible selection of audio effects and MIDI effects, allowing you to edit the layers of your projects in almost an infinite amount of ways. Learning how to effectively use effects will help you achieve professional-sounding mixes.
| Audio Effects
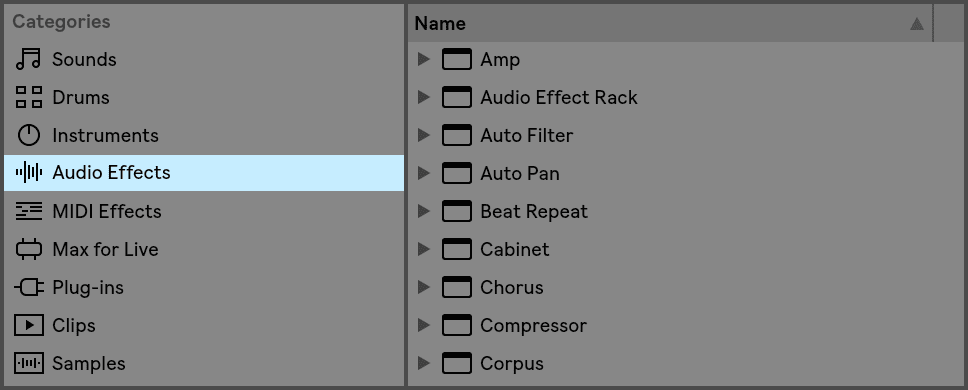
To use audio effects, start by navigating to Live’s browser. Next, select the ‘Audio Effects’ tab and choose which audio effect you would like to add to an audio or MIDI track. Finally, double-click on the device to add it to a new/selected track or simply drag and drop it onto an existing track. You can now modify the parameters of your chosen audio effect from the device view.
Audio effects can be used on both audio and MIDI tracks. Some of the most popular audio effects that come with Ableton Live include, EQ Eight, Compressor, Reverb, Simple Delay, Auto Filter and Limiter.
| MIDI Effects
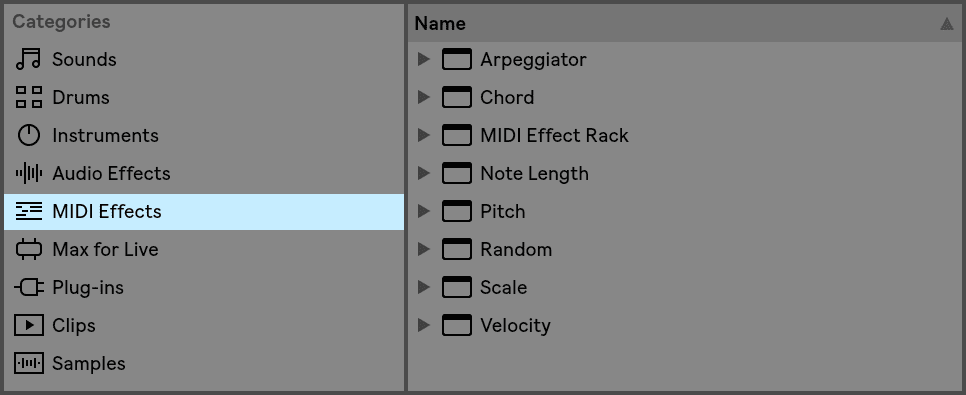
To use MIDI effects, select the ‘MIDI Effects’ tab from Live’s Browser and choose which effect you would like to add to a MIDI track. Finally, double-click on the device to add it to a new/selected audio track or simply drag and drop it onto an existing MIDI track. You can now modify the parameters of your chosen MIDI effect from the device view.
MIDI effects can only be used on MIDI tracks.
Part 7. Recording Audio
Recording audio in Ableton Live is a great way to capture a performance or incorporate external audio as part of a Live project. To record audio into Ableton Live, you need to use a device that can record sound, such as an external audio interface or your computer’s built-in microphone. You also need to make sure that you have everything set up correctly before you hit record. Whether you’re looking to record vocals, instruments or a podcast, here’s how to record audio in Ableton Live:
Step 1: Select Audio Input Device
To record in Ableton Live, start by selecting your recording device from the Audio settings in Live’s preferences.
Click on the Live (Mac)/File (Windows) menu in the top left corner of your screen and select Preferences. Next, select the ‘Audio’ tab on the left of the Preferences window. Lastly, select the applicable Driver Type and Audio Input Device from the drop-down boxes.
Step 2: Create Audio Track
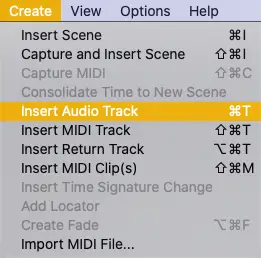
Next, create an audio track by selecting ‘Insert Audio Track’ from the Create menu. Alternatively, you can use the keyboard shortcut [COMMAND] + T on Mac or [CNTRL] + T on Windows.
Step 3: Select Microphone Input
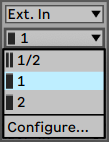
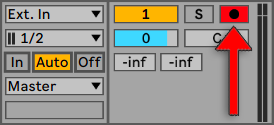
On your new audio track, select the Input Type and Input Channel. For the Input Type drop-down box, ensure ‘Ext. In’ is selected. If you are using an audio interface, select whichever input slot your recording device is plugged into from the Input Channel drop-down box. If you are unable to see the In/Out Section (as seen below) on the audio track, press [COMMAND] + [Option] + I on Mac or [CNTRL] + [Alt] + I on Windows to reveal it.
Step 4: Prepare To Record
Select the arm recording button (circle icon) in the mixer section of your audio track. Ensure your track isn’t clipping by observing the peak level monitor beside the arm record button.
Step 5: Record
Select the beat|bar on the arrangement view where you would like to begin recording. Lastly, click the circle record button from the control bar to begin recording. To finish recording, press the square stop button or press [SPACEBAR] on your keyboard.
If you would like to set a count-in before recording, expand the drop-down menu on the right side of the metronome icon. Locate the ‘Count-In’ category and select the duration of the count-in. You can select between a 1, 2 or 4 bar count-in.
![]()
Part 8. Automation
Automation is a powerful tool in Ableton Live that allows you to apply changes to parameters over time—it is the process of automatically modifying a parameter throughout the arrangement view. It is used to automatically adjust faders, knobs or buttons that control parameters within a track or device.
Skilfully crafting automation will boost the energy of your track and improve the professionalism of your productions. Automation can help avoid repetition, create variation and build a sense of anticipation.
Popular uses of automation include fading in or out volume, turning on and off audio effects, adjusting auto-filter cutoff or panning a track. Almost any parameter in Live’s interface and collection of devices can be automated. Here’s how to automate in Ableton Live:
Step 1: Enable Automation Arm
To create automation in Ableton Live, start by enabling automation mode by pressing ‘A’ on your keyboard or selecting the automation icon above the tracks list in the arrangement view. Automation lanes will now be displayed on each track.
![]()
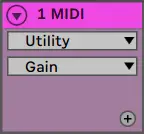
Step 2: Select Parameter
Next, left-click on the parameter you would like to automate. This can be anything from the Dry/Wet knob on the Reverb plugin to the Filter Cutoff on the Auto Filter plugin.
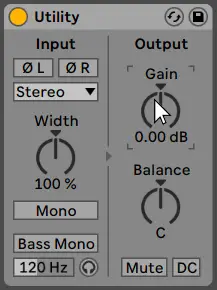
Your selected parameter will appear in the Device Chooser and Automation Control Chooser of the target track and will display its automation lane in the arrangement view.
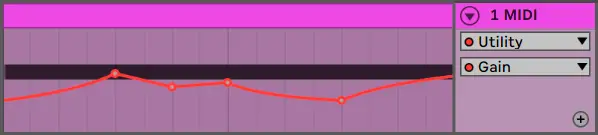
Step 3: Create Automation
Click on the dotted red line to start creating your automation envelope. To create automation breakpoints and a more accurate automation envelope, make sure Draw Mode is disabled by toggling the pencil icon in the control bar. A small red dot will appear on the Device and Automation Control to indicate that automation has been created.
If you would like to learn more about automating in Ableton Live, make sure to visit our tutorial titled ‘How To Automate In Ableton Live‘.
Part 9. Warp Function
Warping a sample allows you to sync audio to a chosen tempo, manually quantize audio and change the tempo of an audio clip without affecting its pitch. Warping is also useful for beatmatching, remixing, sampling, sound design, and other creative endeavors. Understanding Live’s warp feature will help you expand your creative palette and open up a whole new way to edit audio.
| How To Warp Audio
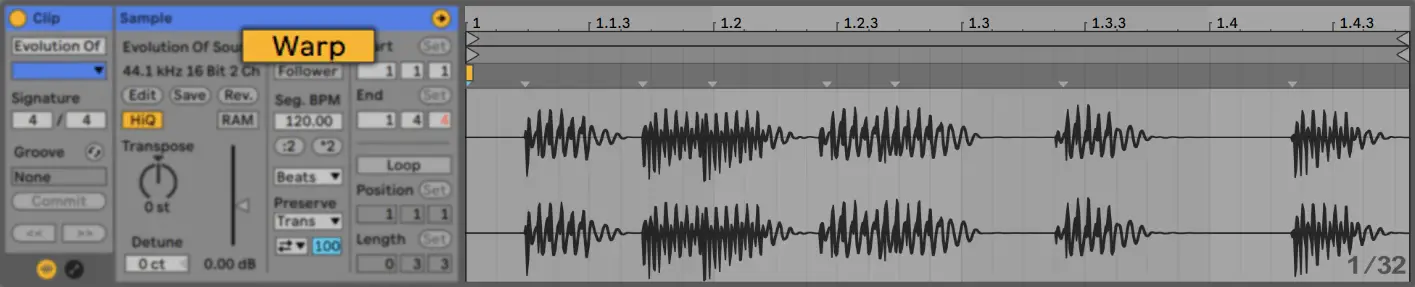
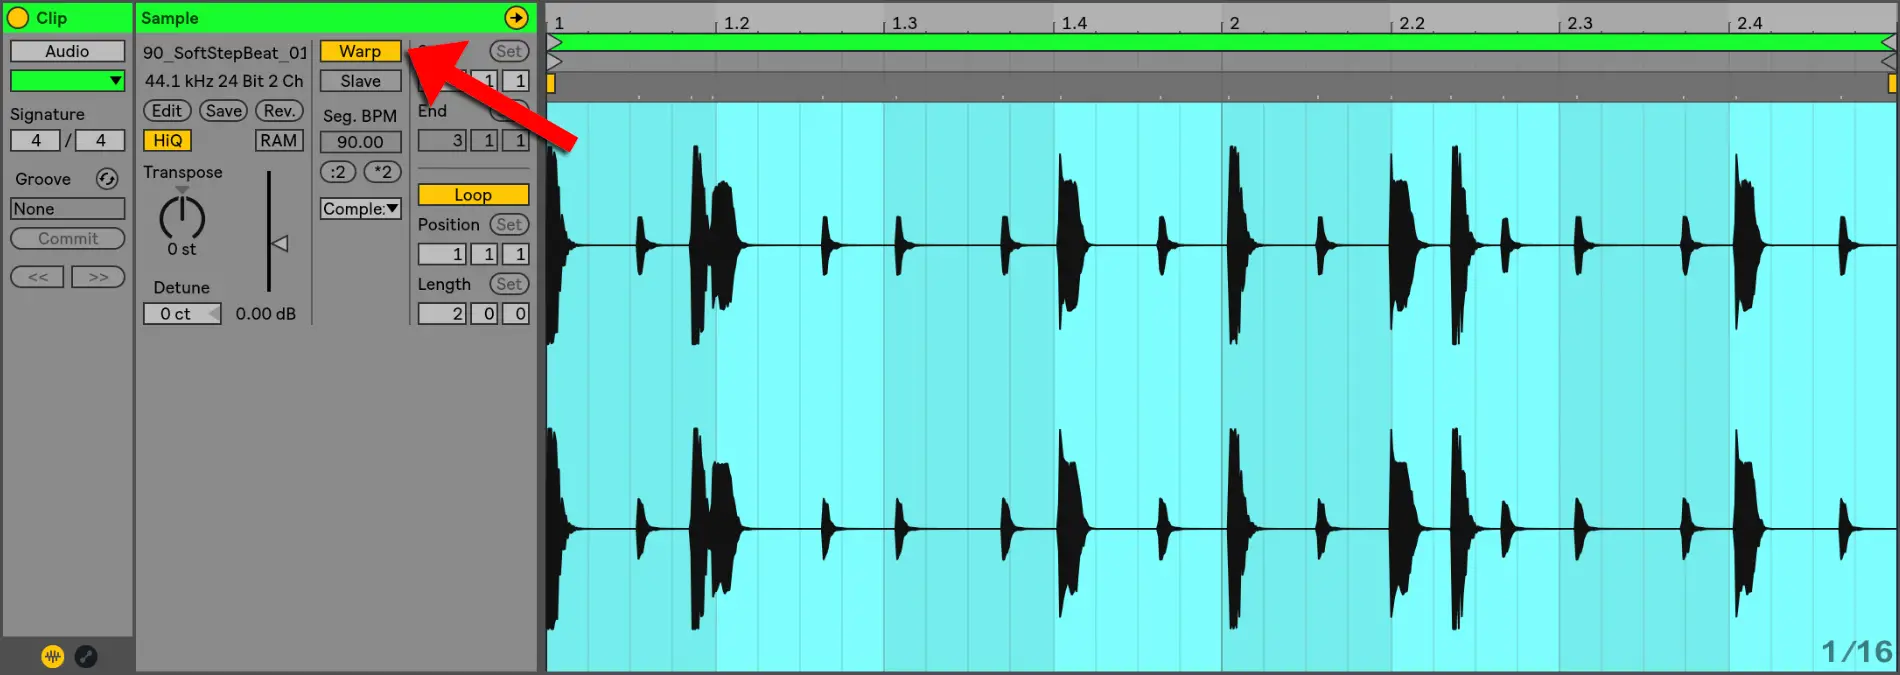
To warp an audio sample, open the clip view by double-clicking on the top half of an audio clip in the arrangement view. From the left side of the clip view, select the ‘Warp’ button.
Live will automatically estimate the original tempo of the sample in order to accurately sync it to the master tempo. If Live has inaccurately warped your sample, simply type its original tempo into the ‘Seg. BPM’ box below the ‘Warp’ button.
| Warp Modes
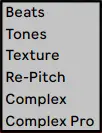
Live offers six time-stretching modes to accommodate different audio materials. When warping audio, choose a warp mode that best suits the characteristics of the audio sample.
• Beats Mode is best for rhythmic audio samples such as drum loops, beats or percussion
• Tones Mode is recommended for distinctly pitched audio such as vocals, bass-lines and other monophonic instruments
• Texture Mode works best for textured sounds without a distinct pitch such as noise, atmospheric pads and other polyphonic audio
• Re-Pitch Mode stretches audio by adjusting pitch, similar to a vinyl record. Adjusting the master tempo or Segment BPM will alter the pitch of any audio in Re-Pitch warp mode
• Complex Mode works best for audio with a lot of character such as entire songs or multi-layered audio
• Complex Pro Mode offers better sounding results than Complex Mode but requires more CPU load
| Warp Markers
Warp Markers are used to manually stretch locations of a sample and lock points of a sample to the grid. They allow you to create specific rhythm and timing changes to sections of a sample.
Create a warp marker by double-clicking anywhere on the clip view or by double-clicking one of the grey pseudo warp markers above the sample’s waveform. When an audio sample is first warped, pseudo warp markers are automatically placed at each transient.
Warp markers can be moved to different positions on the timeline by clicking and dragging or using the arrow keys on your keyboard. Holding [Option/Alt] while adjusting a Warp Marker will temporarily disable the grid, allowing you to place it more precisely.

Part 10. Quantizing
Quantization is a powerful feature of Ableton Live that allows you to instantly snap MIDI and audio to a fixed grid. It is used to correct imperfect timing, iron out mistakes and instantly make your recordings rhythmically faultless. Live allows for the quantization of both MIDI and audio clips.
Quantizing works by detecting the transients in a piece of audio then moving them in line with the grid. For MIDI, Ableton simply detects the beginning and end of MIDI notes.
| How To Quantize MIDI
Step 1: Select MIDI Clip
Double-click on the top half of the MIDI clip you would like to quantize. This will open up the piano roll and you will be able to see the notes of that MIDI clip.
Step 2: Select MIDI Notes
Next, select the MIDI notes you would like to quantize. Press [COMMAND + A] on Mac or [CNTRL + A] on Windows to select all notes within a MIDI clip. Press [COMMAND + A] on Mac or [CNTRL + A] on Windows to select all of the notes in the MIDI clip.
Step 3: Quantize
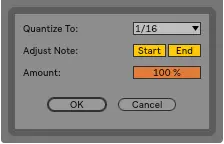
Open the Quantize settings by pressing [SHIFT + COMMAND + U] on Mac or [SHIFT + CNTRL + U] on Windows or right-clicking on the piano roll and selecting ‘Quantize Settings’. Alternatively, you can instantly quantize the highlighted MIDI notes using the previously used settings by pressing [COMMAND + U] on Mac or [CNTRL + U] on Windows.
Finally, make sure ‘Start’ is selected. Choose ‘End’ if you would like to quantize the end of each selected note. Select the grid you wish to quantize to as well as the amount of quantization then hit ‘OK.’
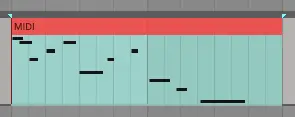
Below is an example of a MIDI clip that has been quantized using the above settings:

| How To Quantize Audio
Step 1: Select Audio Clip
Double-click on the top half of the audio clip you would like to quantize. This will reveal the clip view of the audio clip.
Step 2: Select Region
Next, select the region of the audio sample that you would like to quantize by clicking and dragging on the top half of the waveform. Press [COMMAND + A] on Mac or [CNTRL + A] on Windows to select the entire audio clip. Ensure the ‘Warp’ function is turned on.
Step 3: Quantize
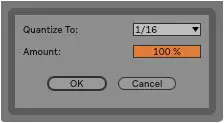
Open the Quantize settings by pressing [SHIFT + COMMAND + U] on Mac or [SHIFT + CNTRL + U] on Windows or by right-clicking on the piano roll and selecting ‘Quantize Settings’. Alternatively, you can instantly quantize the highlighted audio region using the previously used settings by pressing [COMMAND + U] on Mac or [CNTRL + U] on Windows.
Select the grid you wish to quantize to as well as the amount of quantization then hit ‘OK.’
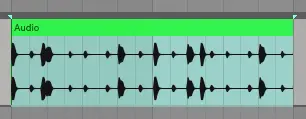
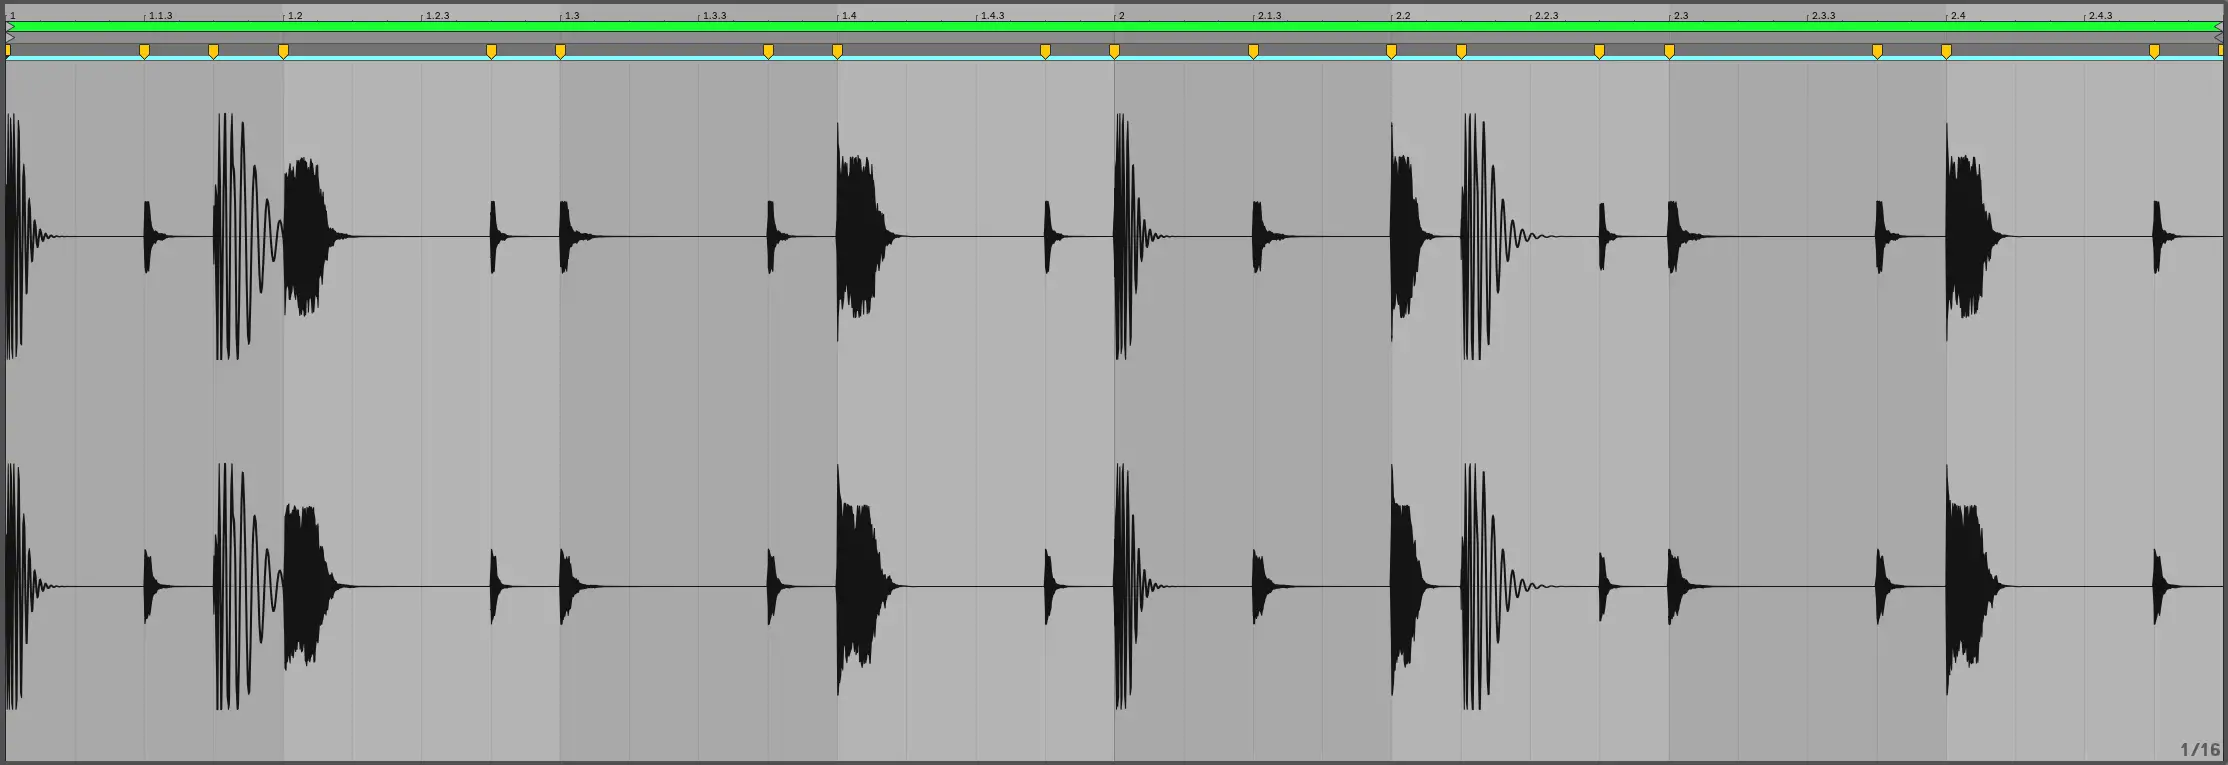
Below is an example of an audio clip that has been quantized using the above settings:
If you would like to learn more about quantizing in Ableton Live, make sure to visit our tutorial titled ‘How To Quantize In Ableton Live‘.
Part 11. Exporting
Exporting your Ableton Live project is the last step in the process of creating a track. It allows you to save your project as a more distributable format. The export window includes a variety of different settings that determine the format, quality, length and size of your project when exported.
To open the export window, head to the Live (Mac)/File (Windows) menu and select ‘Export Audio/Video’. Alternatively, you can use the keyboard shortcut [COMMAND] + [Shift] + R on Mac or [CNTRL] + [Shift] + R on Windows.
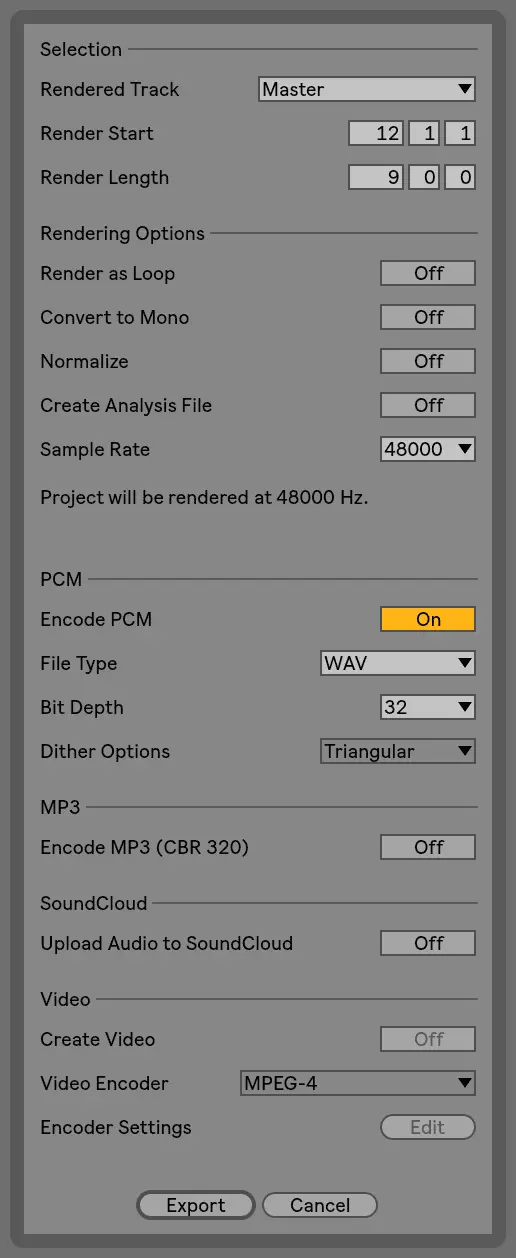
Once the export window has opened, you can save your project as an audio file by selecting your preferred rendering settings and clicking ‘Export’. Next, choose the location on your computer where you would like to save the exported audio. Click ‘Save’ and the rendering process will begin.
If you would like to learn more about exporting in Ableton Live, make sure to visit our tutorial titled ‘Importing & Exporting In Ableton Live‘.
Related Posts:
Top 100 FAQ | Ableton Live
Top 10 Artists That Use Ableton Live
30 Ableton Live Keyboard Shortcuts You Need To Know
Want To Know More?
Here at Live Aspects, we have dozens of useful lessons and tutorials created to enhance your music production skills and help speed up the learning process. You can access our huge range of music theory lessons and production tips and tricks here.