As a music producer, the ability to export your tracks in various formats is a critical skill to have. Whether you’re creating music for your own enjoyment or working with other artists, knowing how to export your GarageBand projects in different formats can help ensure that your music is accessible and shareable across various platforms.
Of all the available formats, MP3 is perhaps the most widely used and versatile. Not only does it offer good sound quality, but it also has a relatively small file size, making it easy to share and distribute online.
To export your GarageBand project to MP3, first head to the Share menu at the top of your screen and select ‘Export Song To Disc’. Check the ‘MP3’ box in the middle of the export window and press ‘Export’.
Hi, I’m Ben from Live Aspects and in four easy steps, I’ll show you exactly how to export your GarageBand project as an MP3 file. I’ll also show you how to save your project to MP3 using the GarageBand iOS app.
- Step 1: Open GarageBand Project
- Step 2: Go To Share > Export Song To Disc
- Step 3: Select ‘MP3’
- Step 4: Export Project
Without further ado, let’s get started!

Step 1: Open GarageBand Project
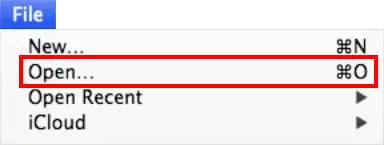
To export GarageBand to MP3, start by opening the project you would like to export. You can do this by heading to the File menu and selecting ‘Open’. Alternatively, you can use the keyboard shortcut [COMMAND] + O.
Step 2: Go To Share > Export Song To Disc
Once your project has loaded, head to the Share menu at the top of your screen and select ‘Export Song To Disc’. A new window will appear.

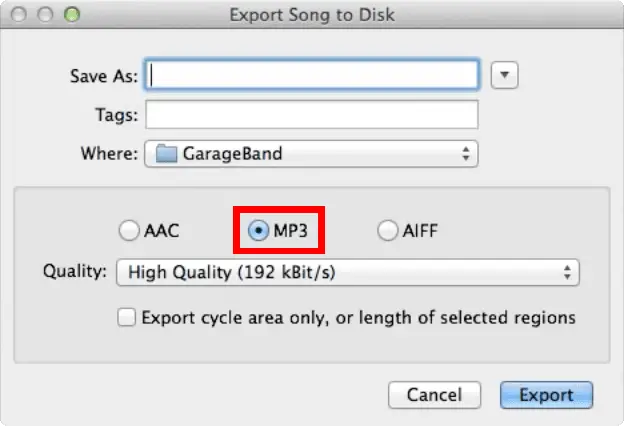
Step 3: Select ‘MP3’
Next, check the ‘MP3’ box in the middle of the export window. Remember to title your track, choose the export location and select the quality of the MP3 file.
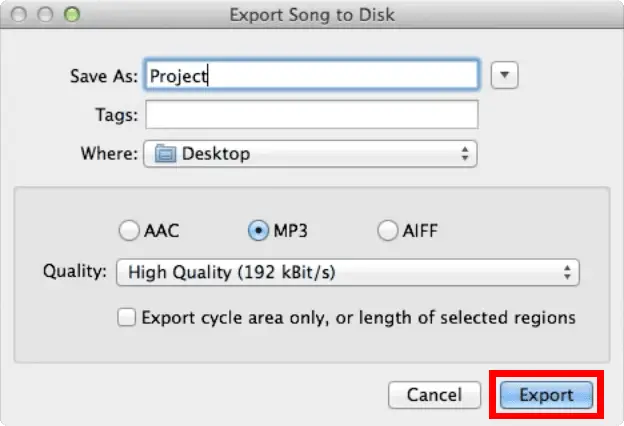
Step 4: Export Project
Lastly, click the ‘Export’ button. Your GarageBand project will now be saved to your computer as an MP3 file.
| Export As MP3 In GarageBand iOS App
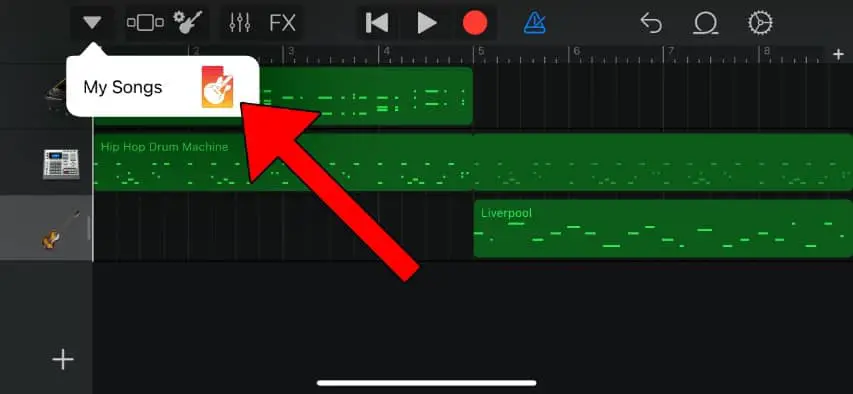
Step 1: Open ‘My Songs’
To export as MP3 in the GarageBand iOS app, start by pressing the arrow in the top left corner of your screen and selecting ‘My Songs’.
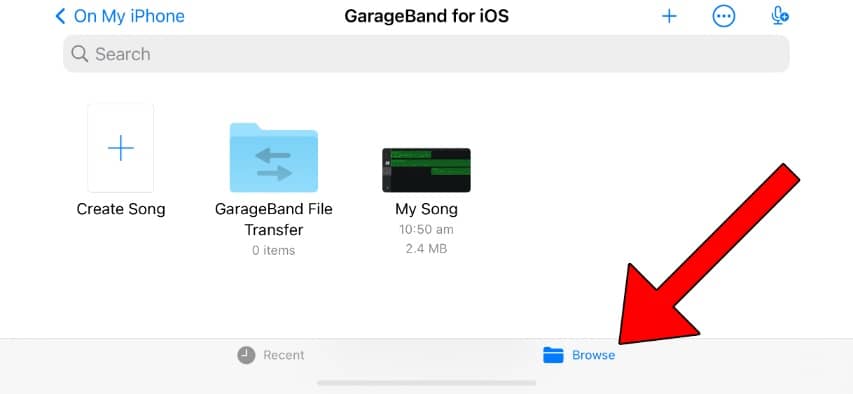
Step 2: Open The Browse Menu
Select ‘Browse’ and navigate to the folder containing your GarageBand projects.
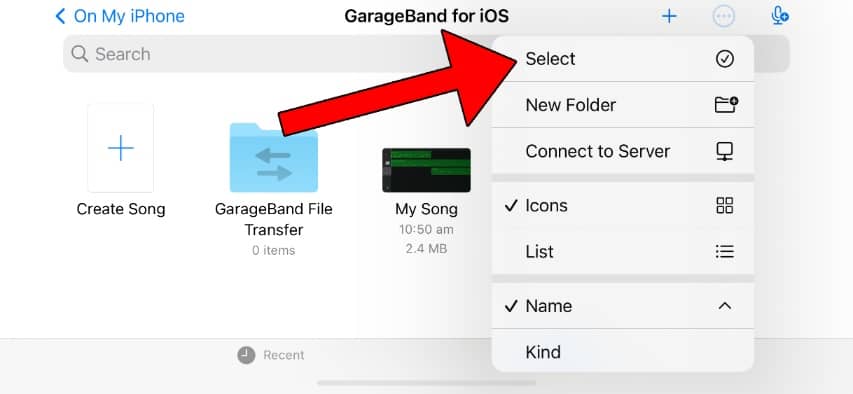
Step 3: Press ‘Select’
Tap the three dots icon in the top right corner and press ‘Select’.
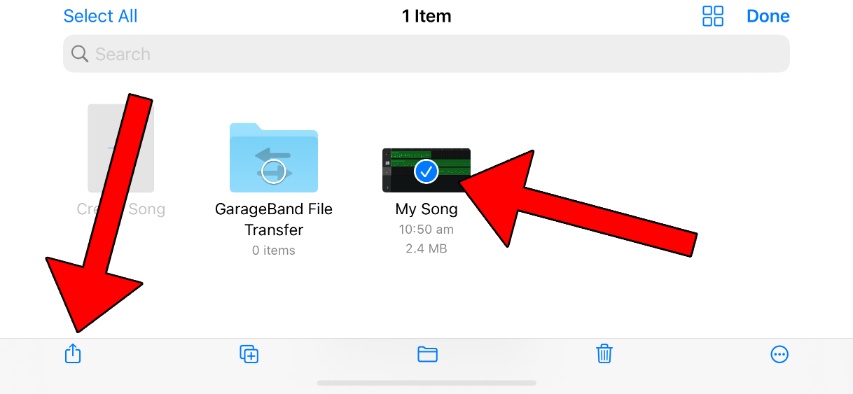
Step 4: Select Song & Share
Next, select your song and tap the Share icon in the bottom left corner of your screen.
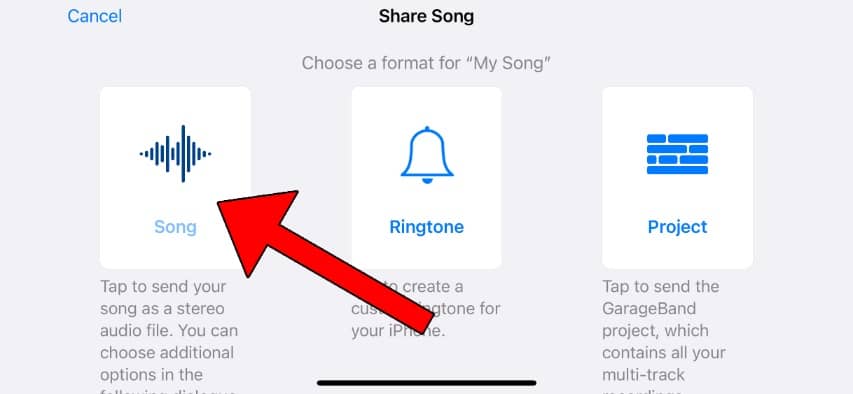
Step 5: Tap ‘Song’
Select the ‘Song’ format to save your GarageBand project as a stereo audio file.
Step 6: Select ‘Highest Quality (iTunes Plus)’
Select the ‘Highest Quality (iTunes Plus)’ option from the Audio Quality list.

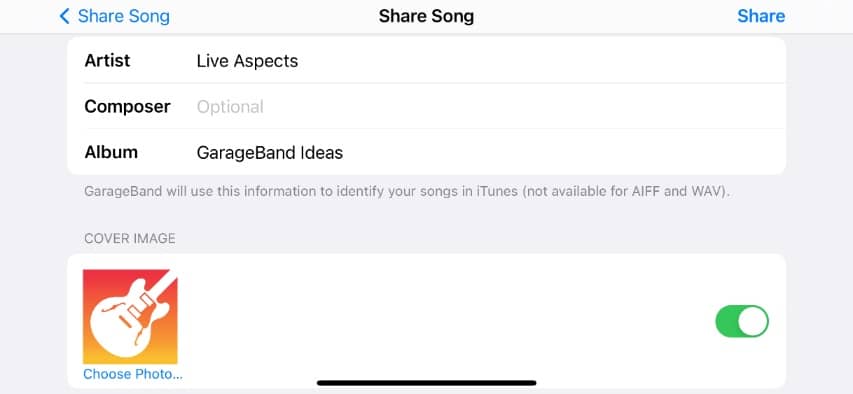
Step 7: Input Song Info & Cover Image
Scroll down and input the Artist, Composer and Album title. You can also select a cover image for your track. Once you have inputted this information, press ‘Share’ in the top right corner.
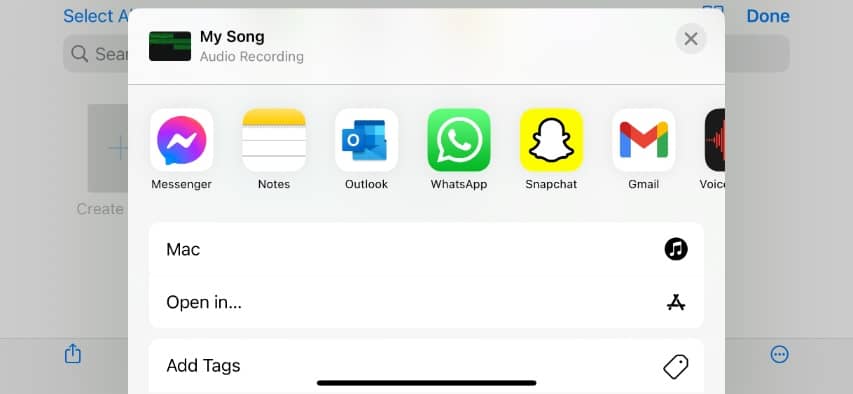
Step 8: Share Song To A Computer
Using one of the options from the Share window, send your track to a computer.
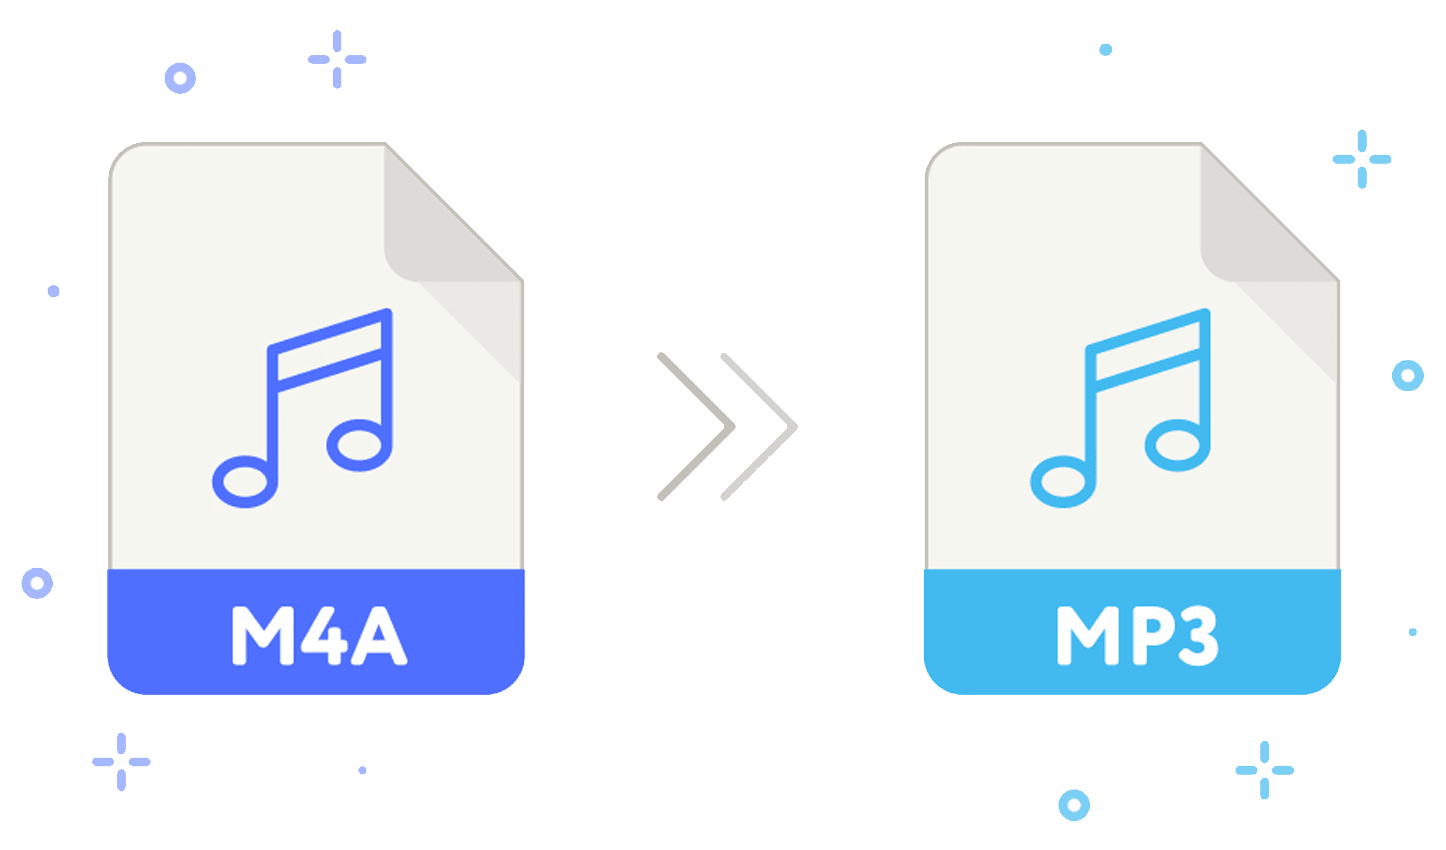
Step 9: Convert M4A To MP3
For the final step, you will need to convert your GarageBand track to MP3 using your computer. We recommend using an online converter like FreeConvert or Convertio. Simply locate your song, upload it to either of these websites then download it as an MP3 file.
Want To Know More?
Here at Live Aspects, we have dozens of useful lessons and tutorials created to enhance your music production skills and help speed up the learning process. You can access our huge range of music theory lessons and production tips and tricks here.