With notable tracks like Fisher’s ‘Losing It’ and ACRAZE’s ‘Do It To It’, tech house has become one of the most popular subgenres of house music. Tech house combines features of techno with house, distinguishable by four-to-the-floor kicks, off-beat hats and rolling basslines. Many acclaimed tech house producers such as Chris Lake, John Summit and Joel Corry utilize Ableton Live’s tools and workspace to create chart-topping hits.
If you’re new to music production or simply looking to improve your tech house projects, this resource will help you build and structure tech house tracks like the pros. From mixing and mastering to sidechaining and FX, this 10-step guide will show you how to create every aspect of a tech house track.
- Step 1 | Set Project Tempo
- Step 2 | Drums
- Step 3 | Bass
- Step 4 | Synths, Keys & Pads
- Step 5 | Vocals
- Step 6 | Buildup
- Step 7 | FX
- Step 8 | Audio & MIDI Effects
- Step 9 | Song Structure
- Step 10 | Mixing & Mastering
Without further ado, let’s get started!

Step 1 | Set Project Tempo
When creating tech house in Ableton Live, it’s important to make sure your project is set to an appropriate tempo. Traditionally, tech house is made at a tempo of 124 to 128 beats per minute. To change your project’s tempo, simply left-click on the project tempo box in the top left corner of the Ableton window and type in your preferred bpm. You can also left-click and use the up and down arrows on your keyboard. Your project’s tempo can be changed at any time.
To learn more about changing tempo in Ableton Live, click here.

Step 2 | Drums
Drums carry the weight of a tech house record and are a staple in any electronic composition. They contribute to the groove of a track and provide a foundation for keeping time. The off-beat hi-hat and four-to-the-floor kick drum are distinguishing features of tech house music. A typical tech house beat will also include a clap or snare on beats 2 and 4, as well as various percussive elements.
When crafting tech house drums, producers will often use a combination of audio and MIDI tracks to create different aspects of their drum beats.

Creating Drums Using Audio Tracks:
Chopping, trimming and manipulating pre-made drum loops or one-shots can be achieved using audio tracks in the arrangement view. To import drum samples into your Ableton project, start by creating an an audio track. Select Insert Audio Track from the File menu or press [COMMAND + T] on Mac or [CNTRL + T] on Windows. Then simply drag and drop one-shots, loops or pre-made beats onto your audio track in arrangement view.
To slice a portion of an audio clip, highlight the region of an audio clip that you would like to remove and press [DELETE] on your keyboard.
To split an audio clip, click the beat|bar where you want to split the clip and press [COMMAND + E] on Mac or [CNTRL + E] on Windows.
To crop an audio clip, start by hovering your mouse over the top left or top right corner of the audio clip. Once your cursor becomes a crop symbol, simply left-click and drag left or right to crop the clip.
Click here to learn more about editing audio in the arrangement view.

Creating Drums Using MIDI Tracks:
Ableton Live comes with three instrument plugins that can be used to create drum beats using a selection of individual drum samples. Live’s Drum Rack can be used to create drum kits out of a selection of drum samples. Ableton’s Simpler and Sampler instruments can be used to create MIDI patterns out of one-shot drum samples.
Live’s drum instruments can be found under the Instruments tab in Live’s Browser. You will also find a large collection of pre-made Drum Rack kits under the Drums tab in Live’s Browser. Double-click an instrument or kit to add it to a new or the selected MIDI track.
To make beats using the piano roll, start by importing drum samples onto the empty drum pads in Live’s Drum Rack or onto the sample display in Simpler or Sampler. Next, create a MIDI clip by highlighting a number of bars in the arrangement view and pressing [COMMAND + Shift + M] on Mac or [CNTRL + Shift + M] on Windows. Access the piano roll by double-clicking on the top coloured region of your new MIDI clip. Lastly, enable Draw Mode by pressing B on your keyboard and pencil in notes.

Step 3 | Bass
Bass is an essential element of any tech house production, providing both a rhythmic and harmonic component. In combination with the kick drum, bass is the driving force that controls an entire groove and supports the mid to high frequency elements of a track. In tech house, a song’s bassline is often composed of a 4 or 8 bar melody that loops throughout the entire duration.

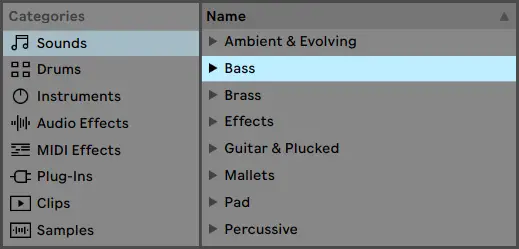
To find the perfect bass preset for your tech house track, navigate to the Sounds category in Live’s Browser. Click on the arrow beside the Bass category to reveal a list of bass presets. Single-click on a preset to hear a preview or double-click to load it onto a new or the selected MIDI track.
To create a tech house bassline, create a MIDI clip by highlighting a number of bars in the arrangement view and pressing [COMMAND + Shift + M] on Mac or [CNTRL + Shift + M] on Windows. Next, access the piano roll by double-clicking on the top coloured region of your new MIDI clip. Lastly, enable Draw Mode by pressing B on your keyboard and pencil in notes.
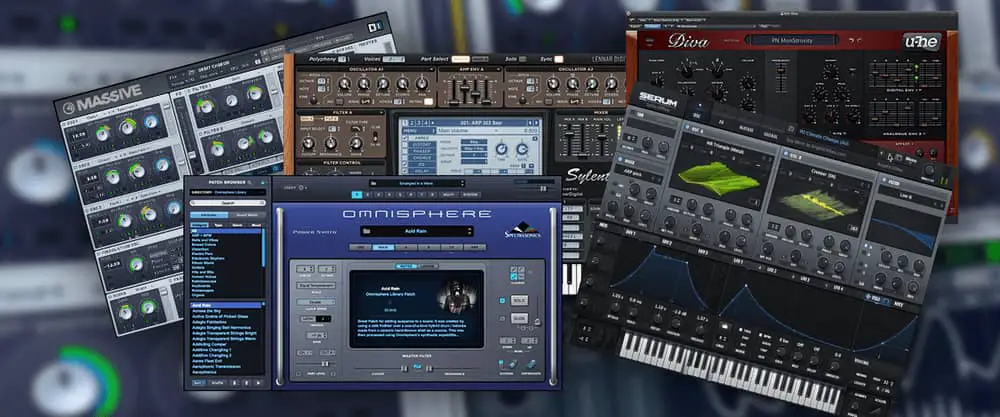
While Ableton Live comes with a terrific library of bass presets, tech house producers will often utilize external instrument plugins to find and create their bass presets. Xfer Serum, NI Massive and Lennar Digital Sylenth1 are three of the most popular external plugins used to create basslines. If you have a selection of third-party plugins installed on your computer, try experimenting with one of these when creating your bassline. You can access any VST plugins from the Plug-Ins tab of Live’s Browser.
Sub Bass
Sub bass is a bassline layer made up of a single sine wave or square wave. It occupies the lowest frequencies of the frequency spectrum and is responsible for the bass exhilaration that defines the tech house genre. While your bass and sub bass may be melodically identical, they each occupy a unique frequency range. Your sub bass will often sit an octave (or more) lower than your main bass layer.
If your main bass patch already occupies the low frequencies of a sub bass, your track may not need a sub bass layer. When incorporating a sub bass layer into your tech house tracks, use an EQ to remove the lower frequencies of your main bass patch to ensure your mix sounds clean.
If you’d like to read more about sub bass in Ableton Live, visit our ‘Guide To Sub Bass In Ableton Live’.

Sidechaining
It’s not uncommon for the frequencies of your kick and bass layers to clash, causing your track to sound distorted and unpleasant. Sidechaining is a production technique where the volume of one audio input is reduced when another is played at the same time. Sidechaining ensures that your kick can punch through the mix.
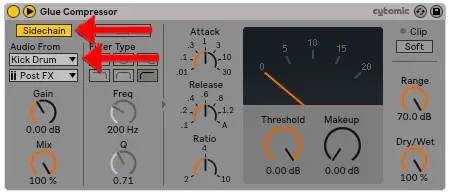
Sidechaining can be achieved using Live’s Glue Compressor plugin. Simply load the plugin onto your bass channel and select your kick drum from the Audio From drop-down box. Next, adjust the Threshold, Attack and Release value to create your desired sidechain effect.
Step 4 | Synths, Keys & Pads
Synths, keys and pads accompany and emphasize the melodic elements of a track such as vocals or leads. Incorporating chord progressions and melodies into your tracks can help convey particular emotions and define different sections of a song.

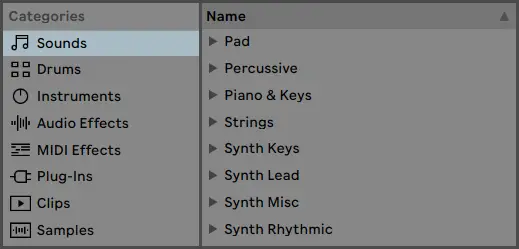
To add a synth element to your tech house track, navigate to the Sounds category in Live’s Browser. Click on the arrow beside an instrument type to reveal a list of presets. Single-click on a preset to hear a preview or double-click to load it onto a new or the selected MIDI track.
To create a melody or chord progression using your chosen synth preset, create a MIDI clip by highlighting a number of bars in the arrangement view and pressing [COMMAND + Shift + M] on Mac or [CNTRL + Shift + M] on Windows. Next, access the piano roll by double-clicking on the top coloured region of your new MIDI clip. Lastly, enable Draw Mode by pressing B on your keyboard and pencil in notes.
If you have a MIDI controller connected to your computer, you can record using your device by first arming your MIDI track for recording. Select your MIDI track’s arm recording button beside the solo/cue button then hit record at the top of your screen.
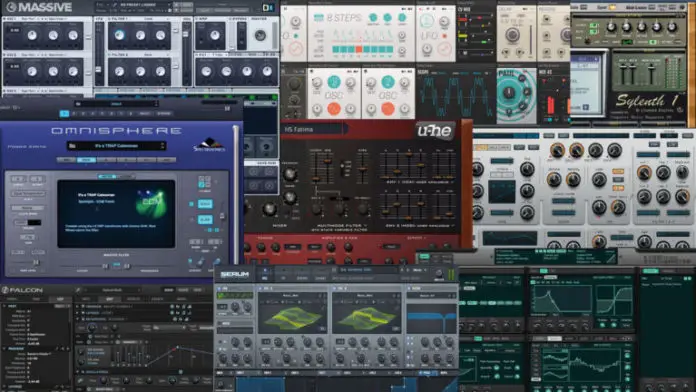
While each edition of Ableton Live comes with a large selection of synth presets, popular tech house producers will often expand their library using third-party VST plugins. Popular VST synth plugins include Spectrasonic Omnisphere, Xfer Serum, ReFX Nexus and U-He Diva. Any third-party VST plugins you have installed can be accessed from the Plug-Ins category.
If you’re struggling to create a melody or chord progression for your track, try experimenting with MIDI files. MIDI files contain pre-made sequenced MIDI data such as pitch, note duration, velocity and tempo. MIDI files can be used to instantly import basslines, melodies or chord progressions.
To download a collection of free MIDI files, visit our previous guide on ‘Using MIDI Files In Ableton Live’.
Step 5 | Vocals
From vocal chops to rap, vocals can help accompany the emotional intent of an instrumental, as well as convey a particular message or idea. Vocals are often the most catchy and memorable aspects of a song as they provide audiences with a way to participate and interact with a track.
To record vocals directly into your sessions, start by creating an audio track by selecting Insert Audio Track from the Create menu or by pressing [COMMAND + T] on Mac or [CNTRL + T] on Windows. Next, select an audio input device from the Input Type drop-down box. Select the arm recording button beside the solo/cue button then hit record at the top of your screen.
Tech house artists will traditionally use a variety of audio FX to manipulate how their vocals sound. These FX include pitch correction (eg. Auto-Tune or Melodyne), EQ, compression, reverb, delay etc. Often, producers will also layer their main vocal recordings with additional vocal layers such as harmonies or ad-libs.
If you’re looking for a collection of royalty-free vocal samples, Cymatics have put together an extensive list of free packages that can be used in your tech house tracks. Click here to download thousands of royalty-free vocal recordings.

Step 6 | Build-Up
A build-up is the section immediately before the chorus (or drop) of the a tech house song. Build-ups are used to create tension and increase expectation, helping to maximise the impact of the main section of a song – the drop. A good build-up creates excitement, anticipation and suspense. Build-ups in tech house tend to have a length of 4, 8, 16 or 32 bars.
A common technique in a tech house build-up is to half the rhythmic subdivision of a snare/clap pattern multiple times throughout the build-up (from 1/4th, to 1/8th and then to 1/16th). This technique helps increase suspense and alerts the listener that the song’s peak is approaching.
Build-ups are often assembled using a combination of the following elements:
| Snares/Claps – Snares and claps are often used in tech house build-ups as their mid-high frequency composition creates tension that is resolved by the bass frequencies of the chorus
| Uplifters – Uplifters are a sound effect that rise in volume or pitch, sometimes both. The increase in volume of an uplifter signifies the nearing of the chorus (or drop), putting the listener in a state of expectancy.
| Fills – Whether it’s a short vocal phrase, a drum fill or a synth pattern, fills are the concluding element of a build-up. Fills traditionally have a duration of 1-4 beats.
| Other Elements – Some additional elements to consider incorporating into your build-ups include downlifters, percussion, cymbals, sirens, etc.
If you’d like to learn more about creating build-ups in Ableton Live, visit our previous post titled ‘How To Make A Build-Up In Ableton Live’

Step 7 | FX
FX are used to create more interesting transitions between sections and enhance the major elements of a track. They can also be used to thicken up your tracks and thicken any unoccupied sections.
Some common sound effects used in tech house productions include white-noise, vinyl crackle, audience or talking samples and nature sounds (wind, waves, birds chirping etc).
Ableton Live also comes with a selection of FX samples which can be accessed from the Sounds category of Live’s Browser. If you’re looking to expand your FX library with a free collection of royalty-free FX samples, make sure to check out Echo Sound Works FX Toolkit.

Step 8 | Audio & MIDI Effects
Audio & MIDI Effects can be used to enhance the elements of your track and create a cleaner overall mix. Ableton Live comes with an incredible selection of stock effects that can be accessed from the Audio Effects and MIDI Effects categories in Live’s Browser. Drag and drop an effect onto an audio or MIDI track or simply double-click to add it to the selected track. While MIDI effects can only be added to MIDI tracks, Live’s audio effects can be used on both audio and MIDI tracks.

| Compression is used to to reduce the difference in level between the loudest and quietest parts of an audio signal.
| EQ is used to increase or reduce low, mid and high frequencies of an audio signal in order to achieve a more pleasing sound or remove errors in a recording.
| Delay is used to add echo to an audio signal. It can also be used to make audio sound wider or to create the illusion of depth.
| Reverb is used to add depth to an audio signal or to mimic it being played back in a physical space.
| Saturation is used to add thickness to an audio signal and make it sound fuller, more punchy, and louder.
| Limiting is used to boost the perceived volume of a particular sound and to limit the level of a signal to a certain threshold.
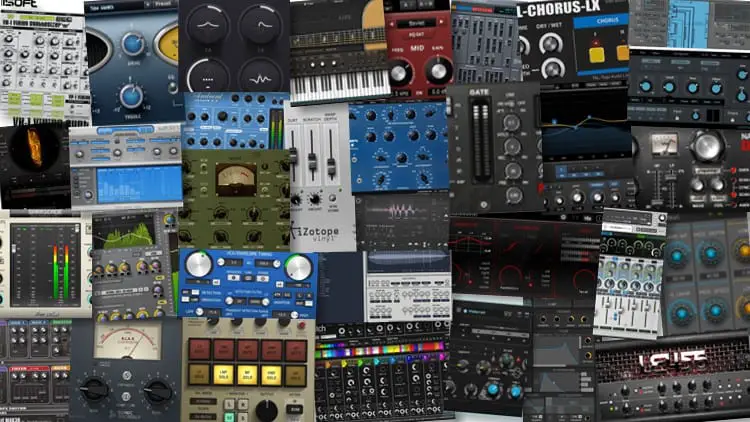
Popular tech house producers will generally use a combination of Ableton stock plugins and external VST plugins. Some of the most notable effect plugins include iZotope Ozone, RC-20 Retro Color, Dada Life’s Sausage Fattener, FabFilter Pro-Q 3 and Xfer OTT. If you’re after a comprehensive list of free effects plugins, click here.
Step 9 | Song Structure
It’s time to start structuring your layers into a full-length song. Copy, paste, duplicate and arrange clips in the Arrangement View to construct your track. While the structure of popular tech house tracks comes in many shapes and forms, below is the most commonly used song structure in tech house:
Intro, Verse, Build-Up, Drop/Chorus, Verse, Build-Up, Drop/Chorus, Outro
| Intro – Many tech house songs will often be available in two versions: a Radio Edit and an Extended Mix. A Radio Edit will often contain a short intro and sometimes no intro at all. An Extended Mix, on the other hand, will usually contain 8 or more bars of introduction to allow for DJ’s to mix tracks in and out.
| Verse – The verse is generally where a vocal element is first introduced, as well as a natural increase in tension in preparation for the buildup.
| Buildup – When constructing a build-up, try to use elements that compliment the drop, as well as each other. A good build-up is key to a good drop.
| Drop/Chorus – The drop/chorus is a tech house track’s climax. It is the most exciting part of a song and is where your bass and drums should dominate the mix.
| Outro – An outro is the final element of a tech house production and helps bring a track to a conclusion. In an Extended Mix, an outro will typically last for 8 bars or more, making it easier for DJ’s to transition to their next song.

Step 10 | Mixing & Mastering
Mixing and mastering is the final step when creating a tech house track. Mixing is the process of optimizing each layer of a track into a final product. This step generally includes balancing the volume of each track in your project, applying EQ where necessary and using effects such as reverb, compression and limiting. Try utilizing Live’s stock effects by selecting the Audio Effects and MIDI Effects tabs from Live’s Browser.
When it comes to mastering, tech house producers will typically send their tracks to a mastering engineer. This step will ensure your remix sounds as good as possible on any set of speakers. Having a single track mastered usually costs between $50 and $200. Try searching online for a mastering engineer that fits your budget.
If you are interested in mastering tracks yourself, there are a variety of mastering plugins that can be used to master tracks directly from your Ableton session. Popular mastering plugins include iZotope Ozone, Waves Abbey Road TG Mastering Chain and Brainworx bx_XL V2.

Related Posts:
How To Install VST Plugins In Ableton Live
How To Make A Remix In Ableton Live
How To Edit Audio In Ableton Live
Want To Know More?
Here at Live Aspects, we have dozens of useful lessons and tutorials created to enhance your music production skills and help speed up the learning process. You can access our huge range of music theory lessons and production tips and tricks here.