Ableton Live is a digital audio workstation that has become a staple in the music industry. One of the things that sets the software apart from other DAWs is its two unique views: Session View and Arrangement View.
These powerful workspaces offer two distinctive methods for handling audio and MIDI clips. Understanding the difference between these two views is crucial for getting the most out of Ableton Live.
Hi, I’m Ben from Live Aspects and in this blog, we’ll take a closer look at Session View and Arrangement View and explore how they can be used to create, edit and perform music. Whether you’re a beginner or a seasoned producer, this guide will help you understand how to use these different views to their full potential.
What Is The Difference Between Session View & Arrangement View?
The key difference between Session View and Arrangement View is that Session View is better suited for live performance and improvisation, while Arrangement View is geared more towards studio production and editing.
Session View allows for quick and intuitive arrangement of musical ideas, where users can trigger audio and MIDI clips in real-time, remix and manipulate them live and capture their creations as arrangements. In Arrangement View, users can create, edit and arrange clips on a linear timeline, with the ability to add and manipulate effects, plugins and automation.
Ultimately, the choice between the two views depends on the user’s creative process and the type of project they are working on.
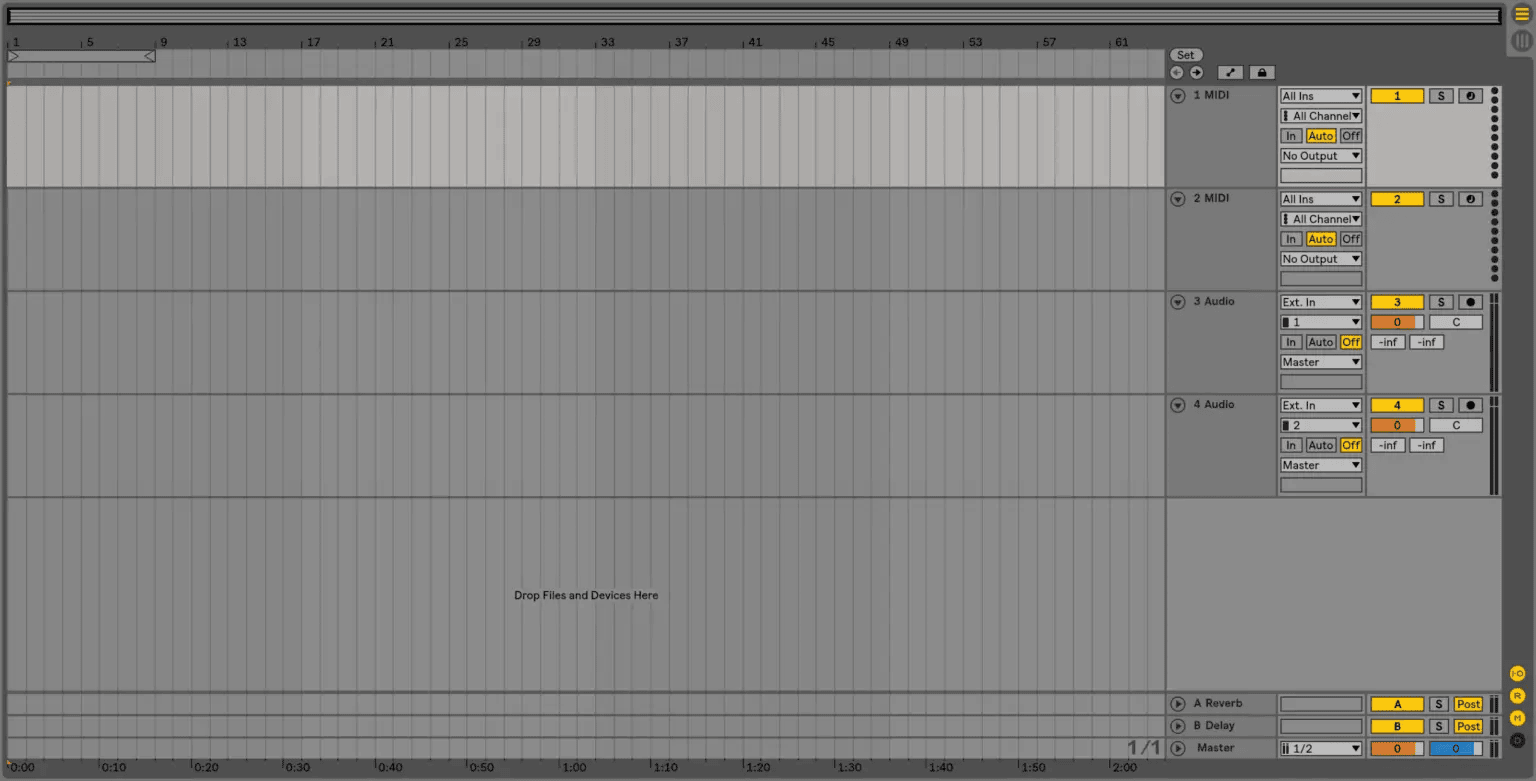
Session View
Session View is a non-linear way of working with audio and MIDI clips in Ableton Live. It’s designed to be a fast and intuitive way of jamming, improvising and trying out ideas. In Session View, users can launch and trigger clips in real-time, create loops and arrangements on the fly and switch between different musical ideas quickly and easily.
The interface is divided into horizontal rows called scenes and vertical columns called tracks. Tracks in Session View can store a selection of audio or MIDI clips (depending on the type of track), which can be triggered and played back using your cursor or a MIDI controller.
In Session View, clips are represented by a rectangular box that contains a sample, loop or MIDI sequence. These clips can be played in any order and multiple clips can be played back at the same time in sync with a project’s tempo.
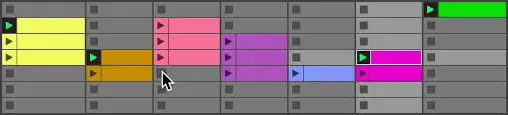
One of the key advantages of Session View is its ability to work in real-time. This means that users can change the order of tracks, add or remove clips and adjust their settings without stopping the music. This makes it ideal for live performance, where the ability to spontaneously improvise and react to the audience is crucial.
Session View is best for live performance, jamming, and impulsive composition. It’s a great way to quickly try out different musical ideas and see what works and what doesn’t.
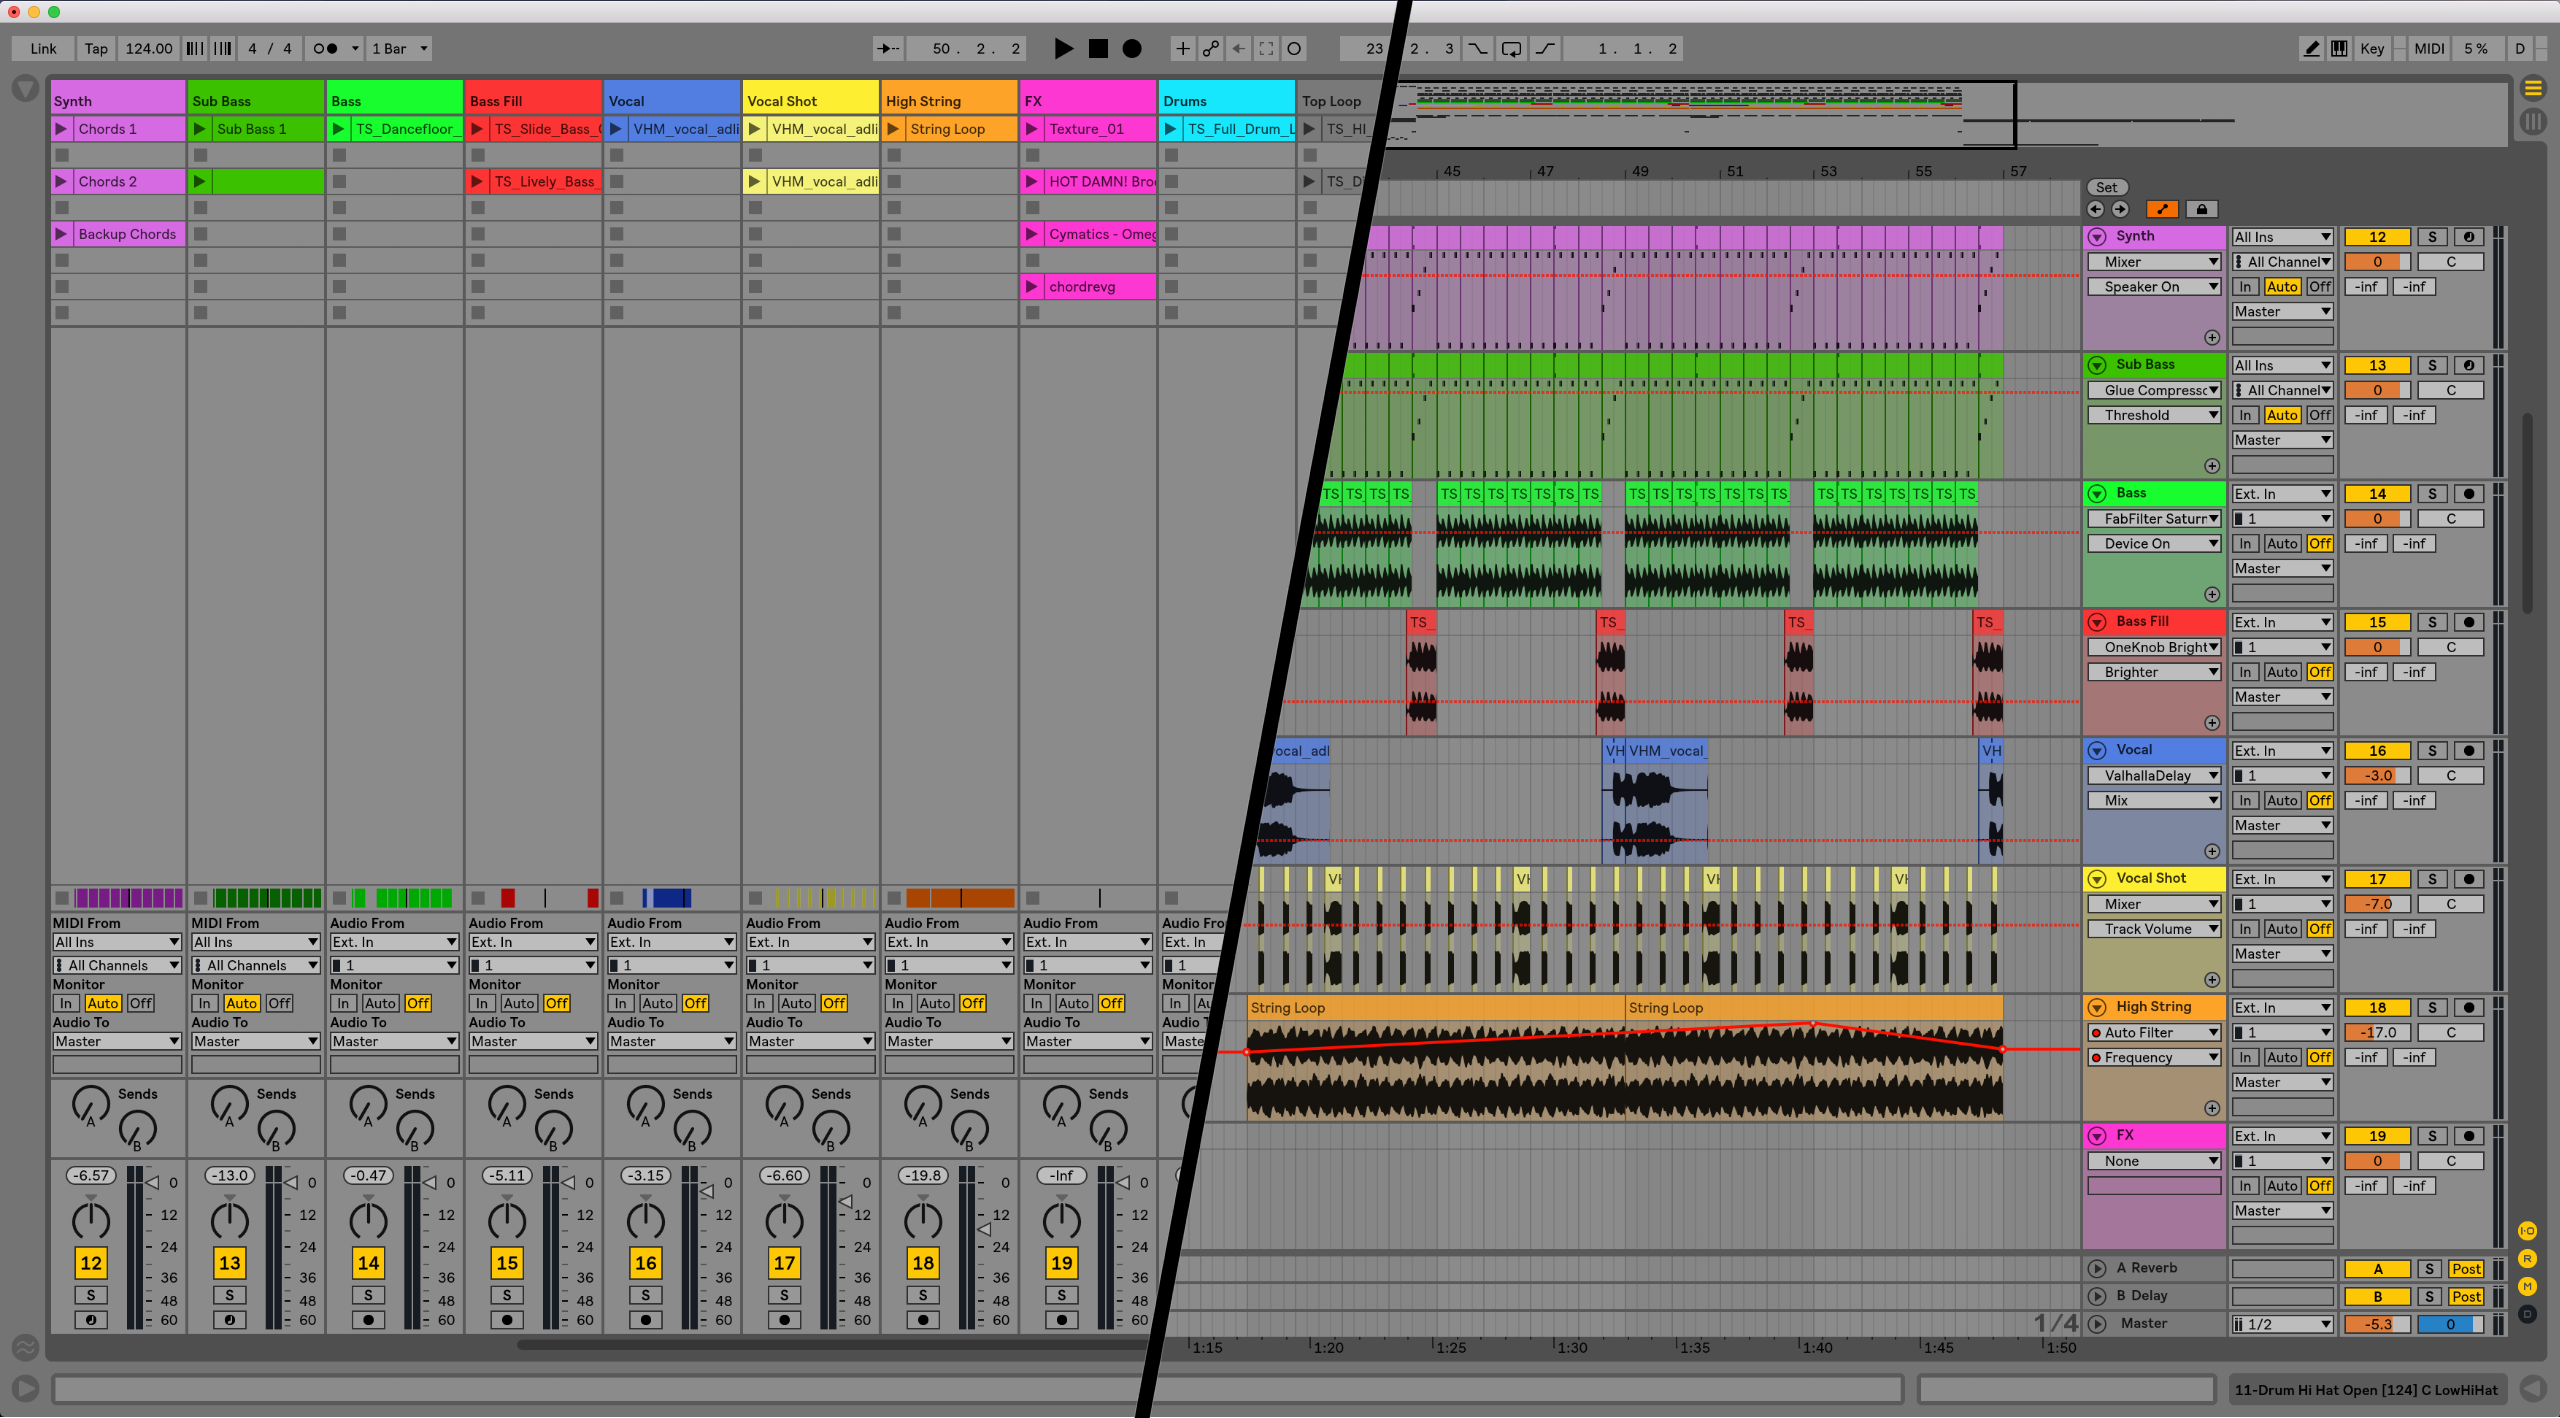
Arrangement View
Arrangement View is designed for arranging, editing, mixing and mastering musical compositions. In Arrangement View, you can position clips along a linear timeline, edit their properties and add effects and automation. Users can add MIDI, loops, sound effects, video and entire songs into the arrangement view, as well as record audio and MIDI using external recording devices.
In Live’s Arrangement View, the horizontal axis displays time measured in minutes and seconds. Playback moves from left to right, triggering the output of any audio or MIDI content it hits. The timeline provides a clear visual representation of how the clips are arranged and how they fit together in the overall composition.
Arrangement View allows users to create a traditional song structure with verses, choruses, and transitions by arranging clips in a particular order.
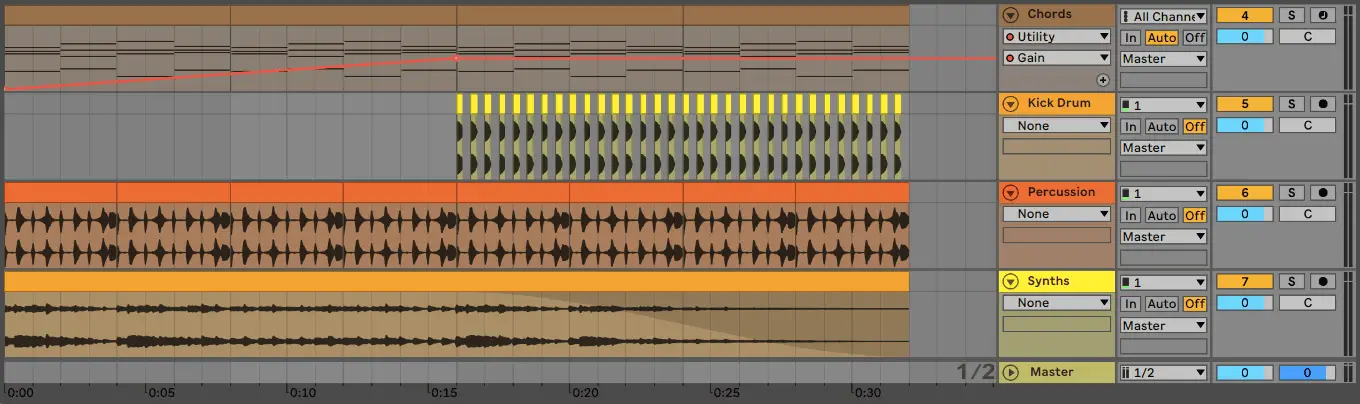
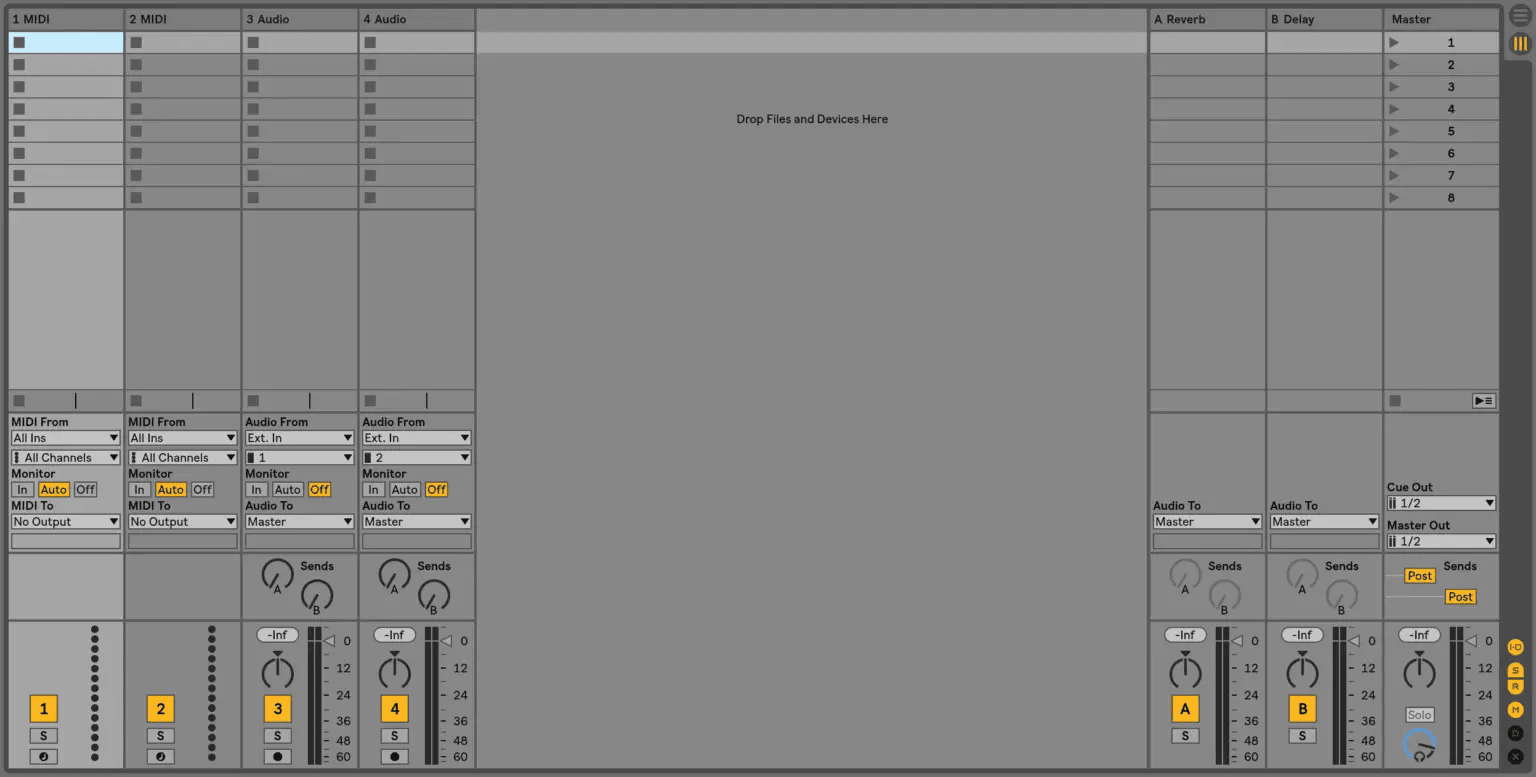
Just like Session View, the Arrangement View also features a mixer section where you can adjust levels, panning, and add effects to your audio and MIDI tracks.
Arrangement View is best for creating polished compositions, finalizing arrangements and recording. It’s a great way to take your musical ideas from Session View and turn them into a final product.

Conclusion
Ableton Live’s Session View and Arrangement View offer different ways of creating, producing, and performing music. Understanding the difference between these two views is essential for making the most out of Ableton Live and taking your compositions to the next level.
Whether you’re a live performer, producer or composer, Ableton Live’s dual-view design gives you the flexibility to work in a way that suits your creative process.
Related Posts:
How To Make A Remix In Ableton Live
Ableton Live 101 | The Complete Beginner’s Guide
30 Ableton Live Keyboard Shortcuts You Need To Know
Want To Know More?
Here at Live Aspects, we have dozens of useful lessons and tutorials created to enhance your music production skills and help speed up the learning process. You can access our huge range of music theory lessons and production tips and tricks here.